So I got a little crafty today in the Artsy Studio. Here's what I used for today's project.....Crate Paper's Restoration line, Papertrey Vintage Buttons and Felt, Wrinkle Ribbon, a Tiny Tag and a Metal Rimmed Tag from
my Etsy shop.
The inspiration for this project came from
this card.....where the focal point takes center stage of the card. I knew my
2-1/4" White Metal Rim Tags were just the ticket. They're neat as is but they can also be embellished with almost any supplies. Today I cut a circle from my patterned paper to fit on the circle tag. I also cut a leaf from some
Ocean Tides Felt using a leaf from the
Delightful Dahlia Collection.
I used a tiny bit of adhesive to secure the circle of paper and the felt leaf to my metal tag. Then I used my sewing machine and brown thread to sew a spiral pattern on the tag. Just be careful not to sew over the metal part of the tag or you might break a needle. I just
love this look, so artsy.
Next up, I used some beautiful Vintage Blue Wrinkle Ribbon from
this bundle. It's got beautiful color variations to make your projects look a little vintage-y. One of my favorite Wrinkle Ribbon colors yet. To make beautiful, messy loops simply wrap a length of ribbon around four fingers three times as shown below. This will create four loops that really help to fill out a Wrinkle Ribbon bow.
Using a piece of Rustic Cream Twine, tie the loops off while the Wrinkle Ribbon is still wrapped around your fingers.
Before tying a ribbon with the twine, thread the two ends through a Vintage Button. Before tying the bow, lay the string part of a
Tiny Tag on top of the button. Tie up the twine....which in turn ties up the Tiny Tag. Leave the long loop of the Tiny tag in tact. I think it looks kinda cool dangling off the bow.
Next up, create the card base...I've shown some of the elements below. The sentiments for this card are from
Vintage Picnic Sentiments.
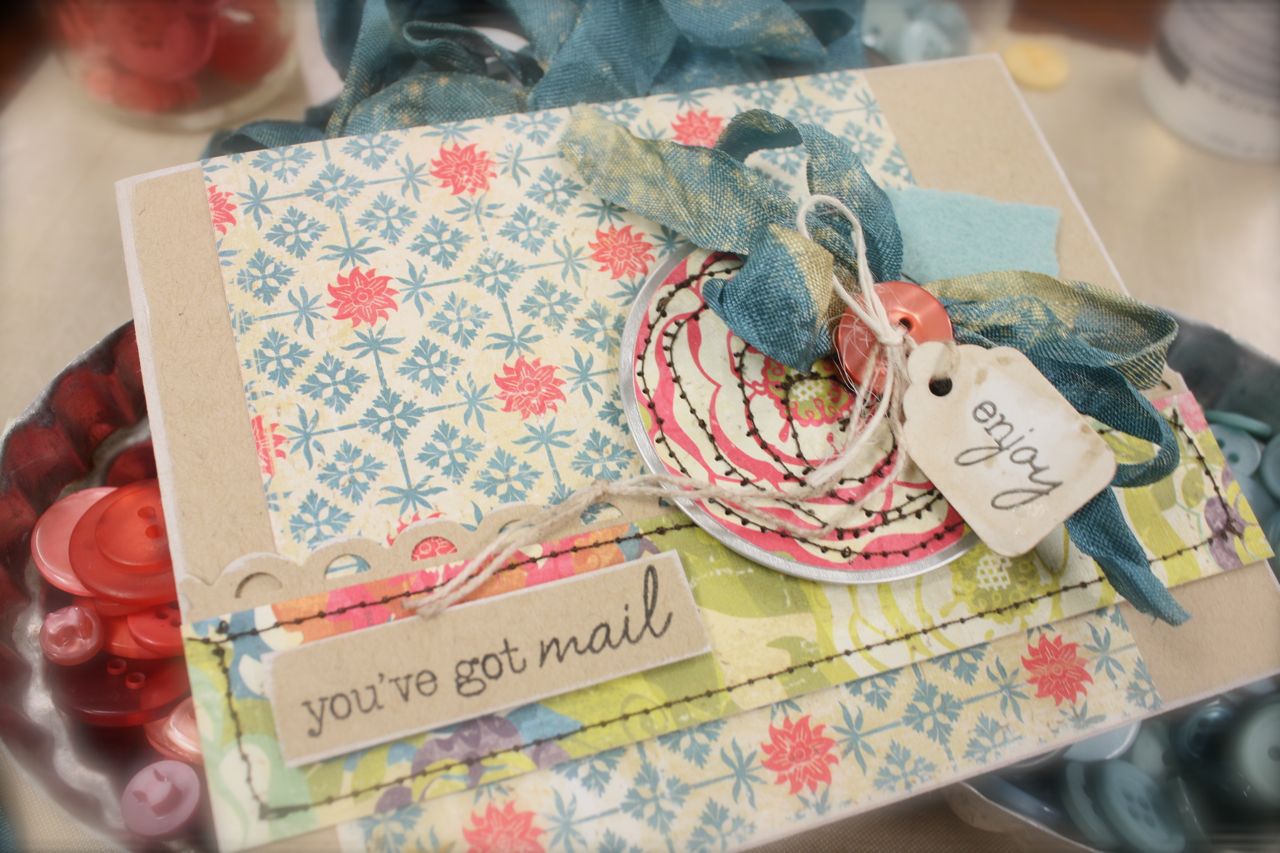
Next, I adhered the metal tag to the card front using pop dots. Then I secured the bow to the tag using a big blob of glue. Let this dry completely.
And you've got yourself a beautiful card. The Metal Rim Tag with Wrinkle Ribbon embellishment definitely steals the show. A very pretty card that someone will love to display. Cards like these get a little bulky to mail, you can zoom in to see all the detail better. I would suggest using a cute
Brown Paper Sack for the envy and mail in a padded envelope mailer.
Hope you enjoyed today's little tutorial. :)


12 comments:
Correct me if I'm wrong, Mishy, but aren't you using FOUR fingers in your pictures?? LOL!!
Great "toot" on how you tie those!
What a fun idea!! Thanks for sharing!
You are just so creative. I enjoy your blog just to see what you think up next. Thanks for sharing.
Another gorgeous card Michelle!
Another gorgeous card Michelle!
Amazing flower!!!
Wonderful project, that flower is so pretty!
I love these colors. I come to your blog and my mouth just hangs open as to how you continue to come up with so many creative ideas, it's wonderful.
I like it! For once, I have the same paper and can totally cardlift. LOL.
Mish - you are always such an inspiration! Tell me, what do you use to launder your vintage fabric?
Love the bow, button, tag embellishment and the Restoration paper collection. I've liked every project you've done with this line. I'm going to try your bow making technique. Thanks for sharing.
Major cuteness!
Post a Comment