Showing posts with label Dainty Doilies. Show all posts

December 2, 2014

Tray Tuesday.....Spiced Tea Mix

Hey there, I'm back today with a fun Tray Tuesday share.  I've been making this Spiced Tea Mix ever since I can remember.  I use my mom's recipe and it was always my job to mix the tea and store it in the Tupperware container.  I love this stuff and I'm not sure now if it's the actual tea or the memories it evokes that I love so much.  Recently I packaged some up in a gift basket I made for a friend to give to her apartment tenant.  The renter texted my friend and told her how much it reminded him of his mom and that he loved it.  Then our little friend Brayden came over with his brother while I was making a new batch.  He was curious so I made him a cup.  He loved it too.  So I sent him home with a little batch of his own.  Good stuff and good memories happen with this stuff, I tell ya. 
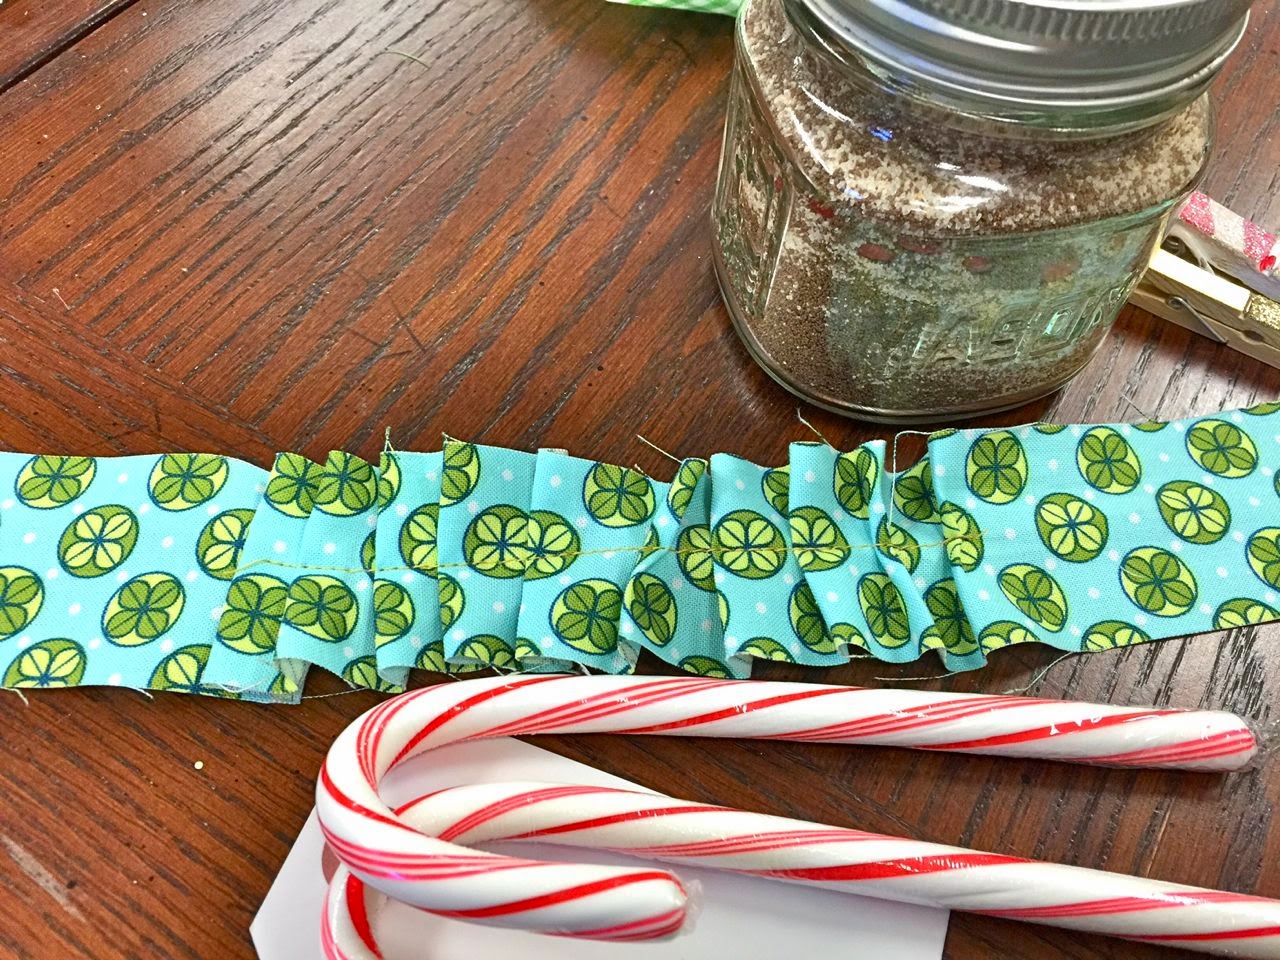
 Sooo...what better gift to give than a little jar of my Spiced Tea Mix.  I reached for a Modern Wrappings Kit from my shop to create my packaging.  I also carry a Vintage Wrappings Kit which uses all vintage fabrics.  I took one of the strips of fabric and ran it through my sewing machine, creating folds as I fed the material through the foot feed.  I left about 4" on both ends plain.
 I wrapped the fabric strip around my jar that is filled with Spiced Tea Mix and some cinnamon red hots.  I added a red sprig from the kit and a Gold Glitter Clothespin for embellishments.
 The ruffled strip of fabric looks fun and festive wrapped around the jar.  I like to leave the lid free of embellishments so it can be screwed on and off with the wrappings left in tact. This way it looks cute sitting out during the holiday season.
 I like these gingham lids from my stash.  They add an instant holiday feel to my jar gift.
 I tied a few candy canes up with a white tag from the kit and some Candy Cane Baker's Twine. I sat the jar on a white doily from the kit. I sat all the goodies on a pretty, vintage tray.  Just the perfect gift for a teacher or friend who comes over to visit.
Here's the entire Modern Wrappings Kit from my shop.  You can see my previous posts for some additional wrappings ideas.
The Gold Glitter Clothespins come in a set of ten here.
 You can find 5 yards of the Candy Cane Baker's Twine here.
I love to give handmade gifts and wrap them up with unique wrappings.  This year though I'm all about keeping it simple.  This little gift jar took about 10 minutes or less to assemble, including sewing time.  Here's to a handmade Christmas.  Thanks for stopping by today. 

November 4, 2014

Tray Tuesday....annual holiday notebook supplies

Well Halloween came and went & November just snuck right up on us.  Now that all the pretty leaves have blown away and the temperatures get cooler, I tend to go into hibernation mode.  I'm not one to decorate my home for the holidays until after Thanksgiving but as a crafter and little shop owner, I do like to get a head start on the holidays. I've been collecting items for my annual Noel Notions that will be trickling into the shop soon and then there's my annual holiday notebooks.  I like to create them every year for my lady friends.  They're a fun little pre-holiday gift that I give out in November, just in time to start making those little shopping and gifts lists + maybe some holiday menus or crafts to make.  You can click on the "notebooks" label at the end of this post to scroll through lots of my notebook posts.  

Today I'm sharing a fun bundle of goodies for Tray Tuesday.  Tis the season for gathering up the holiday supplies. I grabbed this old, wire office basket which is perfect for holiday all my items. 
When I start a project, I tend to gather and collect.  I like to shop my stash of crafty supplies and sometimes I like to order something brand spankin' new.  Each year I like to order a few supplies that are selected specifically for my holiday notebooks.  This year I chose the Webster's Pages Gingerbread Village line by Adrienne Looman.  It's a whimsical little collection with the most delightful holiday colors and patterns.  
 Some of my staple shop items always make it into my supply basket.  Here I chose Small Clothespins, Small White Tags, Small Manila Tags, Medium Manila Tags, White Dainty Doilies and Gold Foil Doilies.  It's good to always tuck a few of these in because they're just good old stand bys for me.
 I also added in some holiday colored Washi tapes, gold scalloped tape and some vintage ribbons from my stash.
The papers will steal the show this year.  Just look how cute and whimsical these are.  You can google the line and various online shops pop up that carry these supplies.
Can't wait to get started on these little gems as they are always fun to package and hand out to the ladies.  Have you started on any holiday projects?  I'd love to hear what's on your list this holiday season.

In other crafty news, the Gossamer Blue 2014 December Memories Kit is now available.  It's jam packed full of holiday crafty items + there is a 6 x 8 album that goes with the kit.  We just added a December Memories 2014 section to the forum so we'd love to chat it up this season with you.
We teamed up with Elle's Studio to bring my sketches to life for the stamp set for the kit this year.  I can't wait to start working on my album.  I'll have posts of my process in the near future.
Also, I'll be joining in on the Winged Blog Tour this week with Bonnie Christine.  She designed this wonderful fabric line for Art Gallery Fabrics and has invited me to share some creations with you.  Check back this week for my post.  You can follow along the blog hop each day for 31 full days right here.  Lots and lots of good inspiration here.
Here's a little peek at the fabrics I'll be working with:
Sooooo....lots of good stuff to come.  I hope you'll pop back in often.  Also, I post a lot more photos on Instagram.  You can follow me on the left hand side bar.  :)  See ya back here soon.

March 18, 2014

Card from inspiration photo + altering patterned paper with watercolor paint

Yesterday I shared an inspiration photo from my March Pinterest Board: Going Green.  
I also shared this color kit that I created for a class assignment for the Color Studio class at Studio Calico.
Today I'm sharing a card I created with my kit contents.  I started with this beautiful patterned paper that you see with the white background below.  I had fun altering the look of the paper with some simple watercolor paints.  If you look at my inspiration photo by the aqua flower you'll see a pillow with yellow flowers and a blue background.  That's the look I was trying for with my patterned paper.  I love the results. 
I trimmed off some of that beautiful paper and created a thank you card for a dear friend who stayed with us the entire day in the emergency room the day of the girls' accident.  
I used lots of items from my color kit you see at the beginning of this post.  I also added a Medium Manila Parcel Tag and some stamps.  The thank you is from a Studio Calico kit and the other is from a Papertrey Ink set..Signature Greetings, I believe. Dainty Doilies can be found here.
During difficult times you sure find out who your true friends are.  It's only fitting to let those dear people know just how much they mean to you.  A simple card with a handwritten note is such a nice gesture.  I've got lots of cards to send out which means my family is so blessed with good friends.

Have a great day everyone!

November 19, 2013

December Memories 2013....pages 1-10 (+ making a plan)

It's such an exciting time if you've joined the holiday album band wagon....or December Daily....or December Memories as we're calling it at Gossamer Blue.  I've shared my album cover and inside cover page and now it's time to share my inside pages, days 1-10.  


Where do you start?
This year I'll be documenting in my regular Project Life album just as I regularly would for any month. I'll be posting some ideas on that soon but today I'm focusing on my December Memories album. I will admit that when I sat down with all of my supplies and album, I literally sat there.  And stared.  And was a little overwhelmed.  I kept asking myself, "How do you put together an entire album in advance?"  I knew I wanted to do it, I just didn't know how to go about it. 
 Make a list...
I went back to the ol' drawing board, scratched my noggin and started making some notes.  I listed all of the holiday events I wanted to document and photograph throughout December. I've added to this list since I first jotted down those ideas but it was the best starting point for my album.
Make a plan....
This is where I had an "ah-haaa" moment.  I decided right then that my album would be about specific memories, traditions and events that we celebrate all throughout December.  It would not be a daily, chronological photographic diary.  I will let those daily photos go into my December Project Life.  I decided that I wanted my December Memories album to stand alone from my Project Life.  I would devote the pages entirely to celebrating the holiday season.
Then just go for it....
Once I had my plan of attack for my pages, I just started.  I made a sticky note for each event and started collecting journaling cards and embellishments that I thought might coordinate well with that event.  Sticky notes are your best friend when it comes to this album. I started sticking things into pockets.  Three hours later I had my pockets fill with the basic journaling cards and trimmed papers.  I had some additional sessions where I spent an hour or two at a time adding more embellishments, etc.  Let it sit. Come back to it.  It all falls into place.  One key point to my album is that even though I'm numbering the pages 1-31, those numbers do NOT necessarily represent Day 1, Day 2, etc.  The numbers just represent one single memory from December.  I'm not worrying about if something is out of order.....and neither will the people who sit down to view this album.  Think about the bigger picture....think about the album as a whole and not just one day.  

My pages 1-10....
For each event, I'm devoting two pages of the album.  I will go back on some days and add in inserts like sacks or trimmed down page protectors or clear acetate sheets, envelopes, etc. I tried to add as much detail to my inserts as possible so that come December I can just add photos,journaling and a few other finishing details.  

Page 1 will be a photo of our family of 4 + Charlie.  Maybe our Christmas card photos, maybe a photo of us cutting wood in the timber.  
Page 2 will have photos of the day we set up the Christmas tree.
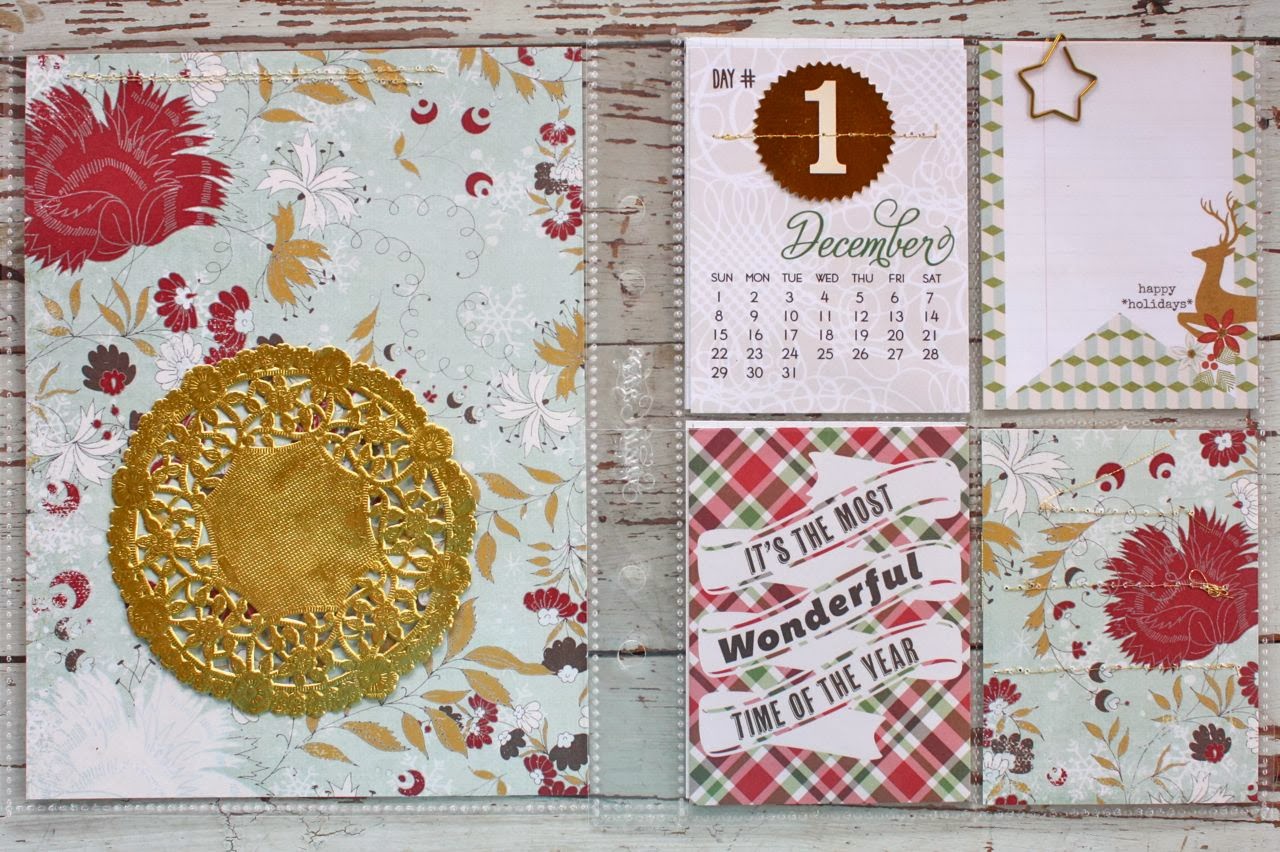
Here's my gold stitching at work.  You'll see this throughout my album this year. It goes so nicely with all the gold foil accents.
Day 3 will maybe be photos of some holiday decor that I set up around the house.
Day 4 will be reserved for opening day of deer season since it's on 12/4.  I'll leave these slots open all month long in hopes that we get photos of someone with a big buck.
Page 5 is open for whatever.
Here I sandwiched two stars around the star acetate sheet.
Page 6 is generic.
I used lots of sequin mixes that I offered in my shop earlier.  The gold doilies look fabulous with all the gold accents offered up this year.  I still have them available here.
More gold stitching over the vellum number.
Page 7 is open.  I used the "day #" stamp from the Gossamer Blue December Memories Kit for each number.  Even though it might not actually be Day 7, I liked the stamped look.
I added a Gold Shimmer Envelope as an insert with a stitched tag and gold paperclip. These are so shimmery in person.  I lined envelope with vintage sheet music.
Page 8 will be reserved for maybe photos of our house from the outside with the lights...or maybe a woodland scene of us gathering firewood, etc. I plan to tuck the gold doily behind a large photo.
The tag is held in place right now with a star clip.  I might move it around depending on what photos I use for this day.
More gold stitching over a vellum tree + some of the Woodland Sequin Mix from my shop (sold out for this season).
Page 9 will be about some holiday traditions.  I will have photos of some of those traditions + maybe some will be in list form on a journaling card.
A fun accent to a trimmed piece of patterned paper. You might have noticed that each and every pocket is filled, none are left blank.  I have a plan in order so that all of my pretty inserts will still be seen when I add photos.  I'll share those tips in an upcoming post.
Page 10 is all about warm drinks, my cocoa station I plan to set up, maybe the hot tea mix I make and baking.  I might need to add some inserts here.  I might need to go to Starbucks too for a red cup.  :)
More gold stitching over the tag.
More sequins added to the cute red cup insert.
These fun sacks were included in the Gossamer Blue December Memories Kit.  I attached all of them to the outside of page protectors for easy access to whatever is tucked inside.  In this case it's a Large White Parcel Tag.
Okay, that's it for this portion of my December Memories album.  Come back soon as I'll be sharing the rest of my album pages + how I plan to keep the pages nice and pretty.  For fun embellishments like glassine envelopes, baker's twine and tags, be sure to pay a visit to my shop.

While visiting my shop, you'll notice lots of fun organizing items for your holiday crafty supplies. They are going quickly so be sure to act quickly if you like something.....like this wood tray with diner dishes.
 This pretty aluminum tray with dessert cups.
 These silver plate trays with vintage jars and dish.  They will shine like new penny if you want to polish them up.
And always a favorite, these muffin tins.  
Enjoy!
Related Posts with Thumbnails