Showing posts with label Travel Watercolor Palette. Show all posts

May 20, 2017

How to set up a watercolor palette....

My blog post today is for those of you who have purchased a vintage watercolor palette from my shop and are wondering how to select pigments which order to place them in the palette.  Here we go....photo heavy but I try to keep the chat concise and easy to follow along. 
This is a sampling of what one of my vintage watercolor palettes look like.  I use vintage tin cigarette/cigar tins, laxative tins, old watercolor palettes, pencil cases and more. I have lots of options here.
 I glue in unfilled full or half size pans.  These are to be filled with professional grade (the best bang for your buck) watercolors that you can purchase in tubes.  I like Daniel Smith brands but experiment often with others too.
So here's my tried and true method for setting up a successful watercolor palette each and every time. My process takes out all the guess work as to whether you added the right colors in the right pans.  Start by cutting 1" square (or use a square punch) pieces of watercolor paper.  Using water and a 1/4" flat watercolor brush (Rosemary brushes are great), paint a color swatch for each color of watercolor that you have.  Label the back of the swatch with the paint color and manufacture.  You will keep these forever so don't throw them away. 
Once you have made 1" color swatches for each of your paint colors, count how many pans you need to fill in your paint palette.  I selected the colors below to fit in the palette I showed above.  You can set your other paint tubes and swatches aside. 
For storage I keep my 1" swatches in a Ziploc baggy.  I keep another baggy full of blank 1" papers because I know I'll always purchase more colors in the future.  Trust me, you'll get hooked too.  
Next I arrange and rearrange my color swatches until I reach a good layout that I want to use for my palette. Take your time with this step, it will save you so much time if you get it right the first time  you fill your empty paint pans.  Some of the pans will have two colors in one pan because less is not always more for me and I'm indecisive as heck.  Just squeeze two colors side by side.  It's okay.  Don't freak out. 
Next I trim (or tear on the table edge or use a metal ruler) a piece of watercolor paper to fit inside the palette lid.  I don't measure anything. I simply trace the lid onto the watercolor paper then tear the paper a bit smaller.  I then eyeball it and draw on the approximate divisions of the pans.  Again, I don't measure but just make tick marks with a pencil and then a straight piece of scrap paper to make the straight lines. If this makes you cringe and you need to measure and be perfect, then by all means please take the time to do that.  I'd rather get to the painting part.  
Now it's time to paint the color swatch chart that will fit inside the lid of the palette with closed (and your paints are dry).  I start by using a very fine tip waterproof fountain pen to write the color names at the bottom of each color swatch space.  This way you don't forget to leave space for the labels.  Then I paint my color swatches in the order that I laid out the 1" color swatches.  
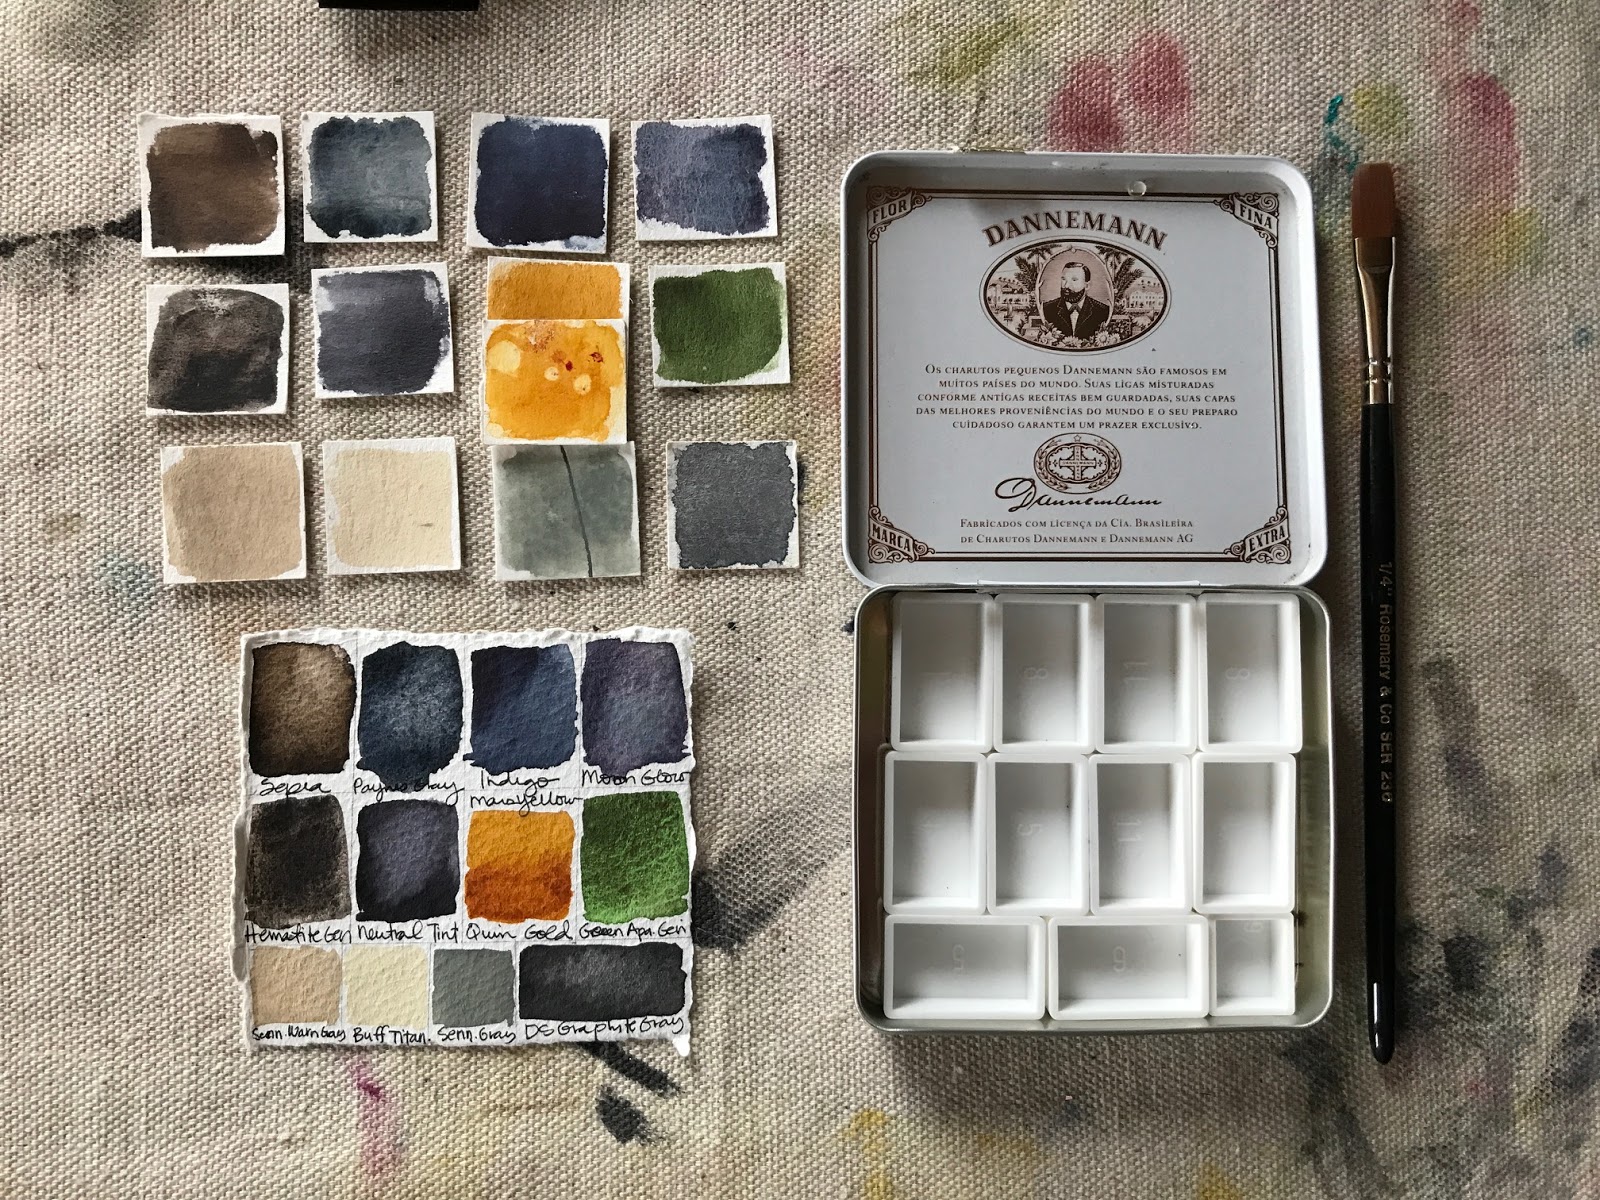
 You can now put your 1" color swatches in your storage baggy and store away.
Next it's time to fill your palette with professional tube watercolor paints.  I usually purchase my paints online because I live in the middle of nowhere.  I like Blick Art Materials but please research your favorite local and online shops.  Daniel Smith brand fills about 99% of my palettes.  You can go to their site and see all of their pigments to make decisions on colors.

To squeeze the paints into the pans, unscrew the lid and gently squeeze the paint into the pan. You can fill the pan entirely but I have learned from experience that I like to fill the pan about 1/2 full and leave a little area unfilled.  This gives a little wiggle room for wetting down the paints and mixing your paints up.  If you decide to fill the pans all the way full let them set several hours.  You can then take a clean jar of water, dip your pinky finger in and make a small indentation into the paint.  This makes a concave well and helps the water to puddle a bit in the middle of the paint.

Allow your palette to sit open and dry for 24-48 hours.  It all depends on your climate, the brand of paints and how much paint is added.  The paint will dry pretty solid and to rewet your palette when you are ready to paint you just use a small spray bottle filled with clean water.  This reactivates the paint and you're then ready to create.  Use the palette lid for mixing colors.  Refill the paint pans as needed.  Sometimes I decide I want another shade of a blue so I just squire in whatever color I want.  I've learned that paint names don't really matter, it's what looks best for what you like to paint.
So here I have a my filled palette ready to go.  As you can see I've about used up a lot of my paint tubes.  To get the most out of the tube you can purchase paint tube wringers which squeeze out every last bit of paint.  
For storing my paint tubes, I keep them in an old metal tool box in my studio.  You don't need to keep them with your sketch kit unless you have some extra tubes you want to try. 
Here are some of my vintage watercolor palettes that I've created for different uses.  Why so many palettes?  Well I love them for one and secondly each palette was created for a specific use.  I have one for value studies, one for gouache, one for quick studies of landscapes and underpinnings, one that is a brighter color palette, etc.  Once you get into your painting, you'll know more about what colors you might like to add or what different palettes you might want.  
Beautiful right?  My hopes are that you get your palettes fill and take them from the shiny new stage to the used and abused stage like mine below.  The idea is to get creating right?  Don't be an art supply hoarder.  If you're going to buy supplies, use them! Make yourself that promise.  

You might be asking why I didn't clean up my palettes for this photo.  Don't be so quick to clean your palettes.  All those beautiful dried, swirly mixes can be rewet and might just have the perfect mix you're looking for.  I don't clean my palettes very often, I just start right where I left off.  As you can see I also have a variety of sizes and shapes of palettes.  I love collecting the old tins so check my shop often, you' never know what you'll find. 
I'll leave you with some photos of my palettes in action.  
Look at that beautiful purply pink.
So easy to transport and take outside.  Haven't tried plein air painting?  Oh you should.
Painting in my little vintage diary.
Making underpinnings on pastel paper for pastel paintings.
Using lots of sketchbooks outside.
A tiny sketchbook for quick landscape sketches.
Brighter colors for the beautiful flowers in my gardens.
Here is how one of my smaller palettes fit into my handmade travel sketch rolls.  I add these to my shop from time to time but they sell quickly.  
All of my supplies for sketching outside fit into the sketch roll and then I roll it up and secure with the attached ribbon. 
Okay, whew.  I hope this helps you get started with your beautiful art.  Please let me know if you have any other questions or if there's any subjects you'd like me to cover.  Like how to take your supplies outside to paint, how to pack them up, etc. I don't do blog posts too often but I post almost daily on Instagram.  My username is MishWooderson over there.  You can follow my Facebook page also.  Thank you so much for stopping by today and if you've purchased one of my vintage palettes from my shop, I also thank you.  Happy painting everyone! 

I've also done a previous blog post about setting up a palette.  You can check that out here.  

August 4, 2016

New classes, new shop items!

Hey there, I wanted to provide a few updates of some fun happenings. My class Close to Home: A Watercolor Landscape Journey starts this month, August 22nd.  You can register HERE.  The count down is on and there is a lot of excitement buzzing around for this class.  It's not too late to join in.  Details are on Jeanne Oliver's site HERE.  

Also, I'll be teaching another new class at Jeanne's studio in beautiful Colorado! If you love art, travel and the great outdoors, this class is for you.  You can find out more about the class Field Guide: A Nature Inspired Sketchbook and register at the end of that post. 

 We'll be nestled in for two days at Jeanne's beautiful home and studio in Colorado.  Fall is a beautiful time in Colorado so it will be two days of pure heaven.
 We'll learn the basics of drawing, learning from beautiful nature inspired still lifes.
 Nature will be our guide.
 We'll develop a wonderful color palette and learn about value and composition sketches.
 We'll touch on watercolor basics and learn about quick pencil sketching with watercolor washes added.
 You'll get to practice your drawing skills and learn how to capture the essence of a scene.
We'll touch on mixed media and how it can add so much to your watercolor sketches.
 It's all happening here in Jeanne's beautiful studio.  We can't wait to pamper you!  I hope you'll join us.
 If you're in need of watercolor palettes for either of my classes, I have some fun vintage travel palettes just added to my shop HERE.
 Unique and one of a kind.
If you're looking for an art adventure, I hope you say yes.  Yes to the journey.  Yes to yourself. You deserve it!

July 2, 2016

Close To Home: A Watercolor Landscape Journey......palette & color wheel

Hi guys! I'm back today to share more about my class over at the Jeanne Oliver Creative Network called Close To Home: A Watercolor Landscape Journey.  I've been sharing on Instagram and Facebook a few more sneak peeks and will share more here on the blog as well.  
 I will take you through the basics of setting up a watercolor travel palette, discussing which watercolors are best, what half pans are and will show you several types of watercolor palettes that I own and like to use.  At the registration page on Jeanne's site, I also have my supply list available which includes my current 24 colors of watercolor paints that are in my palettes. Just follow through the link above and click on my class within the blog post.  From there you may have to register on Jeanne's site, then will be able to access the class sign up.  You can see the supply list without signing up though.  That way you can tell what supplies you might need if you're interested in the class.  
I'll also be revisiting/introducing the color wheel theory and we'll create a beautiful color wheel that will be like a piece of artwork in your studio.  You can reference it time and again and I'll give you some tips on how to easily reproduce your color wheel to keep with you at all times.

There's been lots of excitement and many of you signing up for the early $28 registration price.  Thank you!  I hope you'll join me as there is LOTS to learn.  Whether you are an experienced painter or just a beginner, this will class will be perfect for you.  Can't draw?  That's okay because the landscapes that we'll be using as references are simple enough that just a few lines are all that are needed.  We will build upon the lessons we learn as we get through the 4+ hours of videos.  You can access the videos and watch them at your leisure, again and again.

I'll be back with more fun details of the class soon.  If you have Instagram I am MishWooderson and my Facebook page is HERE if you want to follow along with more frequent posts of mine.  Thanks as always for stopping by and I hope to see you in class!


March 4, 2016

Close to Home series of cards...

This month I'm setting a goal for a daily landscape sketch using my #closetohome hashtag on my Instagram account.  Today I'm sharing some miniature landscapes created with beautiful handmade watercolors.  
 I turned my mini landscapes into some blank greeting cards, numbering the limited edition series with my Close to Home theme.
 All of these landscapes were painted from country landscapes near my home.
 I love winding roads as you just never know what journey they may take you on.
 Beautiful trees and hillsides fading into the distant sky.
 The trees are just now getting their leaves so I'm even more excited to do some en plein air painting.
 My cards are all up for sale in my shop today, my first official paintings are now listed.
You can find the shop link here.  Thanks for stopping by.

February 23, 2016

Watercolored teacup...

Sharing an entry in my artist journal.  Today it's watercolored teacups.  I started by sketching first with pencil then using my Lamy Safari fountain pen...ink is not waterproof.  
 Great practice and I love that the blue ink bled a little.  Reminds me of that beautiful blue China.
 Closeup of the beautiful way watercolor has a mind of it's own.
 Detail of notepad with shadows.
 I used my Sketch 3 method for this journal entry.  That means that I simply did 3 different types of sketches.  I did the main tea cup with notepad, the blue teacup and the more detailed pattern.  I find that when I take the extra effort to sketch something three different ways, I get more and more practice.
And......#practiceisart.  You can find more of my #mishsketch3 entries on my Instagram account, MishWooderson.  Thanks for stopping by today!
Related Posts with Thumbnails