Showing posts with label Confetti. Show all posts

August 29, 2013

Boutique Item...Gray Polka Dot Gift Packaging

Hi all.  As I'm getting back into the swing of things as the girls are back in school, I'll be focusing more on my shop and fun blog posts.  I'll be bringing back the Friday Favorites posts which will include good junk finds, awesome recipes, great Pinterest finds and more.  I'll have more cards and packaging items up on the blog in addition to my Project Life posts.  It's going to be a great Fall season and I hope you'll join me.

When doing a little work for my online business, I realized that I have over 100 items in my shop! Many of those items are staple items that I keep stocked on a regular basis. Other items are little kits & cards & special finds that I put in the shop in very limited quantities.  Sometimes those speciality items sell out quickly & I get emails asking for more quantities.  Sometimes I can accommodate and sometimes it's just a one time deal, depending on quantities of supplies on hand and if I feel like creating more items.  

For those items that are listed in limited quantities, I'm going to start listing them as a Boutique Item.  The Boutique Items will be listings that are very limited in quantities and perhaps a creation that I devoted a little more time to. The Boutique Items may be a special project that I created using a featured product in my shop.  They may be a limited quantity of some great vintage find.  Whatever the case, my hope is to showcase those Boutique Items here on the blog in a special way.  So stay tuned for my Boutique Item featured posts.  

Today's Boutique Item is set of gift sacks that I created using the Gray Polka Dot Gift Packaging up in the shop. With the little kit you get a fun little bundle of supplies to create a unique gift sack for that special present.  Today I created 2 of the gift sacks to hold some notebooks that I created for my two favorite secretaries at the girls' school.  They are nicest ladies & always give a shout out to my girls as they pass through the halls.  They deserve something special.  
 On my gift sacks, I used every little item that is included in the little kit.  I adhered the Dainty Doily to the sack.  Then I used the Small Clothespins in a fun way.....I added double sided tape to the backs of them and adhered them right to the doily.  I tied the gray twine and tiny little silver tag to the Small White Parcel Tag.  I used some white cardstock, a circle punch and wood letter stamps to create the name tags.
 I then placed all of the sequins into the clear cello bag & adhered that to the top of the doily with the silver Washi tape.
 I tucked in the cute notepads (which you'll see in September for the Gossamer Blue release) and they're ready for the girls to take to school.  Boy, doesn't it make you feel good to create a gift for someone special.  I need to do it more often.
I hope you'll enjoy my Boutique Items posts & everything else that is to come this Fall.  I've got a few more Boutique Items up in the shop currently which include my Special Delivery Gift Packaging kit, my Hello Gift Sack Kit and Vellum Pocket Inserts.  You can see them in the main shop HERE.  Have a great day everyone.

March 12, 2013

Spring Packaging...

The 17" of snow has all melted and hopefully Spring is on it's way.  I like to have some fun packaging on hand for Easter and little small gifts so here's what I came up with today.  A fun Spring sack featuring a confetti sack, pretty patterned paper from Amy Tan, a die cut border, stamped tag, button and string.  To soften the sacks, I misted them using a mask and white spray.  
My favorite way to package up a few cards for the school secretaries or our moms.  
Also great for little Easter goodies and fairly flat items.
I've got 2 different kits up in the shop today.  You get all the supplies you need to complete a sack with just a little bit of assembly.  Each kit comes with extra confetti so you can use it on other projects.  This kit is the Multi Stripe Spring Kit.
This kit is the Pink Spring Packaging Kit.
I get lots of nice notes with orders and emails letting me know that you love to have these little packaging kits so that you can keep a few ready made sacks on hand.  Many of you also just like to purchase the packaging products separately too so you can have a stash of supplies on hand.  If you like today's packaging and want to purchase the items separately, I used Large Kraft Sacks, Pastel Confetti, and Dainty Doilies.  The Simple Sack Gift Packaging Kits would also be a good staple to have on hand for gift giving.  The glittery clothespins in the shop would be cute to top the sacks off too.  

Thanks so much for dropping in. Coming soon I'll have some more Gossamer Blue projects created from the March kit, Project Life updates and some fun new artsy finds. 

March 7, 2013

Confetti Easter cards...

Hey there, I'm back today to share some Easter cards with you using some new shop products.  My product picks from my shop today are these fun bags of Pastel Confetti Fluff.....
.....and the Small Yellow Glitter Clothespins.
I got a jump start on some Easter cards and packaging and here's what I created.  Some fun cards using confetti bags as a focal points and some simple packaging.  I used about a teaspoon of the confetti fluff in each clear bag...the bag you get comes with about 3 heaping tablespoons so there is lots to work with for cards. 
For my cards I used some new My Mind's Eye papers and stamps.  I stamped the whimsical flower onto Small White Parcel Tags.  For packaging up a fun springy gift, I used Large White Glassine Sacks and Dainty Doilies.
 For cute little clips, I used a Small Yellow Glitter Clothespin and a Glittery Gold Clothespin. I just added some paper flowers to top them off. If  you want to create your own colored, glittery clips I also have plain clothespins in the shop.
Cute and springy cards for my stash.  I'm thinking some fun sugar cookies with lots of pastel sprinkles might be a fun treat for the sacks.
For another treat idea, have you seen my Peep Show Cookie Jars?  This post has been pinned a bunch on Pinterest lately so I thought maybe it was worth sharing again.  The actual blog post is here with the recipe.  I think I'll make up some of these for the little kiddos this year.
Here's hoping Spring will be here soon.  Enjoy!

January 13, 2013

Valentines from shop items...

With Christmas behind me now, I always look forward to working on some new projects like Valentine  goodies.  This week I re-opened my shop after a holiday break and there are some fun items to help with creating Valentine cards and packaging.  I thought I'd share a few of the creations I made with the items today.  And thank you for all the nice comments left about my Project Life + One Little Word posts.  I love the feedback you guys give & hearing your own little stories as well.  :)

First up today I have some peeks at some items from the shop.  The Heart Confetti Packaging Kit is very simple in nature but when you add your own patterned papers, stamping or embellishments your project will come to life.
 Glittery Gold Clothespins will add the perfect sparkle to a project.  Use them as closures for Valentine treat sacks or to clip a special message or fun tag to a card.  I like to keep a stash of these with my Project Life supplies to clip together snippets of patterned paper or journaling cards.
 Here I have a gift sack and a card using the Heart Confetti Packaging Kit + the Glittery Gold Clothespins.  I used patterned papers from Crate Paper and some grid circles that I typed a sentiment on.
This year I'm experimenting with being a little more hands on with my projects.  For this card I just sat down with a little pile of supplies and used my scissors to hand cut some papers....I layered a lot of little scraps I had laying around....I used simple graph paper for a sentiment.  A fun little trick I've been adding to my projects is to use one large staple from a regular stapler then a small staple from my tiny attacher.  Stapling is so much easier than using adhesive.  I stapled 6 layers together on this card before using just one swipe of adhesive to adhere the layered piece to my card.
 I used a Medium Glassine Sack to create a fun place to tuck in a simple index card on the front of the card.  I could easily attach a gift card or write a special message.
 On the Valentine gift sack, I used the brown paper sack, a small glassine sack, both the snow and the sequins and the baker's twine from the Heart Confetti Packaging Kit.  I love creating these fun confetti pockets to add to packaging.  I'll probably slip in some stamped cards for the recipient.
Next up there is the Just a Note Tag Kit.  Very simple in design but you can add the stamped grid vellum pieces and tags to any project like cards, notebooks, gift sacks, or Project Life journaling cards.
 Here I used the tags and stamped circles for some Valentine tags.  The medium glassine sacks are the perfect size for tucking in a wrapped treat or candy bar for Valentine's Day.  I used plain Small Clothespins and Valentine Confetti (now sold out) to fill some small, clear bags.  The patterned paper is from My Mind's Eye.
 If you like the look of adding a confetti sack to projects, the Sack Assortment for Confetti is handy.  The small, medium and large glassine sacks are also sold separately in the shop.  If I'm going for a bold look I like to use the clear sacks...if I want a more subtle look I like to use the glassine sacks.
The Vintage Valentine Kit is what you'll find me working with today. My poor little niece broke her arm last week so I think a little care package would be just the ticket for her.  The vintage floral enclosure cards with the wheelbarrow images were an extra special find one year.  I'm happy to finally be digging those out of my vintage stash. 
Cards as gifts.....finally for today, if you're like me you used up a bunch of cards from your stash for Christmas gifts.  I think I gave away nearly 60 cards so I definitely need to build up a new supply.  What I typically do is find a box and make chipboard dividers with the names of people I give cards to.  Our moms always get a stash of cards for their birthday + Christmas then I also add Eric's grandma and my sister + some teachers, etc to the card list.  That's a lot of cards to create throughout the year.  No way do I want to try to create these cards all at one sitting.  I like to create as a I go and just hold some back for their stash.  

If you'd like to follow along with my plan for building up a card stash, I have two card kits in the shop that would help you get a jump start.  The Mixed Greetings Card Kit and the Happy Day Card Kit are both on sale at this time.  

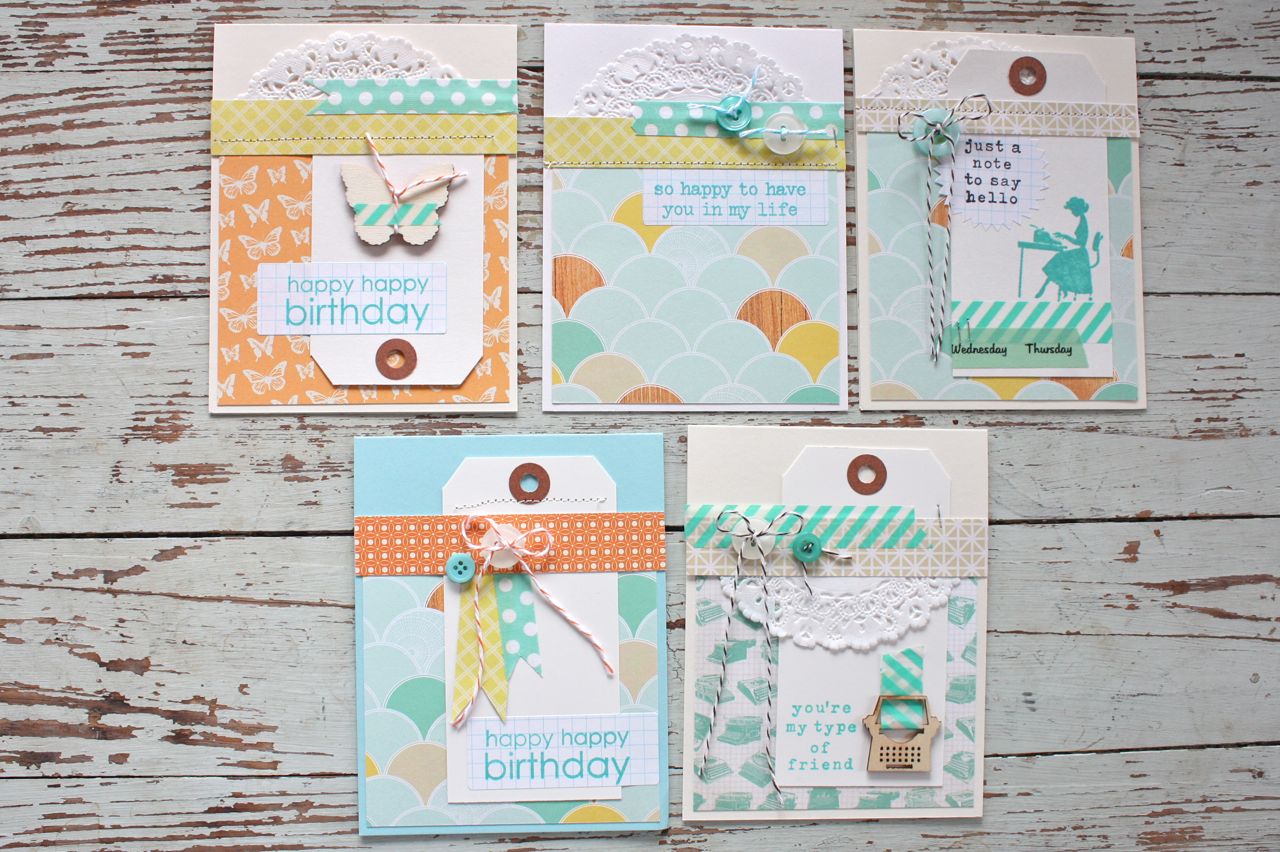
These samples are from the Mixed Greeting Card Kit.  You get all the pre-cut supplies to assemble 5 cards very quickly.  Simply add your own sentiments using a stamp or run them through a typewriter.  
 The samples that follow are made using the Happy Day Card Kit.  You get enough pre-cut papers and products to create 4 quick cards + you get a full 6 x 6 paper pad to create even more creations.
 A very quick and easy way to add sentiments to cards is to stamp them on my Grid Paper Labels.  You  get a sheet with the above card kit and you can also purchase them separately in the shop.  I also have Notebook Paper Labels and Starburst Grid Paper Labels.  I'm all about making things simple and easy this year and the labels are such a great go-to item.  They take ink well and they are very fun to run through a typewriter.  Be on the lookout for other grid label shapes coming to the shop.  Below are more samples of cards I made when I needed some quick and easy cards to add to my card giving stash.
 The simple Dainty Doilies are still a favorite to add to cards and projects.  I like to cut them in half usually and get double duty from them.  All of the basic tags in the shop are a staple item for me when it comes to crafting.  I use them on cards, for tags, notes to teachers, lists, Project Life inserts,etc.  At this time I carry pink, manila, white and grey tags in assorted sizes.  They are great to layer with strips of patterned paper and Washi tape plus they fit into the small sacks for journaling pockets, etc.  You can see the full line of tags and all of the other shop items at the main link here.
Thanks so much for stopping by today.  I can't tell you how much I enjoy sharing my creations with you.  Your wonderful comments and links to your own projects and fun ideas just make my day.  Here's to great, crafty year....I hope you're off to good start.  Let me know what you're up to in the comments section.

Coming soon.....I'm working on sorting and putting away all the holiday products in my work room.  After that I'm going to snap a few photos to show you of how I'm storing all my crafting supplies this year.  It won't be anything magazine worthy but who cares, right?  I'm looking to re-purpose some fun junkin' finds and just make my space functional.  I've also got a ton of 2012 Project Life pages to show you, including my finished Project December pages.  

Have a great day everyone!!

December 24, 2012

Project Life 2012, Week 49 + Daily December...

Happy Christmas Eve everyone!  I had a nice morning drinking coffee and sitting by the warm fire with my little family.  We're off to our first big family dinner today at my mom and dad's but first I wanted to share another week of my Project Life.  

If you've been following my posts, you know that I've been combining my Project Life pages with a December Daily of sorts....calling it Project + December.  It's worked out really well for me and I love the festive look the last few weeks of my album.  Today I'm also sharing my pages over at Elle's Studio.  There's been a fabulous month long blog event featuring some great folks and I'm so happy that Elle asked me to join in on the fun.  I used lots and lots of Elle's printed tags and journaling this year in my Project Life and will continue to do so next for Project Life 2013.  You simply must add some of Elle's goodies, and now stamps, to your Project Life product list.  

On to the pages.  I'll try to keep the talk short since we're all hustling and bustling for the holiday.  Here's the 2 page full spread. Lots of my pre-made journaling cards which was a huge time saver.
Christmas cards in the making, some classic Christmas movies and a little story about an ornament.  I used lots of Elle's 4 x 6 journaling cards for my main, dated insert.  So easy to layer with other embellishments.  
The traditional hot peanuts, Eric's work party, a nice cozy fire and Jordan got her first deer.
 Here I tried some glitter on October Afternoon chipboard letters + a cute snowman tag.
Lots of mixy matchy letters with a fun ornament...all layered onto another Elle's 4 x 6 journaling card.
 A little flipper photo for a story underneath.  I used various numbers throughout my pages just like you do in a traditional Daily December type album.
 The inside of the flipper photo.  I created a pocket by stitching on a large manila tag from my shop. (Check back for a grand update in January) Inside the pocket I tucked in 2 more photos and the story of   Eric's hot peanuts.  I adhered the tag pocket directly to the outside of the page protector so that the pocket items could be accessed more easily.
 Eric's work party. There is always a fun "rob your neighbor" type gift exchange and Eric was determined to get me a battery operated heated scarf.  Just what I always wanted.  ;)  A 4 x 6 Elle's Studio card was the perfect foundation for this mini layout.
 The 3 x 4 inserts, complete with a Week in Review card + a list of our favorite Christmas tv shows and movies. Notice the little circle journaling spots from Elle's Studio.  I love to tuck those in here and there.
 I had a blank spot so I used a Project Life card with stitched on patterned paper, an Elle's Studio tag + sequins and an October Afternoon tin pin.  On the right card I used one of the Studio Calico arrows that I stamped on.
 More 3 x 4 cards, using an Elle's journaling card for a base.
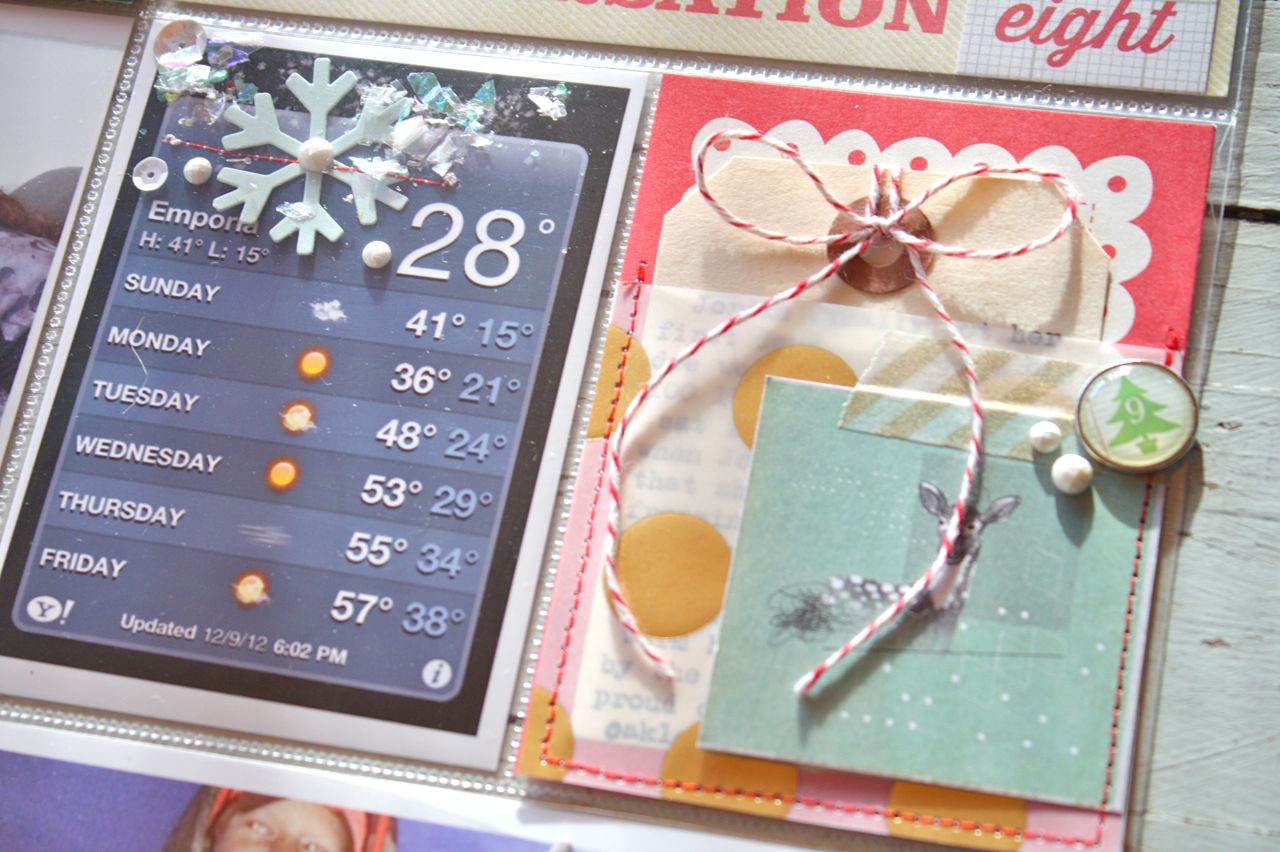
 The weather update which I fancied up with a snowflake and some glittery snow confetti from my stash.  On the right I created a fun pocket using polka dot vellum and a tag from my shop.  The deer image was from the Gossamer Blue Daily December Kit.  I adhered all of this to the outside of the page protector again.  The pockets are just too fun to be tucked inside the plastics.
Here's my 2 page Project Life with the inserts tucked in.  I really love inserts because I know more goodies are tucked in between the pages.
You've seen this insert as I had pre-made it some time ago.  It's a pocket page that holds my lists.  I love how it looks with a few actual lists tucked inside.
Turn the page for the next set of inserts, a 2 page spread about putting up our Christmas tree.  Note:  Due to Charlie's constant wagging tail & 5 broken ornaments, the tree now has ornaments from 3' up and higher.  And no presents under the tree, that would be a playground for Charlie.
 This 8.5 x 11 photo of our living room was embellished with a simple journaling piece from Evalicious.  Be looking for more of her items on my pages for 2013 as I love her style.
 Some closeups of the inserts.  The star of wonder insert is a 3 x 4 Elle's Studio journaling card. The glittery tree is a Studio Calico wood veneer piece that I covered with shiny green glitter.
 The next set of inserts featuring my holiday decor + the Senior Citizen's Dinner we attended as guests for Eric being on the School Board.
 My favorite part of this week, just so festive and colorful.  I used a pre-made 4 x 6 card that I made from Elle's products.  I had a piece of the polka dot vellum stitched on and then I added more stitching and some confetti to create a fun base for yet another Elle's tag.  Stamping is from Ali Edwards' holiday set.The bottom journaling card was from my pre-made stash and has a stamped sentiment from Elle's Christmas set.
 A few photos accented with an Elle's tag and an October Afternoon Santa brad.
Inserts from the school dinner.  I used a 3 x 4 Elle's journaling card on the left, layered with a photo and the bottle cap pin that the art students made for the guests.  I just popped off the pin backing.  On the right is a journaling card featuring a large circle tag from Elle's.  I love how the circles add fun twist to the inserts.
 The very back page features photos from the girls' basketball tournament.  Both JV and Varsity teams took FIRST PLACE! So proud of my girls.
 I love how this pre-made holiday card worked for my basketball photos.  The "joyful" sentiment definitely fit in with the theme of my photos.  A short story I must tell:  Jordan had just stolen the ball and made a layup for 2 pts.  The other team was taking out the ball under our basket.  Jordan and her best friend deflect the ball and are scrambling on the floor for it.  Kara is sprawled on the floor and passes it to Jordan who is on her knees.  She can't get up or she will get called for traveling.  So she shoots the ball while on her knees.  AND SHE SCORES THE BASKET!  The crowd goes WILD!  Best shot ever made!!  And the funny thing is Jordy tells us afterwards that she and Kara practice that shot all the time in PE class for some weird reason.  It paid off!  And no, I didn't get the photo, dang it, but I  will remember this story forever.  :)
 A special thank you again to Elle and Jenni for having me guest at Elle's blog today.  Here's to another great year of Project Life in 2013. I'll be back with some of those fun posts I've been promising....slow but sure.  :)

Survery....I'm debating on whether to keep the white borders for my photos or print them borderless.  What do you think???

And with that I wish you a joyful holiday season.  Our hearts are all heavy for those that have lost their loved ones this year. I think a lot about my grandparents and my brother Jeff, wishing they could see my sweet girls and be with us.  My thoughts and prayers go out to everyone who is missing their special someone this year.

Related Posts with Thumbnails