It's a new year which means I need a new calendar. I always keep a small calendar on my desk where I do all my blogging and shipping & I needed one like pronto. I was kind of happy when I got the note about the Studio Calico calendar that was to be included in the Project Life kit. Although I would have rather had all the journaling cards in the kit be perfect and not have to trim them, the little calendar set was a bonus. But upon viewing it, it was a hot little mess of uneven corners and edges...free or not, it was not really usable in it's current condition.

Instead of recycling the lot, I decided to make the best of it and re-purpose the calendars into something I could use for my desk. I went to work with my paper trimmer and cut all the calendar cards to 2.5" x 3.5" rectangles. I'm thinking that leaving all the journaling cards as rectangles might be the best route for the Studio Calico PL kits...I kind of like them that way because then I'm free to round or not round. Anyway, I reached for
12 Library Cards to use as a bigger base for the calendar cards.
I wanted to make this project go rather quickly so I picked out just a few embellishments to adorn the calendar months. I have this enamel bread pan full of little stickers & such so I pulled out a bunch of My Mind's Eye labels.
I used the MME labels to hold down the calendar cards then used a neutral assortment of Washi tape strips to further embellish the calendar cards.
I stitched over each label to secure it even further. Then I used my "one mini, one regular" stapling to really make sure the pieces stayed secured. No other adhesive was used.
And I kinda like them. When laying out the calendar cards, I discovered that you could use all white or all grey or a combination of whatever you like. I just alternated every other color and called it good.
To store my calendar I used a
Medium Glassine Sack and a simple mini index card with typing.
And now how about incorporating the calendar in with some vintage finds for my desk?
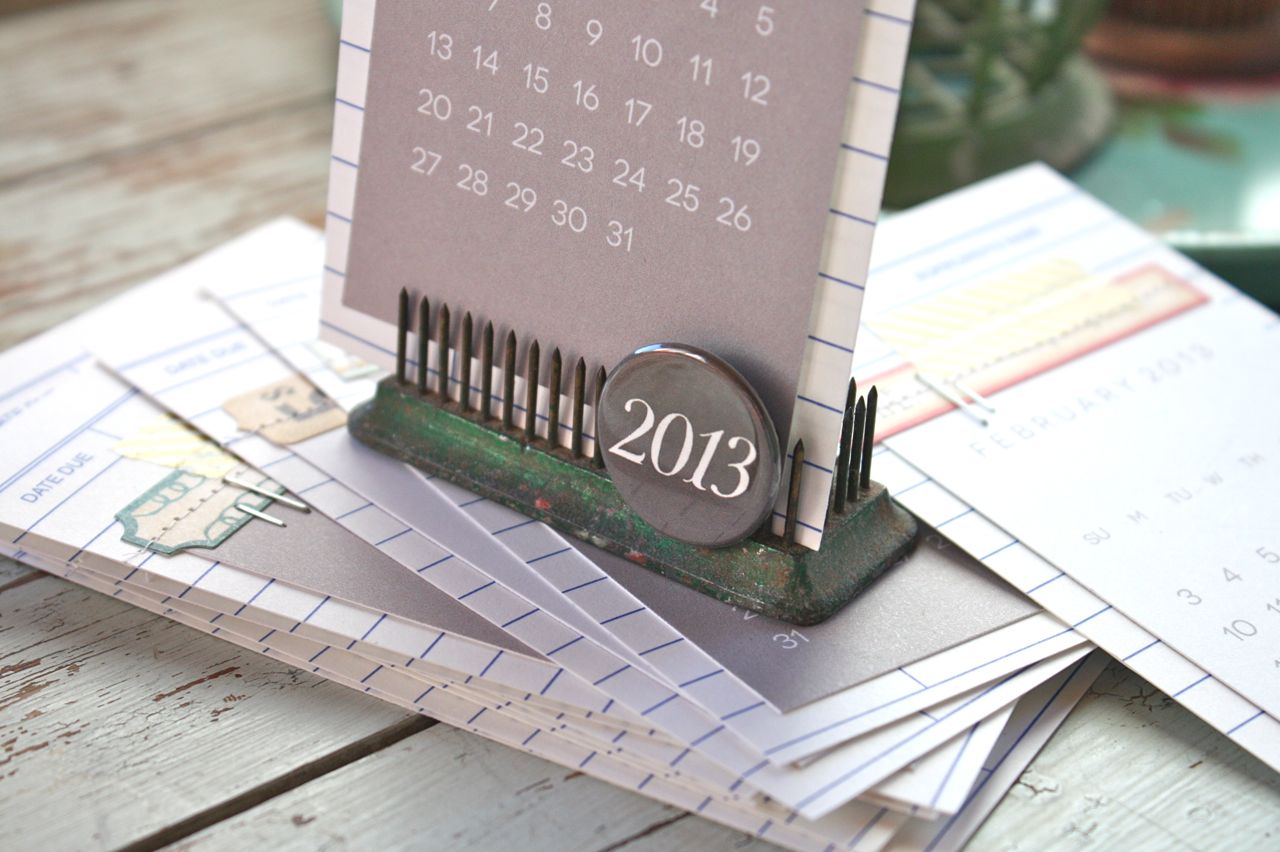
I spend a lot of time at my desk which is where I do all my blogging, shop packaging, printing and shipping. It might as well have some fun new stuff for a new year, right? I decided that I'll stand each calendar month up in a vintage floral frog. I've got lots of these sitting here and there so I might trade them out each month for variety. Basically, they are very heavy bases with with lots of needle-like prongs sticking up. Floral frogs were used to sit in vases and then flower stems were poked in to secure the arrangement. You can find them in antique shops and online. That's even a flower frog on the left side. Of course now it's a pen holder for me.
Included in the Studio Calico Project Life kit was this 2013 badge also. I stuck some foam dots on the back of it and secured it to the front of my flower frog. Just so I don't forget what year it is and all.
I placed my calendar along with my other floral frogs + an old receipt spike that I use to hold customer thank you tags + my old stapler on a pretty painted tray. This will sit on my desk, right within reach of where I ship orders and do my blogging.
So there ya go, a re-purposed project that resulted in some new organization for the new year. It's all good.


10 comments:
Really beautiful calendar! Inspiring project :)
Hi Michelle, just found you (not sure how) love your attention to detail and your office space! Gorgeous.
Am awaiting my Calico kit and i think I may just give my calendar a similar treatment and gift it to someone. thanks for the inspiration x
Love your calendar! That neutral washi tape.... pure love. Is that studio calico? Have to find some floral frogs.
My kits calender pages look the same as yours and I was disappointed also but I love how you used yours! I was going to just trim them and mat them but I love this idea:)
I just might have to do that to my calendar cards too! I love how you set it up on your desk!
Hi Michelle! I love your layouts. Can you tell me how you get the white border around your 3X4 photos. I love that look. I have a Mac and wasn't sure if that is an option when printing or if you print your photos a little smaller to get the border. Thanks!
Leslie
Love what you did with your calendar & what a fun way to display it. Wish I had some of those cute frogs. Thanks for never failing to inspire me.
That is so cool! I haven't got my PL kit yet but I am using my own calendars for my album so I may have to steal this idea.
I'm so glad it wasn't just me with the oversized cards . . . that was very frustrating. I hope they resize them for future sets - bummer! However, I loved what you did with them - loved how you turned a negative into a positive :) Thanks Michelle!
This type of post are some of my favorites of yours. I like to see how you incorporate organizing and storage into your craft space and how you use it for projects. It gives me great ideas. That is my plan today is to re-think some of the things I keep on my desk and do a bit of purging and organizing, bringing in some cute containers, ect. Great post!
Post a Comment