Showing posts with label sequins. Show all posts

November 19, 2013

December Memories 2013....pages 1-10 (+ making a plan)

It's such an exciting time if you've joined the holiday album band wagon....or December Daily....or December Memories as we're calling it at Gossamer Blue.  I've shared my album cover and inside cover page and now it's time to share my inside pages, days 1-10.  


Where do you start?
This year I'll be documenting in my regular Project Life album just as I regularly would for any month. I'll be posting some ideas on that soon but today I'm focusing on my December Memories album. I will admit that when I sat down with all of my supplies and album, I literally sat there.  And stared.  And was a little overwhelmed.  I kept asking myself, "How do you put together an entire album in advance?"  I knew I wanted to do it, I just didn't know how to go about it. 
 Make a list...
I went back to the ol' drawing board, scratched my noggin and started making some notes.  I listed all of the holiday events I wanted to document and photograph throughout December. I've added to this list since I first jotted down those ideas but it was the best starting point for my album.
Make a plan....
This is where I had an "ah-haaa" moment.  I decided right then that my album would be about specific memories, traditions and events that we celebrate all throughout December.  It would not be a daily, chronological photographic diary.  I will let those daily photos go into my December Project Life.  I decided that I wanted my December Memories album to stand alone from my Project Life.  I would devote the pages entirely to celebrating the holiday season.
Then just go for it....
Once I had my plan of attack for my pages, I just started.  I made a sticky note for each event and started collecting journaling cards and embellishments that I thought might coordinate well with that event.  Sticky notes are your best friend when it comes to this album. I started sticking things into pockets.  Three hours later I had my pockets fill with the basic journaling cards and trimmed papers.  I had some additional sessions where I spent an hour or two at a time adding more embellishments, etc.  Let it sit. Come back to it.  It all falls into place.  One key point to my album is that even though I'm numbering the pages 1-31, those numbers do NOT necessarily represent Day 1, Day 2, etc.  The numbers just represent one single memory from December.  I'm not worrying about if something is out of order.....and neither will the people who sit down to view this album.  Think about the bigger picture....think about the album as a whole and not just one day.  

My pages 1-10....
For each event, I'm devoting two pages of the album.  I will go back on some days and add in inserts like sacks or trimmed down page protectors or clear acetate sheets, envelopes, etc. I tried to add as much detail to my inserts as possible so that come December I can just add photos,journaling and a few other finishing details.  

Page 1 will be a photo of our family of 4 + Charlie.  Maybe our Christmas card photos, maybe a photo of us cutting wood in the timber.  
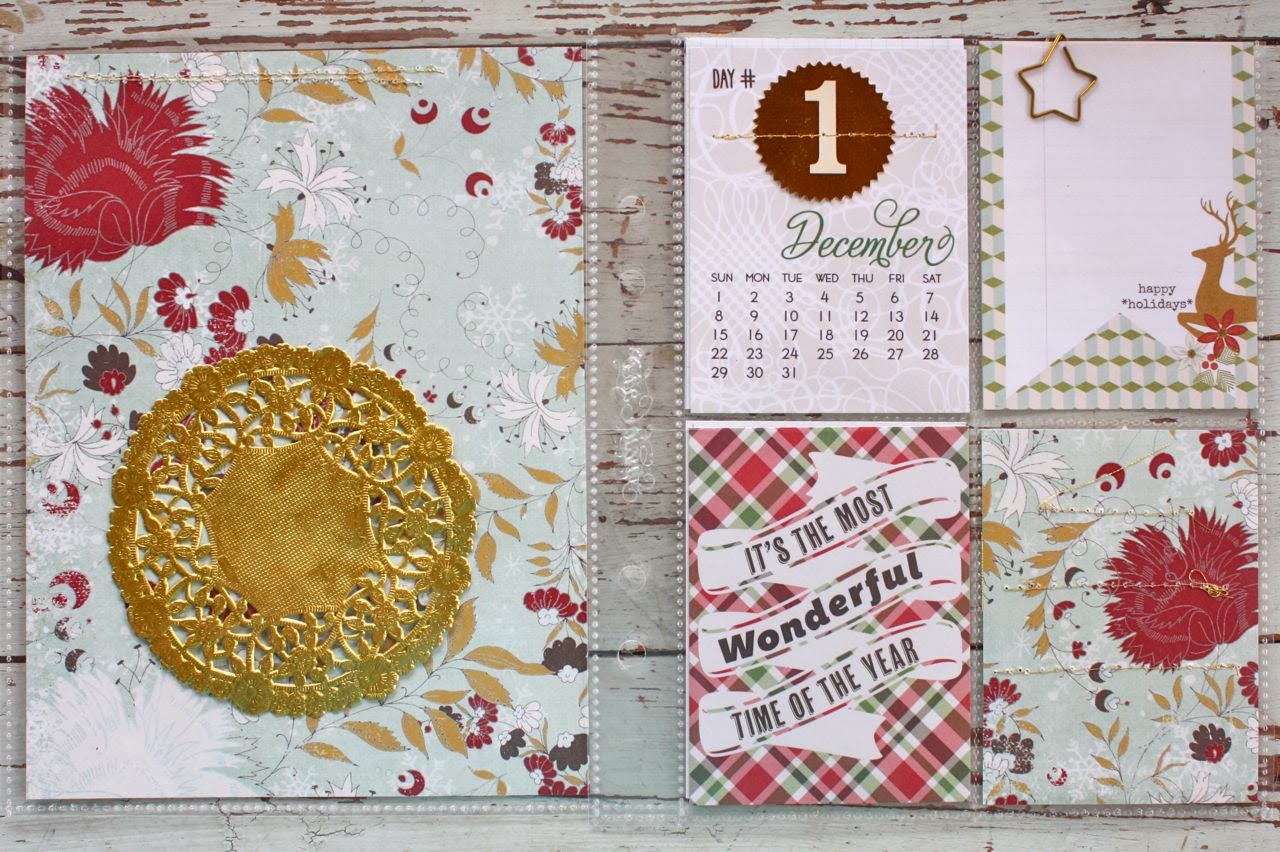
Page 2 will have photos of the day we set up the Christmas tree.
Here's my gold stitching at work.  You'll see this throughout my album this year. It goes so nicely with all the gold foil accents.
Day 3 will maybe be photos of some holiday decor that I set up around the house.
Day 4 will be reserved for opening day of deer season since it's on 12/4.  I'll leave these slots open all month long in hopes that we get photos of someone with a big buck.
Page 5 is open for whatever.
Here I sandwiched two stars around the star acetate sheet.
Page 6 is generic.
I used lots of sequin mixes that I offered in my shop earlier.  The gold doilies look fabulous with all the gold accents offered up this year.  I still have them available here.
More gold stitching over the vellum number.
Page 7 is open.  I used the "day #" stamp from the Gossamer Blue December Memories Kit for each number.  Even though it might not actually be Day 7, I liked the stamped look.
I added a Gold Shimmer Envelope as an insert with a stitched tag and gold paperclip. These are so shimmery in person.  I lined envelope with vintage sheet music.
Page 8 will be reserved for maybe photos of our house from the outside with the lights...or maybe a woodland scene of us gathering firewood, etc. I plan to tuck the gold doily behind a large photo.
The tag is held in place right now with a star clip.  I might move it around depending on what photos I use for this day.
More gold stitching over a vellum tree + some of the Woodland Sequin Mix from my shop (sold out for this season).
Page 9 will be about some holiday traditions.  I will have photos of some of those traditions + maybe some will be in list form on a journaling card.
A fun accent to a trimmed piece of patterned paper. You might have noticed that each and every pocket is filled, none are left blank.  I have a plan in order so that all of my pretty inserts will still be seen when I add photos.  I'll share those tips in an upcoming post.
Page 10 is all about warm drinks, my cocoa station I plan to set up, maybe the hot tea mix I make and baking.  I might need to add some inserts here.  I might need to go to Starbucks too for a red cup.  :)
More gold stitching over the tag.
More sequins added to the cute red cup insert.
These fun sacks were included in the Gossamer Blue December Memories Kit.  I attached all of them to the outside of page protectors for easy access to whatever is tucked inside.  In this case it's a Large White Parcel Tag.
Okay, that's it for this portion of my December Memories album.  Come back soon as I'll be sharing the rest of my album pages + how I plan to keep the pages nice and pretty.  For fun embellishments like glassine envelopes, baker's twine and tags, be sure to pay a visit to my shop.

While visiting my shop, you'll notice lots of fun organizing items for your holiday crafty supplies. They are going quickly so be sure to act quickly if you like something.....like this wood tray with diner dishes.
 This pretty aluminum tray with dessert cups.
 These silver plate trays with vintage jars and dish.  They will shine like new penny if you want to polish them up.
And always a favorite, these muffin tins.  
Enjoy!

August 29, 2013

Boutique Item...Gray Polka Dot Gift Packaging

Hi all.  As I'm getting back into the swing of things as the girls are back in school, I'll be focusing more on my shop and fun blog posts.  I'll be bringing back the Friday Favorites posts which will include good junk finds, awesome recipes, great Pinterest finds and more.  I'll have more cards and packaging items up on the blog in addition to my Project Life posts.  It's going to be a great Fall season and I hope you'll join me.

When doing a little work for my online business, I realized that I have over 100 items in my shop! Many of those items are staple items that I keep stocked on a regular basis. Other items are little kits & cards & special finds that I put in the shop in very limited quantities.  Sometimes those speciality items sell out quickly & I get emails asking for more quantities.  Sometimes I can accommodate and sometimes it's just a one time deal, depending on quantities of supplies on hand and if I feel like creating more items.  

For those items that are listed in limited quantities, I'm going to start listing them as a Boutique Item.  The Boutique Items will be listings that are very limited in quantities and perhaps a creation that I devoted a little more time to. The Boutique Items may be a special project that I created using a featured product in my shop.  They may be a limited quantity of some great vintage find.  Whatever the case, my hope is to showcase those Boutique Items here on the blog in a special way.  So stay tuned for my Boutique Item featured posts.  

Today's Boutique Item is set of gift sacks that I created using the Gray Polka Dot Gift Packaging up in the shop. With the little kit you get a fun little bundle of supplies to create a unique gift sack for that special present.  Today I created 2 of the gift sacks to hold some notebooks that I created for my two favorite secretaries at the girls' school.  They are nicest ladies & always give a shout out to my girls as they pass through the halls.  They deserve something special.  
 On my gift sacks, I used every little item that is included in the little kit.  I adhered the Dainty Doily to the sack.  Then I used the Small Clothespins in a fun way.....I added double sided tape to the backs of them and adhered them right to the doily.  I tied the gray twine and tiny little silver tag to the Small White Parcel Tag.  I used some white cardstock, a circle punch and wood letter stamps to create the name tags.
 I then placed all of the sequins into the clear cello bag & adhered that to the top of the doily with the silver Washi tape.
 I tucked in the cute notepads (which you'll see in September for the Gossamer Blue release) and they're ready for the girls to take to school.  Boy, doesn't it make you feel good to create a gift for someone special.  I need to do it more often.
I hope you'll enjoy my Boutique Items posts & everything else that is to come this Fall.  I've got a few more Boutique Items up in the shop currently which include my Special Delivery Gift Packaging kit, my Hello Gift Sack Kit and Vellum Pocket Inserts.  You can see them in the main shop HERE.  Have a great day everyone.

July 25, 2013

Project Life 2013....Week 20 with veggie seed flip pocket

Lots of blogging going on around here and I'm continuing today with Week 20 of my Project Life 2013 album.  I'm trying to get all my posts caught up here because in August.....hang on to your hats.  As soon as the girls get back in school, I'm planning to offer up more Project Life fun.  I'll be kicking things off by introducing you to the first Gossamer Blue Life Pages kits.  I'll be showing you my project pages all month long + I'll be introducing in more Project Life topics....like my reorganized PL work area, my new PL planner book and more.  So hang on while I get my weeks caught up a bit here on the blog.  :)  Card makers....don't worry, I have lots in store for you too here on the blog like new kits, fresh cards, etc.  

Okie doke, here's Week 20.  We were wrapping up the school year here and the kids were itching to be done with classes.  Gardening season was upon us..everything was fresh and green.
Josey was finishing up track season which still lasted past school for a week or so.  Summer vacation was just around the corner. 
My main dated insert.  Lots of stickers and chipboard, some stamps from Studio Calico, a Small Manila Parcel Tag from my shop.  
I've been combining 2 similar photos on one 4 x 6 insert lately.  This saves space instead of using up two slots.  For convenience since they're sticky backed, I've been typing journaling onto Notebook Paper Labels.  I love adding little ampersand embellishments in between the photos. 
Here I made a 4 x 6 flipper that opens to the right like a book page.  This photo shows all the seed packets we planted from this year. 
When the flipper pocket is opened there is typed journaling on the back side of the flipper.  The other 4 x 6 insert on the left has a ledger paper band stitched onto it.  A few of the seed packets I saved were slipped inside.  I used my sewing machine to stitch on the trimmed down flipper page protector. 
School's out for Summer! I was lucky enough to get this photo of Jordan walking out of school because I was there to pick her up to ride to a track meet.  I love seeing all of her bags filled with locker stuff.  
The typical weather shot and Jordan's text to me that she met her reading goal.  
Here I used another Notebook Paper Label which was cut in half to journal on 2 separate inserts.  
A new puppy for the grandparents and some journaling on an embellished journaling card I had in my stash.  The sequins I sprinkled throughout the layout are from my Neutral Sequin Collection.  Just a few of these left in the shop. 
A few inserts this week.  This is the front and back of a 5 x 7 insert.  I used the Becky Higgins Project Life page protector.  The left has a simple 5 x 7 photo with Elle's Studio journaling tag.  The right has some birthday cards I received. 
Some more from the 5 x 7 insert.  A little scrappy page about some vintage finds and more birthday cards.  
A close up of the vintage mini page.  This size seems to be a perfect size for me to scrapbook.  Much larger than this and I get stage fright.  It's true, I can't scrap large pages for some reason.  
It's all in the books.

A true fact for you....as of today I have ZERO...that would be NILCH, NADA, NONE....photos on my iPhone.  I transferred to a new phone and I made it a goal to get over 1,000 photos emailed to my big computer.  Done!  I'm about 3 weeks behind on Project Life...down from about 9.  That feels good too.  How are you coming along?

June 13, 2013

Gossamer Blue meets Lily Bee.....a notebook

Hey there, today I'm back to share a creation made from the June Gossamer Blue kits.  This month we teamed up with Lily Bee to create some fun filled kits.  Be sure to check the Gossamer Blue blog + the Lily Bee blog to see more team creations.  

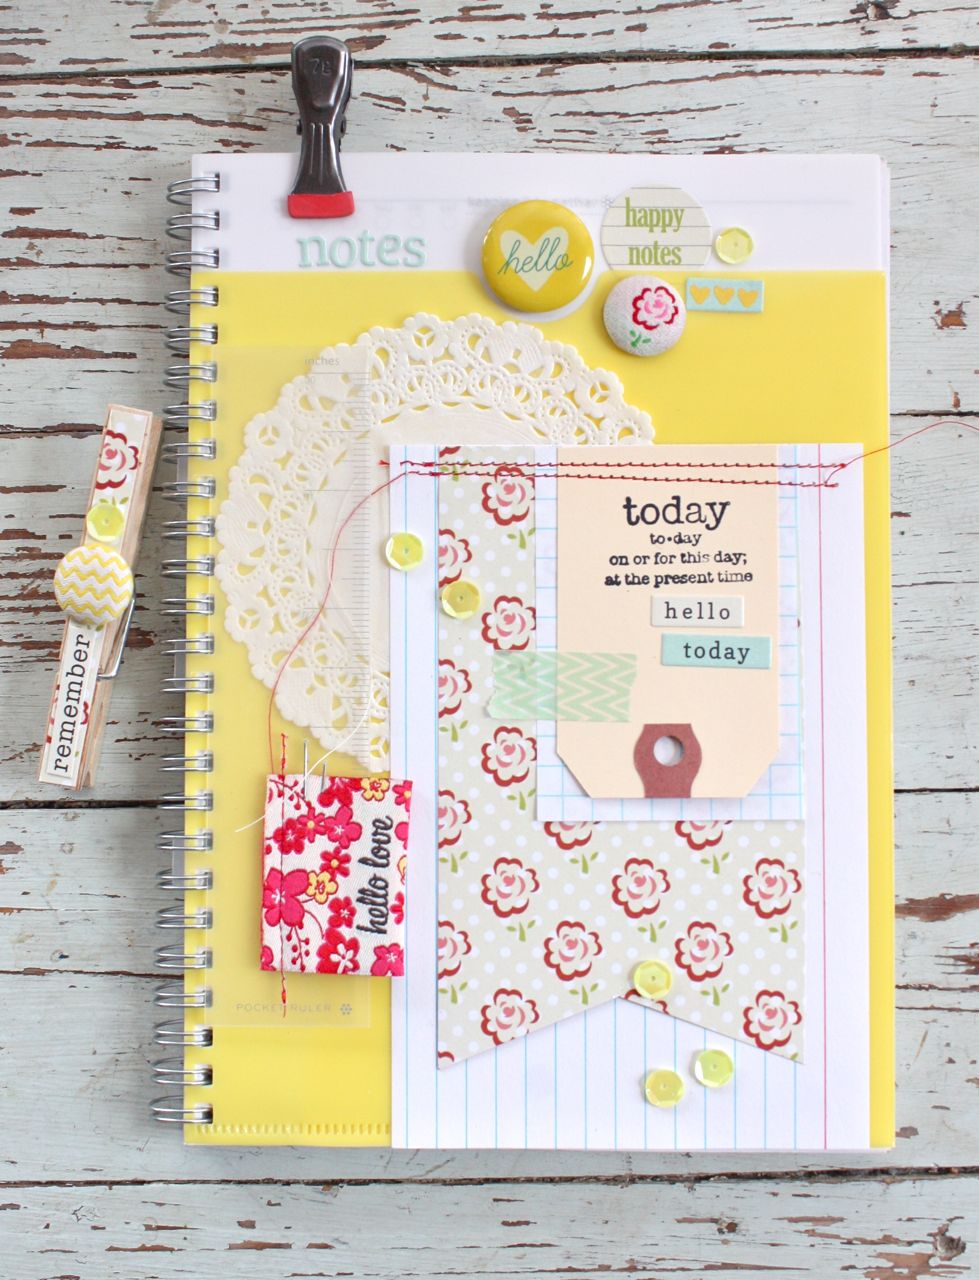
I created this cheery notebook because I just love to make notebooks.  I saw this yellow one in my stash that I picked up from Target (I don't see them carrying this style anymore, boo!) and decided it would look great with the fun yellow accents from the Lily Bee products.  
My favorite part about my notebook is the whimsical brad and flair from the Lily Bee Sweet Shoppe pack that was in the GB June Main Add-on kit.  Such a fun little grouping and I added a little sequin from my shop as a finishing touch. For the layers on the notebook I used red stitching and Dainty Doily
 The pretty floral patterned paper that I created the notched piece with is from the June Add-on Kit #2.  I also used the exclusive "today" stamp from the June Main Add-on Kit, Washi tape and stickers from the kits.  The fun "hello love" fabric tab is from the June Bits & Pieces Kit & the Medium Manila Parcel Tag is from my shop.
 To coordinate with my notebook I also created a fun clothespin clip using leftover bits and pieces.  I like to use the clothespins to mark a page in the notebook or to clip other loose notes to my notebook.
Notebooks are great to have on hand and I keep mine in a basket.  I sometimes will pull out one to use when I want a fresh, new notebook to use.....and they make the best gifts for teachers, secretaries at the school, Christmas stocking stuffers, etc.  Everyone loves the notebooks!  I find the best notebooks to embellish at Target it seems.  Thanks for stopping by today!
Related Posts with Thumbnails