Showing posts with label Card Kits. Show all posts

May 24, 2016

A happy hello....

I'm sharing more cards today made from the Papertrey Ink Don't Forget To Write Kit. I spent some time die cutting and stamping flowers, stamping a sentiment then adding typed words with my vintage typewriter and selecting papers and envelopes.  
 I ended up with a fun little set of generic greeting cards, perfect for any occasion.  My favorite colors too.
 Fun details added like machine stitching, the gold paperclip and Washi tape.  Old dictionary paper was used for the background. Card sets are from Paper Source.
 A hand stamped envelope makes receiving a card in the mail just that much more special.
Hope you enjoy and thanks for stopping by!  Your comments are always appreciated so thank you if you take the time to leave me a note. :)

May 20, 2016

Don't forget to write card making station...

Long time no blog, friends.  It's been a very busy month around here with Mother's Day, graduations, birthdays, end of school activities, softball, etc.  I made it over the hump and finally took some time to do something just for me.  After spending way too much money of store bought cards recently I decided to take some time to set up a card making station.  It's one of my favorite things to do.....just gather up stamps, papers, washi tape, embellishments and more and organize them all in a vintage basket.  The perfect little set up to help create some hand made cards. 
 The main stamp set I'm using is from a kit designed by Betsy Veldman from Papertrey.  She has been knocking it out of the ballpark with her fun designs.  Below is the stamp set that came with the kit but that's just a little bit of the kit...there are dies, stickers, envelopes and much to play with.
 I love colored envelopes and these are the ones that came with the kit.  I also have a huge stash of some fun colors from Paper Source and a few other places that I'll dig into also.
 Still loving gold accents so I fished a few things out of my stash.
 Baker's twine to coordinate with the colors in the kit.
 All tucked into some vintage wood storage boxes.  Those typewriter mini Instagrams are from my shop here.
Stay tuned, I've been made a list of cards I'd like to have on hand and I'll be sharing some designs soon.  You can also see previews on my Instagram account.  I'm MishWooderson over there.

September 4, 2014

Beautiful Butterflies Kits now in shop...

EDIT:  Flash sale going on in my shop right now.  All cards are on sale for $4.50 throughout the weekend.  More may be added throughout the weekend as my stash is growing and growing.  If you place multiple orders, I will be happy to refund excess shipping.  :)

Hi friends.  It's been a while since I've listed some kits in my shop so today I'm excited to show you my new Beautiful Butterflies Kit.  It's a dainty little card kit that was inspired by soft, Fall colors of burnt orange, buttery yellow and aqua.  I love how Fall takes on a subtle appearance at first with muted colors, clear blue skies and fluttery orange butterflies just floating about.  
 I love to offer these small kits because I know how it is when sometimes you feel crafty but the inspiration just isn't there.  In the kit, you'll get all the crafty supplies shown below...just enough to create a few pretty cards & enough leftovers to make some pretty packaging, tags, etc.
 These are samples of two cards that you can create with the kit items.  If you purchase a kit, you can print off this photo, take it to your craft area and and recreate the cards with the kit items.
 I love to layer and stitch over die cut butterflies.  Add a tied button and you've got beautiful butterfly tails.  With the addition of the charcoal gray to the cards, you can easily send these out all the way through Halloween for a pretty Fall pick me up.
 You can get fanciful with your layers or keep it simple.  You'll also receive two stamped pieces in your kit for instant sentiments. This stamp set is from Papertrey and is designed by my good friend, Pine....Heather Nichols to be exact.  :)
The kits are all lined up and ready to go.  Each little kit is picked and prepared and packaged by me with crafty love.  I only created a small number of kits so they're only available in limited quantities.
 I was even inspired to paint some pretty tags this morning for packaging.
 You can carefully remove the tag to recycle and reuse.
Life is beautiful today, folks. Hope you enjoy your day and I thank you for stopping by.

Note:  Look for individually sold items like the tags and gold & white doilies in my shop.  There's lots of good card making and packaging essentials to build up a good stash.  I'll be adding more and more items soon.  :)

April 23, 2013

Art techniques on cards....Gesso and modeling paste

I'm back today to share a few more art techniques I tried out on the Mixed Florals Card Kit.  For the first technique today I'm using a sheet of the dictionary paper paired with Gesso from the Mixed Media Kit + acrylic paint mixed with water to create a spray mist.  
I spread some Gesso onto the book paper with the palette knife included in the Mixed Media Kit.  I then misted the page with the spray ink.  The result was a soft, altered page that made a perfect background for some other layers and embellishments. 
When you spread on the Gesso to create heavy layers in some spots that leaves a great place for little card sentiments whether you stamp them or type them out and cut them apart like I did below.  
The next technique I tried spreading modeling past onto tags from the card kit using the palette knife and a Pink Paislee stencil.  I then sprayed more paint mist on top, leaving some of the modeling paste white.  
As you can see my colors from my work room are off from the real tags once they dried but you still get the idea.  I love that these look somewhat like old wallpaper with the raised finish.  I'll definitely be trying this out again on cards and such.  If you want more of a worn look you can sand off some of the ink with a fine grit sand paper or sanding block. On a few of the tags, I just spread Gesso with no stencil.
Sometimes when creating a card you'll notice you have some big spaces with not much going on.  Or perhaps you made a mistake and smudged some ink, etc.  
Adding modeling paste with a stencil and a palette knife onto cards is a great way to add some textured interest.  It can cover up those little mistakes or just add another point of interest for the eye to land on.  Here I used a Pink Paislee stencil to add a design to an open area on my card.  I like to create an organic shaped area instead of using the entire stencil or rigid boundaries.  
Here's the finished card once the modeling paste dried and I added the other embellishments.  I really love the look of the modeling paste here.  
That's it for today.  Thanks for stopping by.  :)  I'll be sharing some Project Life pages soon + a page from my Dylusions art journal.  

October 18, 2012

October Afternoon Sketch Challenge with Lexi

Hey everyone, today I'm joining in with Lexi over at the October Afternoon blog.  She has a new sketch up and asked me to participate in creating a new project using it.  I chose to create a card based off of the sketch.  I love how sketches can be interpreted for any type of project you want to create, whether it be a scrapbook layout, a card, a notebook, etc.  

For my card, I used products from the October 9 to 5 collection.  I love anything with an old time-y office product feel and the 9 to 5 collection is just perfect and fun!  
I loved the 4 square grid element on Lexi's sketch.  It's the perfect place to use 4 different patterned papers, stickers, labels, tags or whatever little tidbits you have from a collection.  A grid design allows you get mixy matchy with product but yet they're all grouped together in a nice, uniform layout. For my squares I used papers from the 8 x8 Paper Pad, a sticker from the Word Stickers sheet, + the Day Washi Tape.  I tied it all up with a long length of black and white baker's twine.  
The little grouping of elements in Lexi's sketch allowed for the perfect little placement of more, tiny accents.  I used pieces from the Word Stickers sheet, + Designer Brads.  The strip of floral paper sewn along the right side of my card also follows Lexi's sketch.  I used a bracket punch to follow my office theme for the card.
The background of my card uses a page from a 1946 book called "The Silent Secretary", a cute little date book that I've been hoarding for some time.
Hope you enjoyed my take on the sketch.  Thanks for the challenge, Lexi!

You can find the October Afternoon 9 to 5 collection at 2Peas here.  Also the October Afternoon Witch Hazel Halloween line is 25% off right now, a perfect time to add items to your Halloween stash of goodies.

In my shop news, I've got my card kits on sale for 20% off + Halloween/Fall items are on sale too.

October 11, 2012

Stocking my stash...

It's getting to be that time of year when I start making my Christmas gift lists.  Our moms always look forward to their pretty sack of cards so this week I'm stocking up my stash of cards.  It's so cute to see both my mom and Eric's mom and his grandma tear open the sacks first thing and go through each and every card.  It's what makes stamping and card making so much fun.

So since I had all my supplies out from assembling the Happy Day Card Kits, I just kept on creating. Many of you have commented on the happy colors of this kit and mother agrees.  She saw this stack sitting on my counter today waiting to be photographed and said...."ohhhh, what cute cards, I love the colors."  Little does she know that many of these will make it into her gift this Christmas.  

So here's stash #1.  In addition to the kit items, I used lots of items that are still available in the shop.  
A nice stack of Dainty Doilies came in very handy to add a little texture to my cards.  The little strips of Studio Calico fabric strips come in the Happy Day Card Kit.  
 Grid Paper Labels with stamped sentiments also made my card making go really quickly.  The grid lines help to line up stamps nice and straight too. A little machine stitching adds fun detail without adding any bulk to my cards.
 This Aqua Stripe Washi Tape is fantastic for quick and easy cards.  Just rip & stick.  I love that you can see through the stripes on this one.
 Here's stash #2 of my cards that I'll be using for gifts.  A funny little thing....the moms seem to love the simple cards more than any fancy, heavily layered cards.  I think they like the simplicity and clean lines.
Here I used a wood veneer butterfly from Studio Calico.  I tied twine from this colorful bundle around the butterfly then added a cut strip of the washi tape.  All of the patterned papers I used for my cards today are from the 6 x 6 paper pad that comes with the Happy Day Card Kit.  It's nice to challenge yourself to use just one little pad of paper.  Limiting your choices when you want to mass produce cards is a great tip.  
 Here I made some notched little pennants from a scrap of patterned paper and the fabric strip.  Buttons from the Pastel Button Assortment are just the right finishing touch. I like to mix one white button with one colored button.
 Here I stamped my Hero Arts sentiment on a Starburst Grid Paper Label.  I absolutely can't get enough of my printed labels.  They are so easy to stamp or run through my vintage typewriter.  I know I'll be using them lots in my Daily December. I used more of the aqua stripe washi along with some October Afternoon washi from the 9 to 5 collection.  The cute girl typing is also from an OA 9 to 5 stamp set.
 The Large White Parcel Tags made their way onto many of my cards this time.  They're just the perfect size to fill up some space on a card.  I like to layer them under a horizontal strip of patterned paper & a strip of Washi tape.  Here I typed my sentiment and then added a wood veneer typewriter from Studio Calico.  It was a fun discovery to find that a strip of Washi tape fits right in the typewriter to act as paper.
 So, I've got a nice little stash built up to add to the holiday card pile.  So happy about that.  If you purchase(d) a kit and want to keep on stamping past the supplies that I included for the 4 cards, keep that paper pad out and just keep going.  I've got additional aqua envelopes and cream envelopes in the shop that coordinate with the colors in the kit.  The Mixed Greetings Card Kit is still available too, perfect for adding more cards to the gift pile.  Happy card making everyone!

September 25, 2012

Mixed Greetings Card Kit....

Edited on 9/26.....The card kit and other new shop items are now available here.  

Hey there, a few new items coming to the shop.  This week I have a new card kit to share called Mixed Greetings Card Kit.  It's a simple kit to assemble that comes with blank punched circles.  You can any variety of stamped sentiments or images to create endless card combinations.  Or you can purchase my Happy Stamper add-on and receive your circles stamped with the images you see in the photo below.  This is a great kit to build up your own personal card stash or it's a great way to add cards to your stash you've been saving up to give as holiday gifts for teachers, family and friends.  

You'll receive all the items in the kit unassembled.  Simply use your own adhesive to assemble the cards.  You'll end up with 5 completed cards with blank envelopes + 5 brown paper sacks with 5 blank tags for gift giving.  Tuck the cards inside the sacks along with a small gift.  Tuck a gift inside the sack and keep the card on the outside.  Or use the cards all by themselves and save the gift sacks for another use.  It's all up to you.
The cards in the kit have a pretty floral background paper from Fancy Pants.  I topped the card off with a printed hang tag, sentiment circle, a strip of coordinating polka dot patterned paper, Washi tape (you'll receive a full roll in your kit) and a tied vintage button.  Feel free to further embellish the cards with stitching, stapling etc to add more detail.
My tip for this kit:  Lightly adhere the printed hang tag to the card front.  Apply Washi tape over the tag, placing the tag string under the Washi tape.  This keeps the string in place and adds visual interest to the card.  Add the punched circle piece to the card front using pop dots for added dimension.  Then finish up with a tied button.  
I'll also have a few more shop items along with the card kit.  A favorite of mine are some Vintage Finds packets that will be offered in very limited quantities.  
I've been hoarding these vintage sequins but they coordinate so well with the card kit that I had to break out a few from my stash.
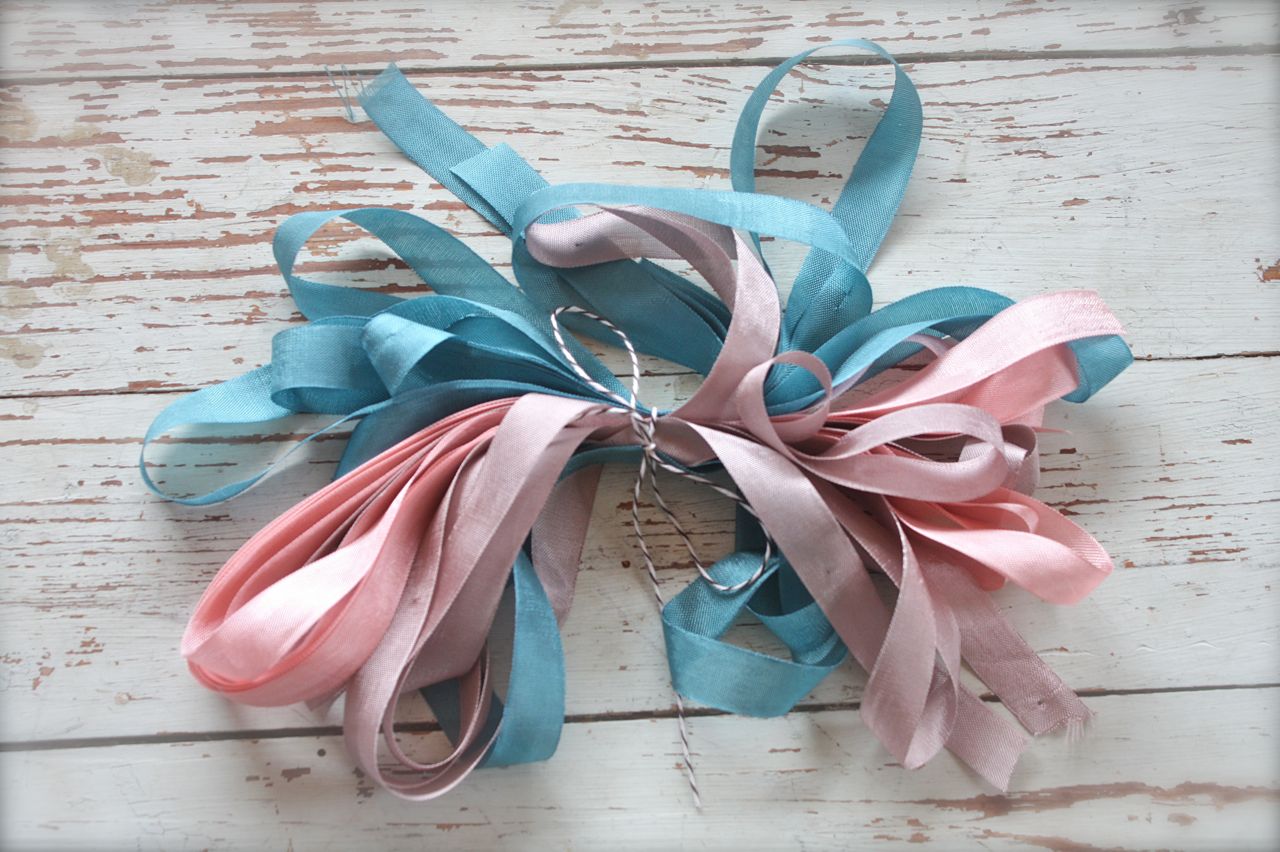
These pretty seam bindings in 3 colors also coordinate with the card kit or just use on other projects.  Perfect for cards and gift packaging.
I have some leftovers of these unique, shell-like buttons.  Lots of dimension and texture for cards, etc.
And that wraps up my upcoming shop update.  The tags, envelopes and sacks used for this card kit are also available as individual items in the shop.  You can view the full shop listings here.  The cards from the kit would also be very pretty packaged in the vellum envelopes.  For the brown paper sacks, any of my grid labels would be great to run through a vintage typewriter for a personal greeting.  Just in time for Fall projects are the Autumn Kraft Packaging Kit, Striped Treat Sacks Kit, Dripping Doilies and Vintage Halloween Buttons.  

My shop update with the card kit and other items shown today will happen tomorrow before noon.  Look for tweets and Facebook updates.  :)  I'll have another post soon showing you how you can fancy up the cards in the kits with some of my new shop items + I have a fun idea of how to use those vintage button cards to create gift packaging tags.  Stay tuned.  

September 1, 2012

My Type of Friend Card Kit

Welcome to the weekend! If you missed it, yesterday I had a big shop update with lots of new product. You can view all the new items in this blog post and all of the products are now in the shop too.

One of the most fun items in the shop update is my newest card kit called My Type of Friend. Below you can see all the contents of the kit.
In the kit, there is enough product to make 5 completed cards with wax paper packaging. The sacks are the packaging for this go round but many of you have already picked up a package of the cream envelopes that can be used instead of the waxed paper sacks. The line of cardstock and coordinating envelopes that I've found to use in my card kits is really good quality. I'm very pleased with the weight and feel of the products and I'm happy to use them on my personal cards.
My goal with the card kits is to keep the quantity small enough so that I can still mass produce them but also add in some speciality items. One of the unique items in this card kit is the 4 x 6 sheet of mini typewriter Instagrams. I've used this little image before on some projects and thought it would be so fun to add to some office themed cards for this kit. You can cut apart the square images and use 5 for the cards. You'll have one extra photo to use for a separate project. I'll have more to show you on that in an upcoming blog post.
I've also selected one of my favorite products from Elle's Studio to use in the kits. This fun Lil' Snippet: Notes card is just perfect for office themed cards. I'll show you some additional uses soon for the extra portion that you will cut off the card.
The kit will also uses one of my favorite Crate Paper patterned papers (I originally said it was October Afternoon, my apologies). With the kit you'll also get 5 yards of brown/white baker's twine and a full roll of Tape Measure Freckled Fawn Washi tape.
Here's what the completed cards will look like. Very suitable for any occasion with the inside of the cards left blank.
I'm a hug lover of the office theme, as are many of you. This is a great card design to add to your stash. And there's plenty of fun details like the added button and little strip of Washi tape. The color scheme with the golden yellows and olive greens are very suitable for the Fall season coming upon us too.
In lieu of a traditional envelope, the cards will come with the supplies to create these fun waxed paper sacks to hold the cards. I love it when the card becomes a little gift in itself. You could easily tuck in a gift card, small notepad or a few flat, packaged candies for the recipient of the card.
There will be enough Washi tape to wrap around the front of the waxed paper sack. Simply insert the card and fold the sack around to the back side, then secure with the Washi tape. Then tie a length of baker's twine around the card like a package, string on the tag and secure it with a loopy bow. So cute that the recipient might want to admire the package before ever opening the card. :)
Please refer back to this post for photos of how your cards will be assembled and for any special tips. I think the card designs will be easy enough to assemble just by looking at the photos but if you purchase a kit and ever need help, just shoot me an email.

Today's tip: Once you cut apart the Elle's Studio sheet, you'll notice that the bottom portion of the notecard has an indentation in the lined paper design. There's also the word "date". In my card design (look at the photos above) you can see that I've covered up both of those parts of the notecard. To do this, adhere the golden yellow paper strip over the portion of the notecard that has the indentation. Then using pop dots or regular adhesive, adhere the circle sentiment over the word "date". Just a little strategic placement of the embellishments to cover up those parts.
I hope you enjoy this card kit as I know it will become one of my favorites.

You might like some of these products to go along with your cards:
5 Cream Envelopes- In case you want to use regular envelopes instead of the waxed paper sacks for packaging.
Vellum Envelopes-These really show off your beautiful, hand crafted cards.
5 Yards Brown/White Baker's Twine-An additional bundle to have on hand.
Mini Typewriter Instagrams-Use for additional cards, notebooks, cute tags, packaging, etc.
Clear Card Boxes-All 5 of your cards and envies will bit in a clear box. Tie up with baker's twine and any tag from the shop for an instant gift idea.
Printed Hang Tag-These would fancy up the waxed paper sacks so much. I think they fit in great with the office supply theme.

Coming soon:
Cards as gifts........I'll be doing separate blog posts on how to use cards as gifts and how to get it organized. This might come in really handy for those of you who might like to give cards for Christmas presents.

Additional items made with the kit.....There will be a few extra items in your card kit. I'll show you a fun project using that extra mini Instagram + I'll show you a few ways that you can add extra embellishing to the card kit items to bling it up a notch.

Halloween shop items.....It's my favorite holiday to decorate and make gifts/cards for. I've been collecting some unique items to add to the little shop of horrors. I can't resist making some Halloween cards and gifts to send to friends and family. I'll share some of my new finds with you.


Related Posts with Thumbnails