Showing posts with label Tiny Tags. Show all posts

February 25, 2014

Gossamer Blue March Project Sneak Peeks...

It's almost time for the March release at Gossamer Blue.  This month is filled with colorful and fresh new product..just what I'm needing about this time of year when it's gloomy outside and I'm longing for  Spring.  I shared some of my favorite products from each kit over in the GB forums earlier and today I'm sharing some peeks at some of my finished projects I created with the kits. 

Starting with Project Life/Life Pages, loved using lots of bits and pieces to create a main, dated insert for my Week 7. Small manila tag is from my shop.  The little circle stamp highlighting the dates is a letter "o" from a small, wood Hero Arts alphabet set. 
I used stamps from the kits to stamp right onto my photo.  One of my favorite products for Project Life is little sticky notes.  There's a fun set in the kits this month. 
Another example of stamping directly onto the photo.  Lots of foodie stamps this month. 
Lots of fun journaling and filler cards this month.  Here I added two small square photos and some fun embellishments + more stamping. 
Here's a 3 x 4 journaling card with lots of stickers added along with my typewriter journaling.  I made a  tab from two stickers placed back to back and then stapled for a smaller insert. 
I created lots of cards this month too because the embellishments and papers are fabulous.  Here I used a new mini typewriter Instagram that I'll be adding to my shop soon.  I layered my set of cards with ledger paper from my stash, fun patterned papers in greens, a fun new wood product and small embellishments.  Cards with office themed products are always a favorite for me.
Look at these gorgeous papers.  So beautiful when used as collages on cards.  Here I used stamps from the kits for some whimsical cards.
Some fancy little cards with die cut butterflies, layers of office supplies, messy string bundles, stitching and more. I'll be sharing blog posts for each set of cards...this one will include a fun packaging idea using Kraft sacks.
A favorite thing I like to do is take all the little leftover bits and pieces from kits and add them to cards.  This month, I'll show you how I started these cards from scratch. See those scalloped pieces?  Those are die cut from wood.  Better snatch this kit up quickly as it was a favorite for me.
Last but not least, I was inspired by this pink fluffy ribbon in one of the kits.  I used it to create some gift packaging along with a Pink Flower Mini Instagram and lots of bits and pieces from the kits.
Hope you'll join us on March 1st over at Gossamer Blue.  The kits will be for sale and all of the Design Team projects will be in the galleries.  Also, there's a new blog post on the Gossamer Blue blog daily so be sure to stop by for more inspiring Design Team projects.  

April 23, 2013

Art techniques on cards....Gesso and modeling paste

I'm back today to share a few more art techniques I tried out on the Mixed Florals Card Kit.  For the first technique today I'm using a sheet of the dictionary paper paired with Gesso from the Mixed Media Kit + acrylic paint mixed with water to create a spray mist.  
I spread some Gesso onto the book paper with the palette knife included in the Mixed Media Kit.  I then misted the page with the spray ink.  The result was a soft, altered page that made a perfect background for some other layers and embellishments. 
When you spread on the Gesso to create heavy layers in some spots that leaves a great place for little card sentiments whether you stamp them or type them out and cut them apart like I did below.  
The next technique I tried spreading modeling past onto tags from the card kit using the palette knife and a Pink Paislee stencil.  I then sprayed more paint mist on top, leaving some of the modeling paste white.  
As you can see my colors from my work room are off from the real tags once they dried but you still get the idea.  I love that these look somewhat like old wallpaper with the raised finish.  I'll definitely be trying this out again on cards and such.  If you want more of a worn look you can sand off some of the ink with a fine grit sand paper or sanding block. On a few of the tags, I just spread Gesso with no stencil.
Sometimes when creating a card you'll notice you have some big spaces with not much going on.  Or perhaps you made a mistake and smudged some ink, etc.  
Adding modeling paste with a stencil and a palette knife onto cards is a great way to add some textured interest.  It can cover up those little mistakes or just add another point of interest for the eye to land on.  Here I used a Pink Paislee stencil to add a design to an open area on my card.  I like to create an organic shaped area instead of using the entire stencil or rigid boundaries.  
Here's the finished card once the modeling paste dried and I added the other embellishments.  I really love the look of the modeling paste here.  
That's it for today.  Thanks for stopping by.  :)  I'll be sharing some Project Life pages soon + a page from my Dylusions art journal.  

September 5, 2012

Project Life Week 26, 2012 + October Afternoon

Hello everyone. Today I have some fun things to share with you. First up is my Week 26 of Project Life. I recently got a fun stash of the October Afternoon 9 to 5 collection which I absolutely love. If you're a fan of October Afternoon's whimsical style + you love all things office supply, then this collection is for you. Orange and aqua are some favorite color pairings for me right now so I knew I wanted to have some Project Life journaling cards using the fun OA products. These came together really quickly, just little bits and pieces here and there with a few added tags from my shop, some wood veneer pieces and some stamps.
I've decided that I like to save most of the stamping on my journaling cards for when I actually do that week's layout. So most of my cards have lots of nice white space.
I paired the OA goodies up with some Washi tape, Elle's Studio goodies and lots of machine stitching.
My Week 26 of Project Life ended up having lots of October Afternoon products on the inserts, including bits and pieces from 9 to 5 + Woodland Park.
My week started out with jury duty. I was chosen among 150 other potential jurors for a huge case in our town. It was a case that involved a small baby and I was not particularly looking forward to serving on this trial. I spent 2 full days sitting in a chair, staring at a blank wall before I was finally released. I was very relieved to go about the rest of my week, without having to spend 2 weeks in a courtroom chair.
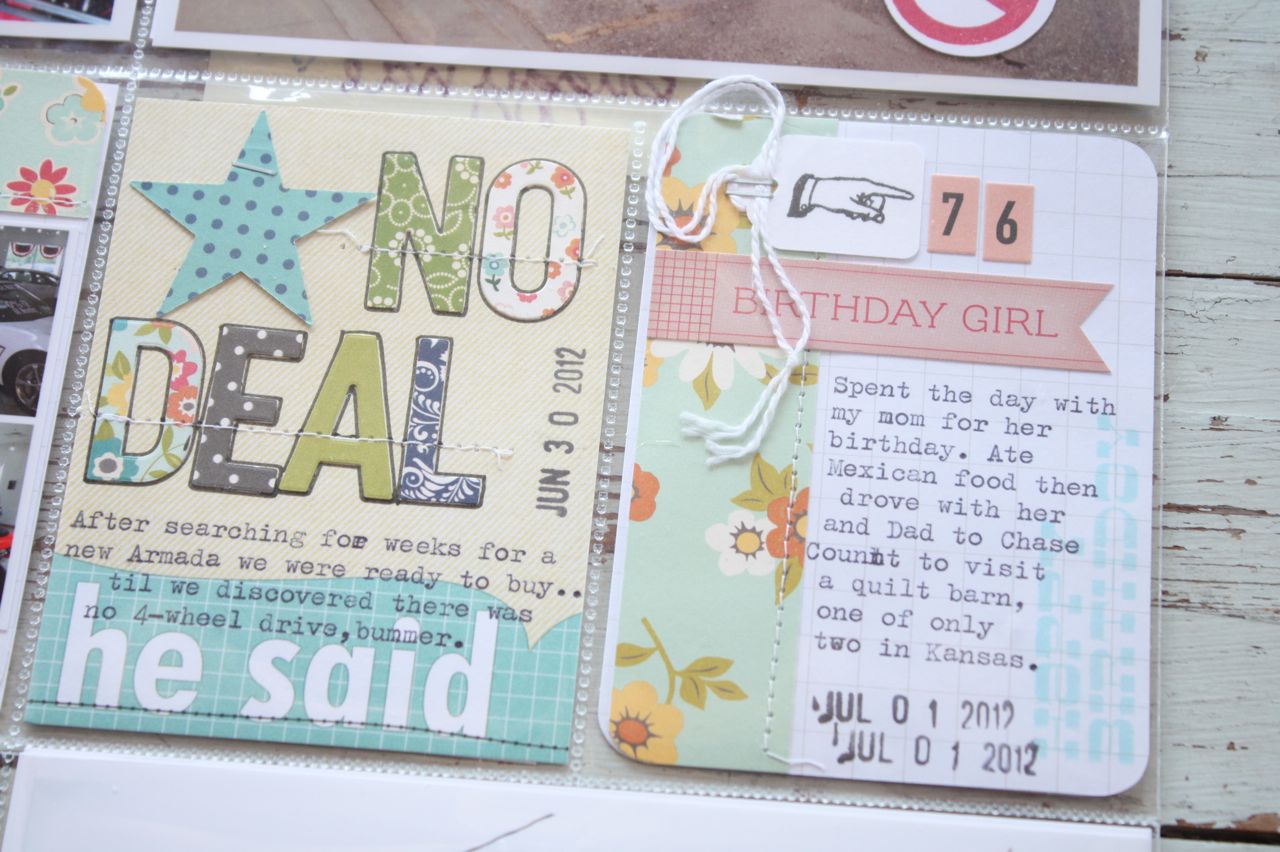
The rest of my week was all about our usual family happenings. We were winding up the Summer league volleyball and basketball, I was collecting the best pickings from our garden, we went new vehicle shopping and my dad and I took my mom out for her birthday and a little field trip to a historic quilt barn.
Once in a while I like to mark my weeks in my Project Life album so that I can reference where I'm at in the year. This was a great time to use the new, colorful stickers from OA Woodland Park. I added them right onto a Project Life journaling card that I turned sideways. I added this to a 4 x 6 piece of OA patterned paper then stitched & added Washi, chipboard numbers and a sticker border.
One of my favorite 4 x 6 inserts showing my before and after of a salsa making session. I used a Starburst Grid Paper Label to type some journaling and then added a Studio Calico stamp.
Here I used another Starburst Grid Paper Label directly on a photo.
A handmade journaling card + a small sack which hides some journaling about the trial going on.
More handmade journaling cards with tags, stickers, and Washi tape added. I used a portion of a Grid Paper Label to add more typed journaling.
Here I took an Instagram photo that I altered with the Diptic app and cut it in half, using one half on each of 2 separate journaling cards. I typed right onto the journaling cards with my vintage typewriter. I love to add tags like the Garment Tags behind strips of patterned paper. I need to go back in and write down Jordan's shoe size and how much her shoes cost for volleyball.
More of the colorful October Afternoon sticker letters on an Elle's Studio journaling card. On the right I added stamp to a Small White Tag.
And another week is in the books. Even though I'm behind I'm not worrying about that at all. Each and every chance I get to work on a week of Project Life is just another week of memories captured for my family. Still loving the process, still chugging along.

Some fun news:
Today I am very excited to announce that I will be joining the October Afternoon Design Team along with Mou Saha and all the other talented OA ladies. I have long loved October Afternoon since their very first products. When looking through my blog projects tagged with OA products, I have steadily used their goodies on dozens and dozens of projects. Their whimsical style and wide array of products is just so enjoyable to create with. I'll be debuting my first projects on the October Afternoon website later this month. I hope you enjoy!


Let's wrap up with an awesome prize package:

The fun continues today as I have an awesome give away for Becky Higgins' Project Real Life class over at Big Picture Classes. This is going to be a very fun class and I can't wait to take part in it myself. You can read all about it below.

To enter for the prize drawing:
Please a comment on this post, telling me something you'd like to implement in your life. Do you want to have more family time, more crafty time? Do you want to get more organized? Do you want to be more a part of your community. Let me know how you would like to cultivate a good life. :) I will select a prize winner on Friday, 8am Central Time. Winner will be announced soon after.
Project Real Life taught by Becky Higgins
12-week workshop for $99
See more at the Big Picture Classes site..
Class starts 10/4/2012

Class Description:
Come join Becky Higgins for a once-in-a-lifetime opportunity to spend some time with her during the last quarter of 2012. As Becky goes about preparing for the holidays, organizing around her home and documenting her family's story along the way, she'll be sharing ideas to inspire you, tips to motivate you, and real-life suggestions on how to cultivate the life you want.
Whether you're a long-time Project Lifer or you're just now hearing about Project Life, you will love learning about the guilt-free philosophy behind this system of memory-keeping. While Becky will give you plenty to think about and do during the 12 weeks of this workshop, she firmly believes that there isn't a person that exists who "does it all" — and it should be the last thing that we expect from ourselves.

Becky's class includes:
● An exclusively-designed set of Project Life cards (3" x 4" and 4" x 6") that will not be available anywhere else!
● Access to a pre-classroom with a presentation from Becky upon registration for class
● Colorful instructional handouts with step-by-step instructions for each lesson/project
● Voice messages, slideshows and videos throughout class
● Three live chats with Becky
● Welcome notes from Becky in the classroom
● Reminder emails when the classroom is updated with new materials
● Message board to share your thoughts with your classmates
● Private posting gallery to share your work and view the work of your classmates
● Supply list with live links to product resources

July 9, 2012

Project Life Journaling Cards using October Afternoon....

It's Monday, back to the ol' grind. Today Becky Higgins will be sharing some Project Life Creative Team projects on her blog. Be sure to visit her blog to get all of the design team links. Becky will be sharing this previous Project Life post from me. There's LOTS of new Project Life products coming out soon. I'm very excited about the 4 x 6 grid cards & all the new sizes of page protectors. You can see what's coming soon in this post from Becky.

Today I have some Project Life inspiration in the form of some more handmade journaling cards using items from my new Clickety Clack Clack Office Kit + my new October Afternoon stash. You can see a card + packaging I made with this kit in my previous post here.

Here's a look at the kit contents:
And here's the journaling cards I made using blank and patterned Project Life journaling cards. I love that Project Life can be as simple or as detailed as you want it to be. If you simply want to journal on the cards from a Core Kit it's a very quick and easy way to document your stories + photos. If you're like me and like to get all creative with it, then embellishing the journaling cards might be the way to go. I have had so much fun just grabbing a stack of journaling cards and reaching for a few supplies & scraps. Once I'm done with a new stash I just mix them in with my other handmade journaling cards. I could easily use this grouping to have a week that totally coordinates.....or most likely I'll just mix and match as I go along.
Most of the patterned papers and stickers are from the October Afternoon 9 to 5 collection. I also used kit items such as parcel tags, stamped tags, the Elle's Studio "notes" stamp and part of an Elle's Studio journaling card. Stitching and stapling are still a favorite of mine.
I also used some of the Elle's Studio journaling cards as the base card. You can see more stamped tags, OA embellishments and little snippets from my stash. The fun thing about creating your own handmade journaling tags is that even though they are in mixy matchy style, there will always be something specific to your style of creating that will tie them all together. For me, it's probably my use of items from my shop like tags, stapling and machine stitching.
I also used this grid sack from the kit and embellished it with a punched circle, a strip of OA washi tape + a strip of the measuring tape washi from the shop kit.
I hope you are inspired to try a few handmade journaling cards of your own. Thanks for stopping by. :) Come back soon for more cards and a few notebooks made with my new office themed kit. I'll have a Project Life week coming soon too that uses some of the journaling cards you see here today.

June 11, 2012

Project Life Week 17, 2012

Hey everyone, please join me and the entire Project Life Creative Team as we share a bit of Project Life inspiration on our blogs today.  You can click on Becky's blog post today to see all the links to the Design Team.  Lots of inspiration to keep you going.  :)

I've got Week 17 ready to share today.  Currently I'm about 3 weeks behind and desperately want to get caught up.  Last year at this time I begin to get behind....really behind, like 17 weeks.  I don't want to go there again.  I'll be sharing some of my time saving tips at the end of blog posts.  Hopefully you'll find some helpful tips to keep you on track.  

Here's my 2 page spread for Week 17.  
This week was all about taking a break from our hectic schedule.  Josey developed a severe case of shin splints and was given doctor's orders to take a 2 week break from running.  Jordan didn't have any meets this week either so there was some nice downtime.
Always busy planting flowers and tending to the gardens at this time of year.  New growth, new beginnings, new baby kittens.
Here's a look at my 4 x 6 inserts.  Instead of devoting a full insert for a title block I've started to select a photo that sets the theme for the week.  My old lawn chairs were perfect with my chipboard titles.  Stamps are from Studio Calico on my Grid Labels from the shop.
Smaller typed labels, a hand cut flag and Waship tape.  More stamps from Studio Calico.
Here I used a Project Life plain grid journaling card and topped it with patterned paper and some Ali Edwards stamps from Technique Tuesday.  More washi tape layers on top with a little machine stitching.
Here I used a Project Life bi-fold journaling card.  I like to embellish the outside, here I used washi tape layers, a Studio Calico wood veneer girl, a SC quote sticky and SC stamps.  I used a Medium White Tag  for a stamped pull out tab.
Here's the inside of the bi-fold journaling card with my frustrated texts and tweets about weed eating.
More 3 x4 inserts.  I've been including lots of photos in these slots as there's just a lot going on lately.  On the left I used a Project Life journaling card with the photo adhered right on top.
One of my favorite set of 3 x 4 inserts.  On the left I created a fun "list" title using chipboard letters and little snippet of a Small White Tag.  On the right I used a Metal Rim Tag with the much loved instagrammed stamp that Kelly Purkey created for Studio Calico.  It punches out perfectly to fit on my metal tag.
I stapled my metal tag right to my journaling card.  I love that it stays fairly flat versus a button or badge that adds more bulk to my album.  This is a good thing especially if you're trying to keep the number of albums you need per year to a minimum.
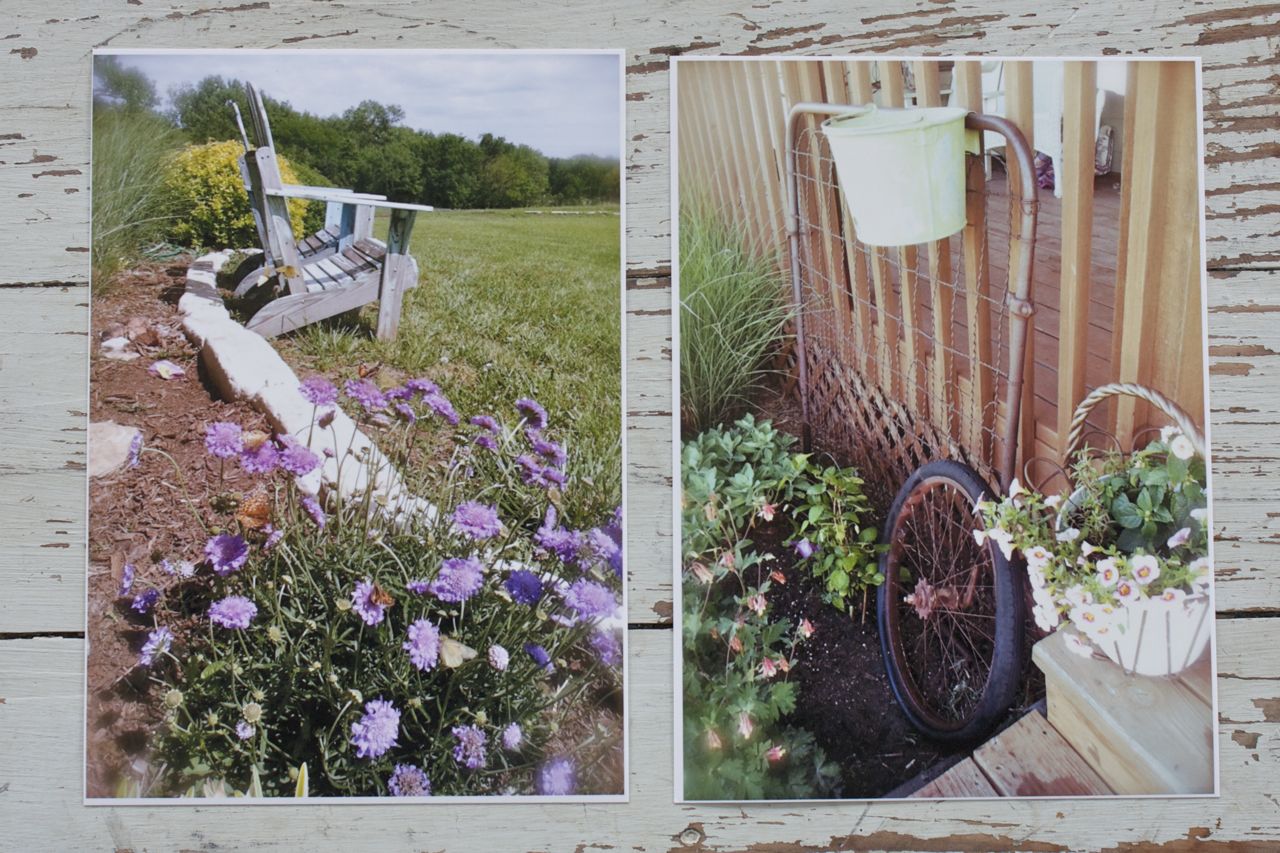
Tip:  Another thing I've started doing is adding in inserts that I'll go back and finish later.  Here I've selected 2 of my favorite photos from the week from around the yard.  I printed them at home (Epson Artisan 730 and it's awesome!) and tucked them into a page protector.  I can leave them as is as showcase photos or I may go back later and create 8.5 x 11 back to back layouts.  Either way the photos are printed and tucked inside this week's spread.  It's a great way to show off your best photos.  
More tips:  Here's a recap of my best time saving tips for this week.  Labels that I can run through my typewriter are a lifesaver.  This week I used small labels, my Grid Labels and my brand new Notebook Paper Labels.  
Washi tape.  It's so easy to just rip off and adhere to the inserts.  You get instant color and pattern without having to drag out a lot of patterned paper.  This Silver Metallic has become a new favorite and I'll more in the shop probably this week.  
Tags of all kinds.  I have oodles of varieties in the shop and use them on every weekly spread.  They're great for making pull out tabs, little journaling pieces, embellishments, etc.  There's no die cutting involved so they're quick and easy.  I love how they add detail without adding a lot of bulk.  My favorite this week was the metal rimmed tag.  
And that's it for this week.  Stay tuned for more completed Project Life spreads coming this week + a shop update with new Washi tapes, tons of sacks and new items coming this Summer.  Thanks for stopping by!
Related Posts with Thumbnails