Showing posts with label Mixed Media. Show all posts

August 10, 2016

Seasons Change Mixed Media Artist Journal Page..

Hello friends.  If you haven't visited in a while, I'm hosting two classes with Jeanne Oliver.  One is an online class called Close To Home: A Watercolor Landscape Journey.  The other is a class at Jeanne's  beautiful home and studio in scenic Colorado, coming up in September.  It's called Field Guide: A Nature Inspired Sketchbook. We'll be learning more about sketching and watercolor and will be taking our supplies outside to sketch scenes from  Jeanne's beautiful land. Both classes are going to be jam packed with tips to jump start your art.  We'll learn about sketching, watercolors, setting up a palette, supplies, and taking it all outside.  You can learn more about each class by checking out the blog post links I've provided above.  I'd love to have you join me in this creative journey.  

In this post I'm sharing a project that will be similar to lesson in the Close To Home class.  You can get an idea of what the class has to offer, however all of the lessons in class will be in video format.  I can't wait for it to begin on August 22nd.  

Experimenting with mixed media and watercolor can give some fun results.  To get my creative juices flowing I like to sometimes get out my Dylusions journals and just have some fun.  In this journal, I've prepared each page ahead of time with a piece of vintage paper, some gesso, etc.  So every time I turn to a new page, I'm given a new challenge. 
I collect vintage postcards and have noticed they offer some of the prettiest landscape scenes.  So I've been incorporating them into my art lately.
I started by adding a simple pencil sketch to my journal.
I don't plan anything ahead, I just let the art flow onto the pages as I dig through my supplies. Here I added some borders and some squares in ink.
I switched my art page to reflect a summer scene instead of a winter scene as the postcard illustrates. So on my pages, I painted winter colors and summer colors.
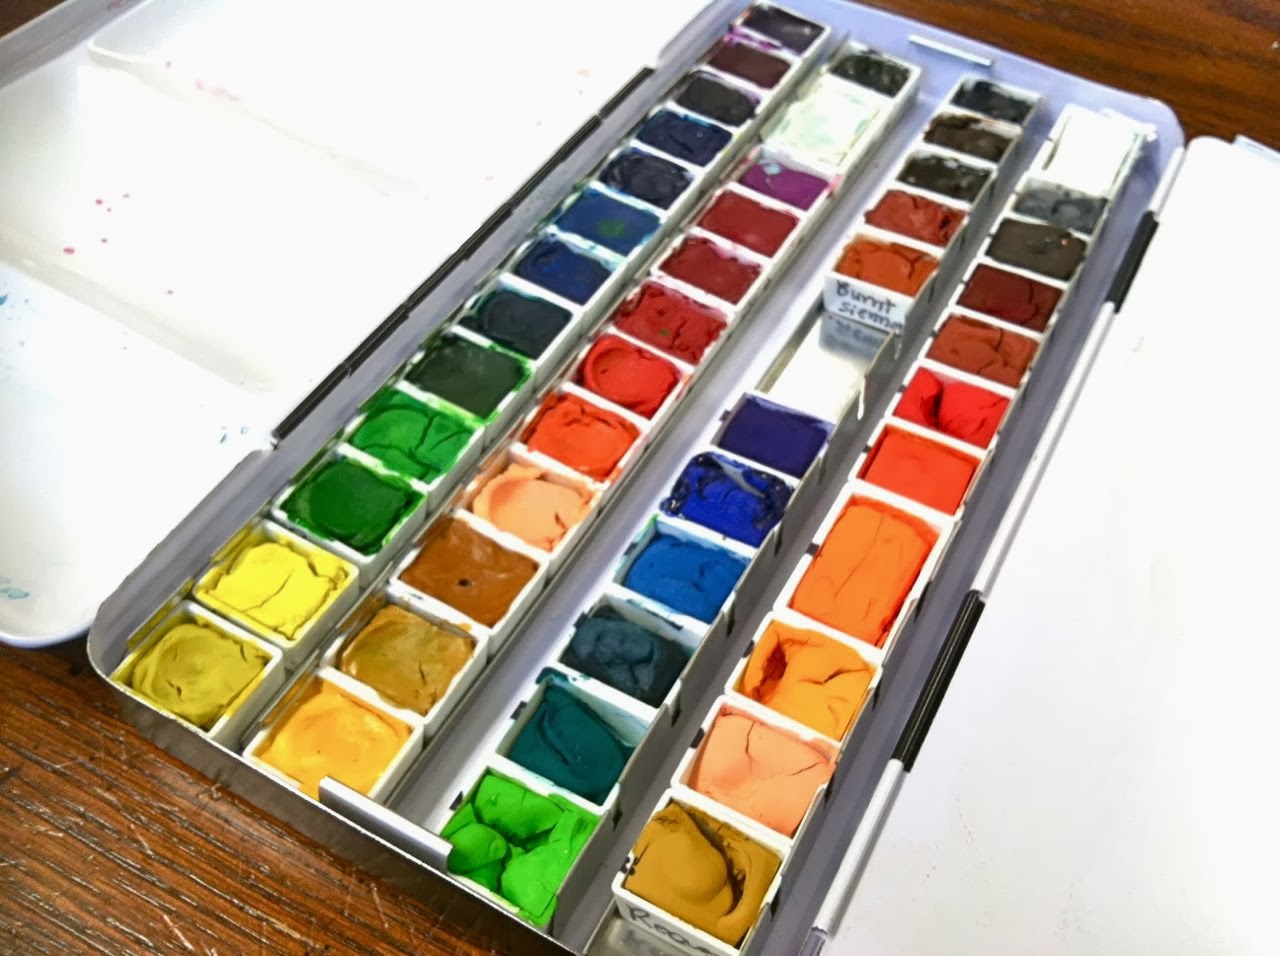
Here's a shot of my well used watercolor palette. We'll talk about supplies in both of my classes.  The online class goes into more depth about supplies needed and how to set up a palette.
Next up I just start adding watercolor.  It's fun to experiment with watercolor to see how it goes down over other painted surfaces.  Here, it's applied over gesso and has a bit of resist to it.
I just kept adding paint, looking for a few values, splattering, adding white paint, etc.
I experimented with acrylic ink and a dip pen.
Here is my final result.  I love the thicknesses, the layers created by the vintage papers, the black ink and watercolors.
Just a fun experiment and as these pages add up in my journal, they're sure fun to look at.
Watercolors have captured my heart.  There's just so much to learn.
Getting back into my art has been so rewarding and satisfying.
I hope you'll get creative with me and join in on a class.  If you've wanted to start, my classes will be great starting points.  If you've abandoned your art because you didn't think you were good enough or life got in the way, my classes are just for you.  I want you to experience the joy of art and Jeanne's network of classes are just the ticket.  So much sharing and a great community of artists.  I hope you'll join me.

February 12, 2016

Plein Air Painting and John Muir...

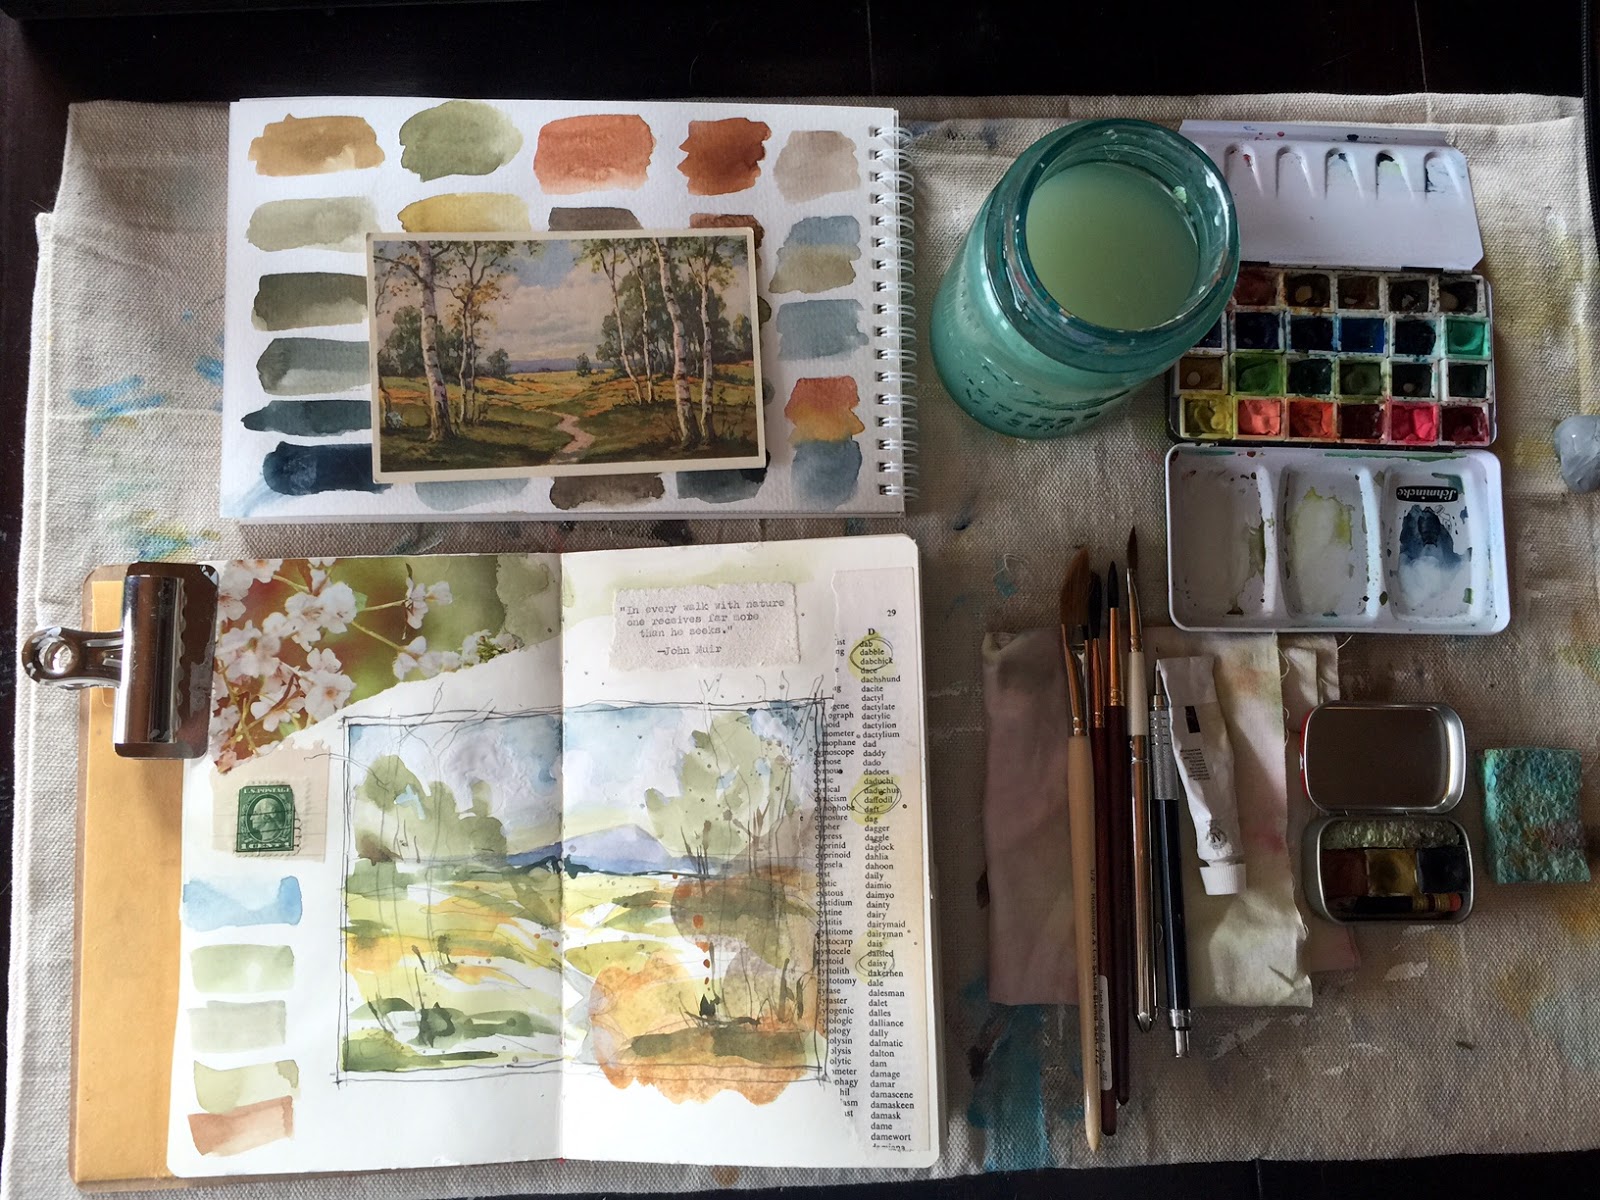
I'm so inspired by our beautiful country.  Landscapes are definitely my favorite thing to draw and paint, whether it be from a photograph, a vintage postcard, a book...but especially right from nature itself.  Today I have a mixed media spread from a small artist journal, featuring a landscape inspired by this postcard below. 
 This was my set up of supplies.  I'm painting inside because it's still fairly cold for outdoor painting for me.
 Some of my colors inspired by a small travel palette from Green Earth and Blue Berry.
 My finished painting.
 I found this wonderful quote from John Muir to add at the end.
 Although this painting was done outside, I went out later and did a watercolor sketch from my vehicle.  Sketching outside just brings all the senses alive.  It's really the best way to capture the true essence of a landscape.
 That brings me to Plein Air painting.  It means paint outside, simply.  And John Muir?  You've probably read a lot of his nature inspired quotes.  He was a conservationist and a leading role in why we get to visit beautiful places that we call call National Parks.
I'd love for you to watch this video about John Muir's role in the history plein air painting.  It's fascinating to me and I've watched it several times.  If you have an interest to paint landscapes, especially from the great outdoors, this is a must see short documentary.  It's from the great people of Plein Air Magazine and the Paint Outside website.  It's called Outside The Lines and direct link is HERE. I hope you enjoy.....and let me know what you think.

January 27, 2016

Floral Journaling Pages....from Jeanne Oliver class

Gosh, just when I got back to posting regularly on my blog, I have Blogger issues.  I'm back and today I'm excited to share some current artwork with you.  I'm taking the latest Jeanne Oliver class called Reflections: Paint Your Story and it's a good one.  You can find Jeanne's site here...amazing classes by her and other artists. 

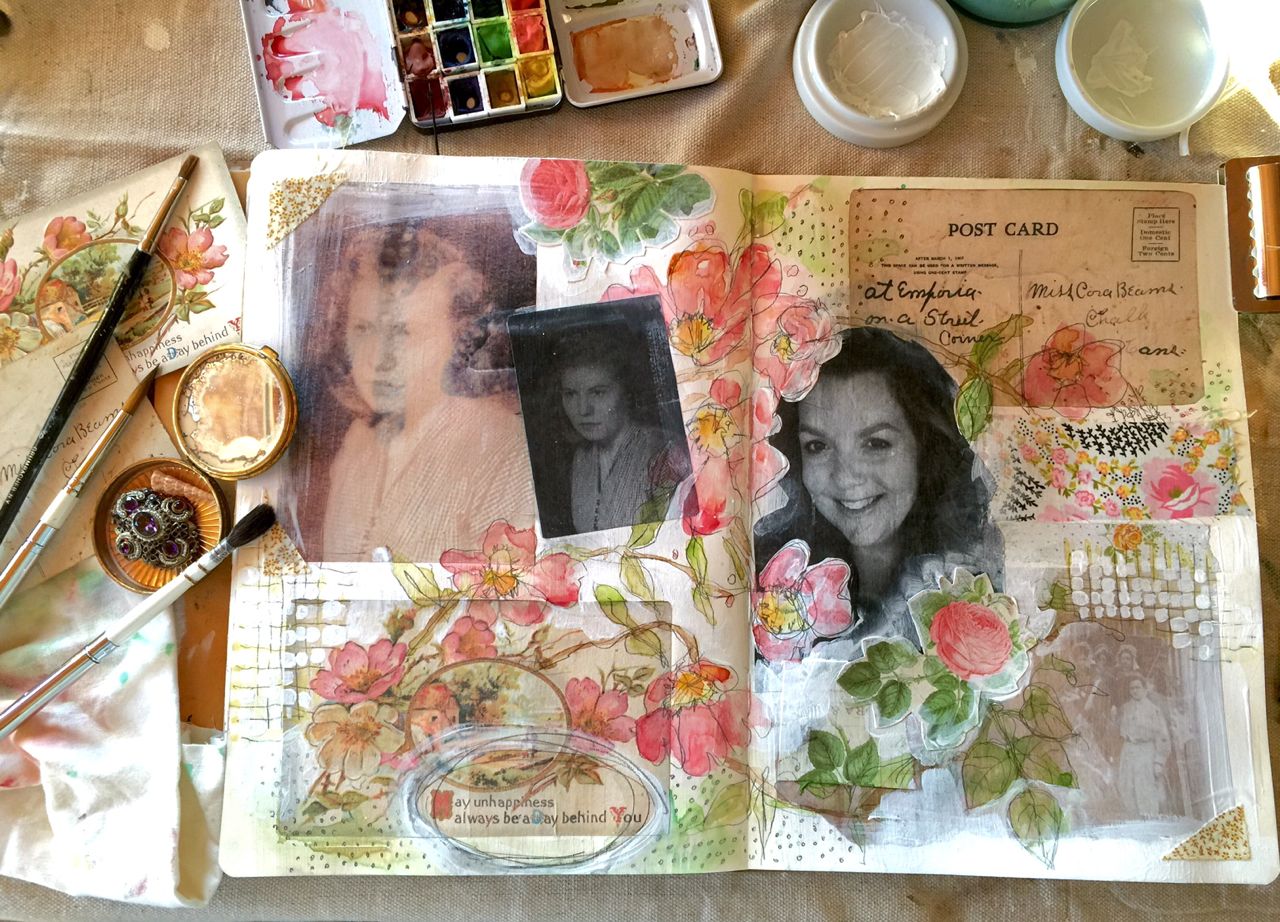
This was my work in progress yesterday.  There's something about a beautiful mess of art supplies, don't you think? This journaling entry was all about trying to create pages about me but it turned into a wonderful tribute to my mother.  
 The beautiful verse on this vintage postcard that belonged to my great great grandmother is a special wish for my mother. It sparked ideas for the rest of my spread and I ended up sketching and watercoloring more hand drawn flowers.
 Just loosely drawn flowers over the gesso covered surface.  Photocopies of the photos were used for ephemera.
 This is a copy of the back of the vintage postcard.  Miss Cora Beams was my great great grandmother.
 Jean emphasizes mark making in this journaling class. Here I used lines that imitate the gingham pattern on my mother's dress.  I filled in the loosely drawn squares with gesso.
 Here I used scrapbook paper and extend some hand drawn leaves.  That faint glimpse of the photo has three little girls in an old horse and buggy.  Some distant relatives and I love their little bonnets.
 More mark marking, a strip of scrapbook paper and some vintage fabric in the corner.
 The full, finished spread here.  Such a fun day of creating art.  This will be lovely to look at each time I reach for my artist journal.
Thanks for visiting today and I'll see ya soon.

March 14, 2015

Using mixed media on cards...

Hi everyone.  Sorry for the absence.  My whole family came down with the crud and we've been down for over a week.  Man, that was a bad virus.  We're on the mend though.

Recently on the Gossamer Blue blog I shared a fun way to add a little mixed media look to some cards. I started out with these products from the March release.  
This shimmery cardstock was in a kit too and I love how it shimmers.  I typed my card sentiments on some scraps.
I prepared my card fronts to see where my sentiment pieces would be placed.
My mixed media of choice today is modeling paste.  It's thick like frosting or toothpaste and I like to use a palette knife when working with this medium.  Spread out a dab like frosting then scrape up a bit onto the palette knife.
Spread it onto the paper making uneven swipes.  You don't want your layers too thick because they will take longer to dry and will warp your paper more.  I like to use a tea towel and iron over my finished pieces to flatten them out a bit.
Let dry and assemble cards.
You'll have some unique cards with a textured, artsy look about them.
I also used some watercolor on the envelopes then stamped the artsy stamp.
I hope you give this technique a try.  Have fun!

June 17, 2014

Winnie & Walter Guest Blog Post....Colorado Countdown Calendar

Today I'm sharing a fun countdown calendar that I created with the Winnie & Walter stamp set called The Big, the Bold and Fun.  I'll be doing a few guest posts this week using Winnie & Walter products.  They're a new little company so be sure to check them out.  
Last weekend we had a BBQ with the four families that will be traveling to Colorado together in July.  We planned out our travel itinerary, meal plans, activities to do in Colorado, lodging, etc.  I thought it would be fun to give each family a little countdown calendar to mark off the number of days until our trip.  I know my girls are super excited and can't wait so I know the younger kids would be excited too.
I used a 4 x 6 Becky Higgins Project Life journaling card as my base.  I included a photo of our lodge and then stamped words and phrases all over the card.  The adventure words were stamped with craft paint, mixing green and brown to give an outdoor feel.
For the bottom of the card I used an older Stampin' Up! calendar that I stamped on grid paper.  I added a swipe of paint to create a base for a typed phrase.  Woodgrain washi tape finishes off the countdown calendars.
Everyone loved the calendars and now we're even more excited for our trip.  Seventeen crazy friends road tripping to Colorado.  It can't get here soon enough.

Thank you to Winnie & Walter for having me as their guest this week. Check back later this week for another fun project.

April 4, 2014

Friday Finds...for the love of watercolor

I'm returning today with a Friday Find post.  I'm featuring some nifty little finds that I've transformed into the most fun mixing palettes for your watercolor paints.  They're all in my shop now.  I'll be happy to refund excess shipping costs for combined orders.  Enjoy!

Darling little Nippon dishes......
 An egg plate perfect for those deviled eggs on Easter....or a beautiful mixing palette with lots of individual wells.
 Loved these old beauties....boomerang shaped dishes with the loveliest florals....
 One of my faves is this simple divided dish...theres 3 of these listed so you could customize each palette with different color schemes....
 Milk glass with gold edging.  So on trend...perfect for a mixing palette and a little side dish for paints and bits & baubles...
 Last but not least I've found that these glass flower frogs are perfect for keeping brushes on display while painting....pencils, markers, small scissors, etc also fit into the holes.....
I've kept a few lovelies for myself so I'll be including those in photos when I do some painting.  Thanks for joining me today.

February 12, 2014

Workspace Wednesday...Creating Your Own Watercolor Palette

It's Workspace Wednesday time and today I'm sharing how I created my own watercolor palette. I've had these photos since September when I first set up my watercolor palette but I never knew just when or where to share them.  My Workspace Wednesday seems like just the right spot.  

The reason I wanted to create a watercolor palette of this variety is because I wanted lots of colors, I wanted to be able to refill colors when they ran low, I wanted to be able to custom mix colors right onto a palette and I wanted something that was fairly small and easy to fold up and store or take with me on my travels if I wish. 
I researched and googled and looked through tons of photos on Pinterest and I finally found the system I wanted to try.  First up was the paints.  Although Winsor & Newton watercolors were far and above the preference for good quality from most of my research, it's all about personal preference.  I might just add, I'm not a watercolor artist...I'm just someone who likes to dabble with watercolors and maybe someday I'll hone my skills enough to get back into some landscape painting like I did in my high school and college days.  

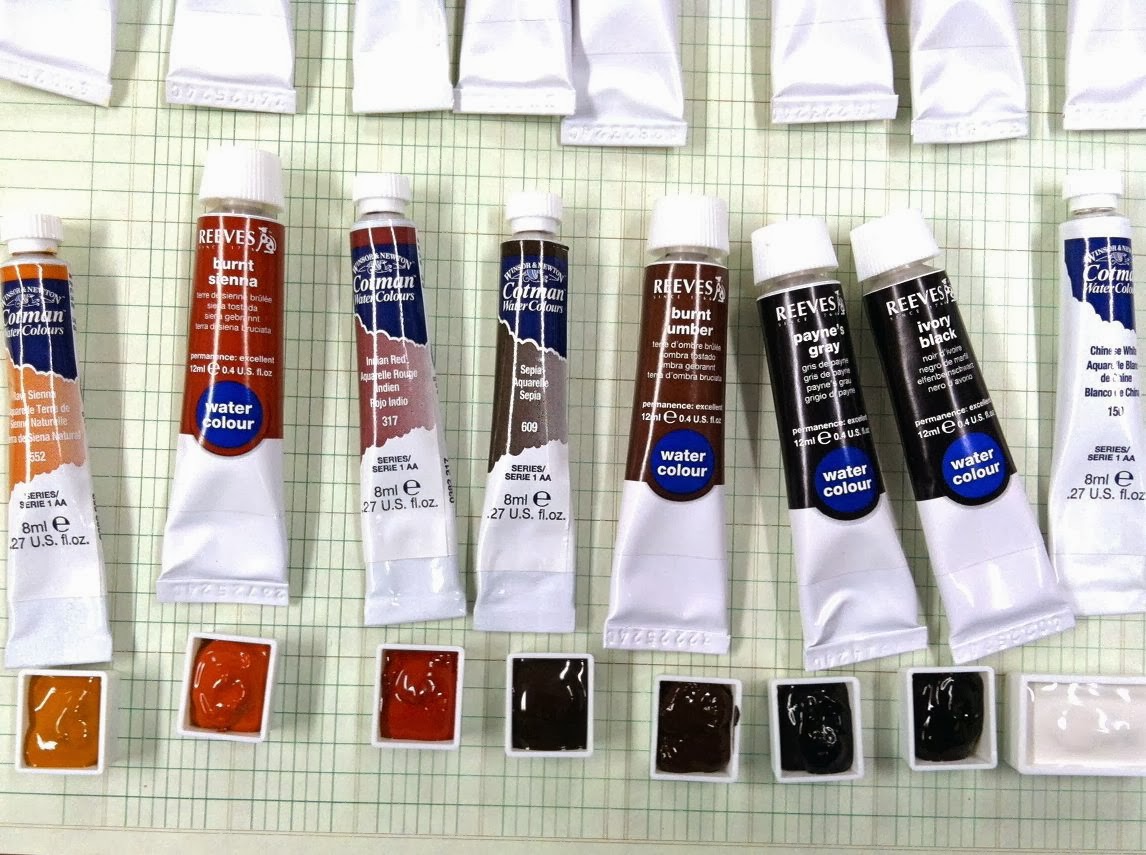
For my watercolor paints, I chose some inexpensive tube paints by Reeves and some from Cotman paints which are from the makers of Winsor & Newton.  The Cotman paints are less expensive and include both traditional pigments and reliable synthetic colors that replace some of the more rare and expensive pigments used in the artist grade Winsor & Newton paints.  I have since picked up some Winsor & Newton colors and a set of gouache paints to try out.  Here's the color palette that I started with, a rainbow variety.
Next up was choosing a watercolor palette.  When I first came across these aluminum, empty watercolor boxes my heart skipped a beat.  It was like a makeup compact for paints and refillable compartments.  The little organizer in me was a happy camper.  The particular palette I purchased was the Kremer Watercolor Box. It holds 28 full pans or approximately 50 half pans of tube watercolor paint. If I remember correctly this shipped from the UK and took about a month to arrive.  I was originally wanted this Schminke Watercolor Box but it's out of stock all the time.  I am very happy with my Kremer box and it was less expensive too.  
Okay, so you're asking what the big deal is with these watercolor palettes...or travel watercolor palettes as many call them.  The palettes come in lots of different sizes which means the bigger the palette, the more pans they hold.  So what are pans, you ask?  Pans are the plastic containers which hold the tube paints.  My particular palette holds almost 50 half pans which are the little square containers.  This means you can add 50 colors of paint.  A full pan is the rectangle container which is twice the size of the square pans.  So it holds twice the paint in one container but less of them fit in a palette.  My palette holds about 28 full pans.  These are sold separately from the palette. 
Once filled, the pans snap into the metal rows as you can see below.  They are held snugly in place by those metal "teeth" so that they don't move around while painting or traveling with the paints. The other great thing you'll see below is that the paint palette has two fold out trays with wells.  These are for mixing the paints and creating custom colors.  You can also squeeze out paint directly onto these areas and leave them there to dry for even more little palette areas.  When done painting you can leave the mixing areas with the paint in them and just keep re-wetting those areas. I prefer to clean up my palette each time since I never know what colors I'll use next.  
On to filling the palette.  You can see the photo above with all my tubes of paint lined up in rainbow fashion.  This is how I chose to put the filled pans of paint into my palette.  I grouped together browns and blacks....
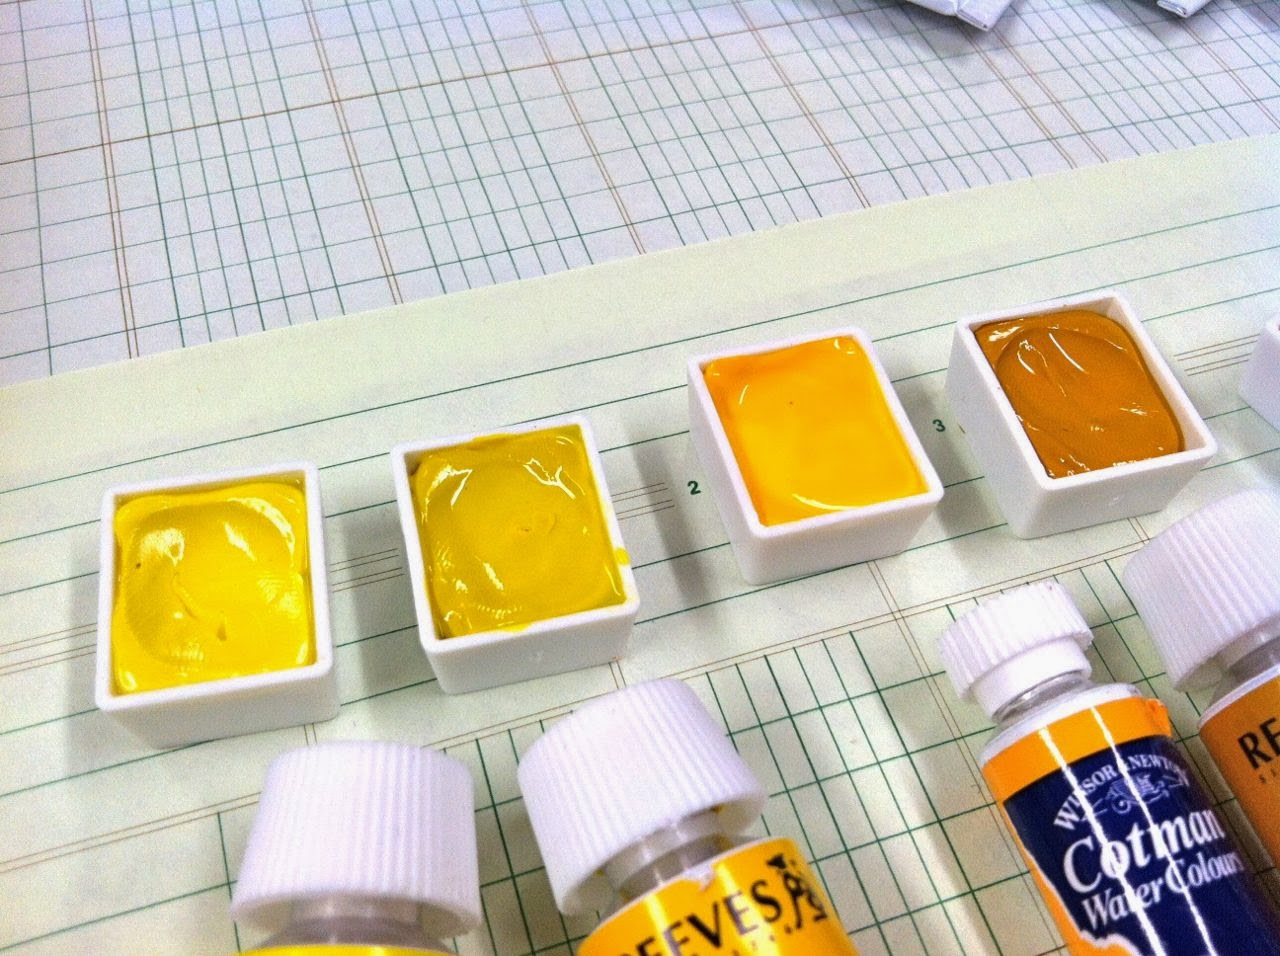
Here I have yellows, oranges and some reds....
Then purples, blues and more reds that carried over from the photo above...
Greens and blues.....
Then it was time to fill the plans.  This was such a fun process, just surrounding myself with art supplies again.  It's been a while since I lugged my art box and t-square across campus.  To fill a pan you simple squeeze the paint into the pan.  I would suggest filling the pan even more than what I have shown in the post.  They shrink down a bit and tend to crack....and I think if I had more paint in the pan originally that maybe I could have prevented that.  
Here's some of the pans all filled.  Oh..pretty.
I read a tip through my research about creating a well in the paint pan before the paints totally dried.  This created a dip in the paints so that when you added water to moisten the paints, it would not seep over the sides.  It was a good tip indeed. To do this you let the paints dry til a little film forms over the paint...but don't let them dry completely.  Maybe a few hours for this part.Then I just had a glass of water and some paper towels handy and dipped my pinky fingertip into the water...then pressed it into the filled paint pan.  The water helps the paint not stick to your finger so much.  Clean between paints and repeat the process. 
You can see a closeup of what the well looks like here.
Then you just let all the paints dry.  Mine took several days and I just left my palette open on a safe surface.  
I also used a fine tip Sharpie marker to label the brand and color onto each filled pan.  Another good tip I found online. 
Here is my lovely little palette filled with all the colors I had at this time.  You can see that in the middle there is a space for a brush. I saw that some artists keep little sponges in some of the spaces and some keep pencils, small erasers and other supplies they need while painting. 
Right before my paints all dried is when they looked their best. 
This is what my paint palette looks like today.  I've added some more watercolor colors and some gouache colors to my palette since.  You can see that some cracking happened.  This doesn't affect the paints at all.  I added some paints back in to fill the pans a little and that did help somewhat. 
Okay, still with me? Here's a photo of my paints in action.  I find that I can easily pull out my watercolor palette for even the smallest of jobs.  On this day I was working on some flowers for cards.  I mixed up the coordinating colors and could easily have my palette and a tin of water nearby without taking up too much space. 
If I want to work on bigger jobs, I've found that these enamel coated lids that fit on vintage refrigerator boxes, baking pans or perhaps medical tool trays work wonders.  Another tip from Pinterest. Here I was actually using paints from the tube with a shimmer medium.  
Another larger job using Hero Arts Daubers with lots of water.  These enamel lids clean up wonderfully. 
Here are just a few of the ways I've used watercolors.  I'm using them mostly for cards and packaging and tags, etc right now.  Someday I will be brave enough to paint that landscape.  Until then here's a fun packaging idea from this kit
Some watercolor wash I did in the colors of the rainbow for a card.
These pretty little sentiment pieces with flowing watercolors.  I loved these.
Finally I'd like to share some of my inspiration for my watercolors.  I have two Pinterest boards that I visit often for ideas and just to gaze and get lost in inspiration sometimes.  The first board is my Art Studio board where I have lots of photos of watercolor palettes, paint brushes, studios...the photos that just make you happy to look at.  The other board is my Watercolor Inspiration board where I have pinned photos of actual watercolor paintings, tutorials, techniques, etc.  These are my "some day I will paint like this" board. 
(photo inspiration from my Pinterest boards

I hope you are inspired to try using watercolors in your work.  Don't be intimidated, just start.  Just pick up the brush and make some puddles of color.  It's so fun to just dabble.  It doesn't have to be perfect. It doesn't even have to make it to an actual project.  The process is just as important as the finished product.  Hope you enjoy.  
Related Posts with Thumbnails