April 30, 2014

Project Life 2014....Week 9 using Simple Stories from April Gossamer Blue Kits

In lieu of a Workspace Wednesday post, I'm sharing Week 9 of my Project Life 2014 so that I get caught up on sharing some completed weeks.  This is my 2 page spread of Week 9 which uses lots of Simple Stories products from the April Gossamer Blue kits. 
Each month Gossamer Blue highlights a few different companies so it makes it easy to pull from all the different kits to get a totally coordinated look.
I mixed in journaling cards and elements from the kits + used a few of the patterned papers to create my own journaling cards. I think my favorite spreads are ones that coordinate like this....but that still have that mixy matchy feel.
This is the dated, main 4 x 6 insert which combines lots of paper elements +  brads, foam stickers, stitching, Washi tape and exclusive GB wood veneer and stamps.
Loved the little plastic clips.  I used this little frame stamp a lot this month.  It was perfect for adding the date stamp.
A collage photo with typed journaling on a small label adhered with Washi tape.
This was a favorite journaling card from the Simple Stories lineup.
Here I added some yellow watercoloring around the circle part of this journaling card.  Love the artistic touch this adds along with more of the GB exclusive stamps.
Here's where I added journaling cards that I made myself using patterned paper.  Love.
A little messy bundle of thread went perfectly with the brad accent and journaling card.  On the right I added lots of sticker elements and a wood veneer to a weather photo. Enough snow and wind already, bring me Summer!
Okie doke, tomorrow we're moving on to the May Gossamer Blue release!  Happy shopping!

Discussion topic:  What's been your favorite little trick to add to your Project Life pages lately?  I love getting stampy here and there with little labels and words and especially like stamping right onto the photos. 

April 29, 2014

Gossamer Blue May Project Sneak Peeks...

Today I'm sharing some sneak peeks at some of my finished projects for the upcoming May Gossamer Blue release.  Kits go on sale May 1st, or a day earlier for subscribers.  

First up, some cards using a fun stamp set and coordinating day from the Bits & Pieces Kit. Don't forget to stamp the envelopes.  
 Glittery inserts to make a birthday dinner special....from various Life Pages add ons.
 I'll show you how I trimmed down a Project Life page protector and finished it off with patterned paper and letter stickers from the May kits.
 Chipboard stickers, exclusive Gossamer Blue stamps, label stickers and lots of fun die cuts in this month's kits.
 Lots and lots of fun 3 x 4 and 4 x 6 journaling cards in the various Life Pages kits.
 One of the exclusive stamps from the main scrapbooking kit.  I love stamping right onto the photos & a puffy sticker for added cuteness.
 I'll be posting a tutorial later in May on how I created this little flipper insert using journaling cards from the kits.
 Our in house designers have created some of the most beautiful papers, journaling cards and now exclusive flair badges.  These floral die cuts in the kits from Heidi Swapp are some of my favorites this month.  There's also some sequins to add pretty little touches to projects.
 Here I dumped some sequins into a journaling pocket.  You can see more of the exclusive flair badges too.
 Later on in May I'll be showing you how I used my printed Instagrams to make quick work of a Project Life week.  Here I was running out of letters from various sticker sheets so it was time to start mixing and matching.  I love it!  This is a small detail but see the "Date:" stamp that I added before all my stamped dates?  I just love adding these touches to my Project Life pages.
Be sure to check the Gossamer Blue gallery for all of the designers' projects coming in May.

April 28, 2014

Project Update: Catherine Quilt (cutting random strips)

So I took over the dining room table and here we go with my new quilt.  I gathered up all my supplies and just dug in.  I started by grabbing a fat quarter and just started cutting strips.  
 There is no measuring in the style of quilt I'm making.  I purposely did not want to have to measure much or cut intricate pieces. There is no pattern to the quilt I'm making.  I just kept on cutting strips in random widths. Note: The ruler grip by Omnigrid is so awesome.  It keeps my long ruler in place and is  easy on my hands.
 I just kept on trimming.  It was an easy task to do while dinner was in the oven, or while drying clothes, etc.
 I finally had all of my chosen fabrics trimmed into random strips.  This is such a pretty sight on my table.  I also have all of the linen pieces trimmed too.  Boy, it was hard to cut into those.  Now I just need to keep the hunters from dumping their camo gear on my nice, clean fabric strips.
Now, I'm ready to start piecing together the parts of the quilt.  I've started on this and that will be my next blog post.  If you want to follow along with the progress of my Catherine Quilt from the beginning just click on the "Catherine Quilt" label at the end of this post.  It will take you to my very first post of this project.

Note: The fabrics I'm using are from Bonnie Christine for Art Gallery Fabrics and the line is Sweet as Honey.  I purchased mine at Fat Quarter Shop.  A few of the patterned fabrics are from my stash as well as all of the linens that I'll be using. 

April 27, 2014

Project Life 2014...Week 8 (lots of sports events)

My Week 8 of Project Life 2014 had lots of sports photos.  Our school colors are black and white so my inserts reflect that color scheme..with some greens and aquas thrown in.  I used Gossamer Blue April kits for both pages. 
 The right page which features mostly basketball photos.
 The right page with some more random photos and some from a power lifting meet.
 Loved that these kits included some strips of ribbon.  I tied one around a 3 x 4 journaling card before adhering it to a 4 x 6 card for my weekly, dated title card.
 Lots of photos so I created a collage and printed a few of my favorites at bigger sizes.  Loved the puffy stickers to which I added the girls' jersey numbers.
 A perfect journaling card, I used it to document one of the biggest games we played this year. Love the wood veneer too.
 More ribbon, this time stitched onto a 3 x 4  journaling card.  The card on the right also uses Gossamer Blue stamps from a Life Pages kit.  You stamp the border then fill in the words at the top.
 One last photo which has Jordan's friends all scattered about our living room.
Another week in the books.  Stay tuned for some sneak peeks of my finished May Gossamer Blue projects, coming this week to my blog.  Also, be sure to join me on Instagram and Twitter for little "mini updates"...I post there a lot too.  Instagram name is mishwooderson and Twitter name is mishwooderson also.

April 24, 2014

Project Life 2014...Week 7 (Valentine's Week)

Week 7 of my Project Life 2014 included Valentine's Day.  Always a fun week that I like to get creative with.  I used Gossamer Blue March Kits and stamp sets.  
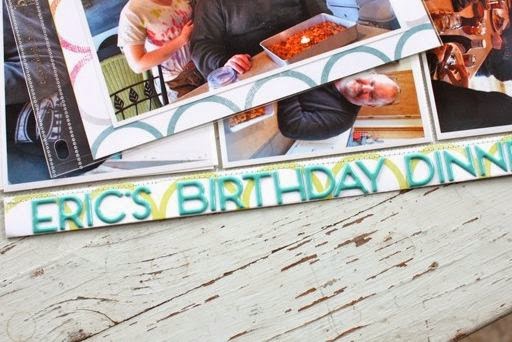
 The left page.
 The right page.
 Main, dated insert.  Here I added a journaling card to a 4 x 6 card, added a Small Manila Tag, chipboard letters and wood veneer. I used a small letter "o" from a wood stamp set for the circles on the calendar card.
 The stamp sets this month were a favorite.  Lots of foodie themed stamps.  I used three on this insert along with a sticky note and metal clip.
 Stickers to accent a photo.
 More foodie stamps, directly stamped onto the photo.
 Photo app on photo, created on my iPhone.
 More stamps and wonderful journaling cards this month.  I'm loving the snippets of ribbon in the kits too...and those daisy brads, need a dozen of those.
 A foodie stamp on a Notebook Paper Label with typewriter journaling.
 Chocolate dipped strawberries for Valentine's Day dessert.  Rub ons right on the photo.
 Fun journaling card, photo corner and brad.
 More 3 x 4 inserts.
 A fun 3 x 4 insert with stickers and embellishments then stitching down the center with gold thread.  Another rub on on the flower photo.
 Ribbon tied to a chipboard accent, photo corner, buttons, sequins.
Lots of fun goodies to play with on this spread.  Enjoy!

April 23, 2014

Workspace Wednesday...Organizing Project Life Page Protectors

It's Workspace Wednesday and today I'm sharing a little bit of organization that I did with my Project Life plastic page protectors.  I think I have all the sizes and configurations that are available from Project Life + some from other companies.  Every time I wanted to find a certain page protector a landslide of plastic packaging happened.  I also had to sort through each package to find the design I wanted.  

To make things more organized I grabbed some plastic 12 x 12 organizer for paper that I had sitting idle.  I made dividers with scrap cardboard and got my page protectors all organized. 
So now when I'm ready to plan out a week of Project Life, I grab my planner with my Pocket Planner Pages + I always have my Project Life Pages Photo Pocket Reference Sheets (the blue and orange sheets you see tucked inside my organizer, above).  You can find them under the freebie section of Becky Higgins' blog.  I print them to fit in my planner below. 
 For weeks when I'm using just a Design A, it's simple.....but for when I want to mix things up, add in inserts or change to a new design, this organization has been so helpful.
So with that....I'm off to get caught up a bit more on my Project Life.  Thanks for stopping by.
Related Posts with Thumbnails