Showing posts with label Library Cards. Show all posts

January 16, 2013

Calendar makeover + organizing the desk with vintage finds....

It's a new year which means I need a new calendar.  I always keep a small calendar on my desk where I do all my blogging and shipping & I needed one like pronto.  I was kind of happy when I got the note about the Studio Calico calendar that was to be included in the Project Life kit.  Although I would have rather had all the journaling cards in the kit be perfect and not have to trim them, the little calendar set was a bonus.  But upon viewing it, it was a hot little mess of uneven corners and edges...free or not, it was not really usable in it's current condition.  
Instead of recycling the lot, I decided to make the best of it and re-purpose the calendars into something I could use for my desk. I went to work with my paper trimmer and cut all the calendar cards to 2.5" x 3.5" rectangles.  I'm thinking that leaving all the journaling cards as rectangles might be the best route for the Studio Calico PL kits...I kind of like them that way because then I'm free to round or not round.  Anyway, I reached for 12 Library Cards to use as a bigger base for the calendar cards.
I wanted to make this project go rather quickly so I picked out just a few embellishments to adorn the calendar months.  I have this enamel bread pan full of little stickers & such so I pulled out a bunch of My Mind's Eye labels.
I used the MME labels to hold down the calendar cards then used a neutral assortment of Washi tape strips to further embellish the calendar cards.
I stitched over each label to secure it even further.  Then I used my "one mini, one regular" stapling to really make sure the pieces stayed secured.  No other adhesive was used.
And I kinda like them.  When laying out the calendar cards, I discovered that you could use all white or all grey or a combination of whatever you like.  I just alternated every other color and called it good.
To store my calendar I used a Medium Glassine Sack and a simple mini index card with typing.
And now how about incorporating the calendar in with some vintage finds for my desk?
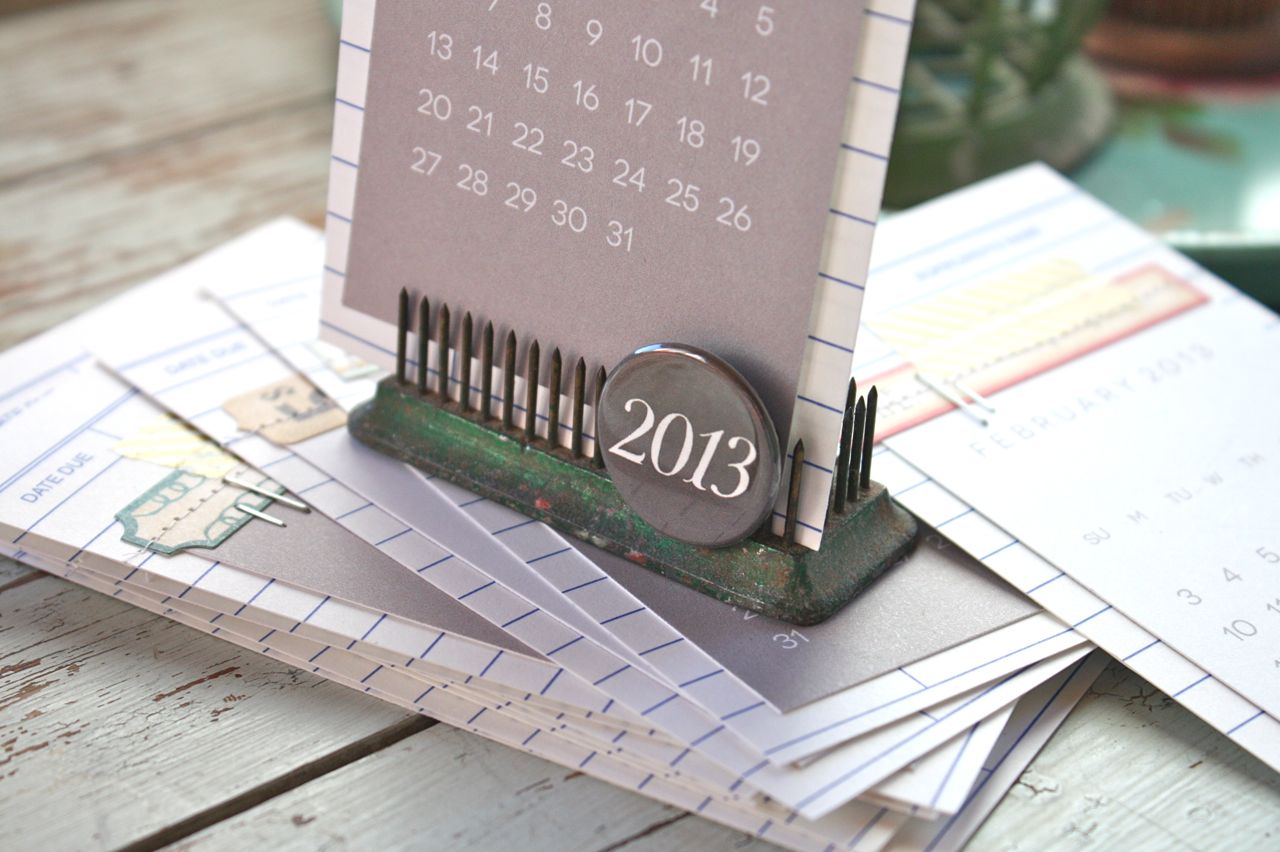
I spend a lot of time at my desk which is where I do all my blogging, shop packaging, printing and shipping.  It might as well have some fun new stuff for a new year, right? I decided that I'll stand each calendar month up in a vintage floral frog.  I've got lots of these sitting here and there so I might trade them out each month for variety.  Basically, they are very heavy bases with with lots of needle-like prongs sticking up.  Floral frogs were used to sit in vases and then flower stems were poked in to secure the arrangement.  You can find them in antique shops and online.  That's even a flower frog on the left side.  Of course now it's a pen holder for me.
Included in the Studio Calico Project Life kit was this 2013 badge also.  I stuck some foam dots on the back of it and secured it to the front of my flower frog.  Just so I don't forget what year it is and all.
I placed my calendar along with my other floral frogs + an old receipt spike that I use to hold customer thank you tags + my old stapler on a pretty painted tray.  This will sit on my desk, right within reach of where I ship orders and do my blogging.
So there ya go, a re-purposed project that resulted in some new organization for the new year.  It's all good.

November 9, 2012

Project Life 2012, Week 34 + my Project December plan

Yesterday I shared my product picks that I'll be using for my Project December pages....Project Life combined with Daily December.  Today I'm sharing Week 34 of my Project Life album so that I can give you visuals of what my plan of attack is for my Project December pages. 

Some thoughts first.....
I pondered long and hard about how I wanted to approach doing a Daily December this year.  Last year I kept my Project Life pages and my Daily December album separate.  I ended up getting confused as to what photos to include in Project Life and what to include in the December Daily album.  There was overlap of photos and stories.  It was time consuming trying to figure it all out.  I got frustrated and still haven't finished the last 2 weeks of Project Life 2012 and my DD album is about half finished.  When I look at my PL album, there seems to be lots of gaps for the month of December.  It looks like we didn't celebrate much for the holidays.  That got me to thinking...what if no one ever knew I did a DD album for last year?  My PL album wouldn't have the stories or the photos.  

Fast forward....
So moving on to this December, I have made the decision to combine my Project Life with a December Daily.  I'm calling it my Project December.  I will continue to complete my December PL pages as I've done all year long.  For my DD portion, I'm going to be adding inserts right in between my PL pages.  I'm not going to worry about what photos and stories go where but my basic plan is to have the every day happenings go in the PL 12 x 12 protectors and the holiday happenings go into inserts that are any smaller than 12 x 12.  I'll be using Project Life page protectors and some others from my stash.  

Some visuals...
Let me walk you through my Week 34 of Project Life to show you some visuals of how my Project December might look this year.  This was back to school week, Jordan got her braces off and it finally rained after a long drought.  I had 3 inserts in addition to my regular PL pages.  There are lots of photos so I won't go into detail about the happenings of Week 34...but there's lots of good stuff if you'd like to study the photos on your own.  Here goes...lots of photos so hope you stick with me. 

This is the 2 page regular Project Life week.  This is how I still plan to handle December's PL.  I will have an insert that denotes what week it is in the upper left hand corner. 
The rest of my inserts will continue to be a mix of 4 x 6 photos, 3 x 4 photos and journaling card inserts.  I also plan to have a Week in Review insert for each week.
I am planning on using a color scheme that is definitely holiday-ish for the entire month of December.  I am adding aqua and yellow and wood grain to a traditional red and green theme.  I debated on this for the events that won't be holiday related but here's my final thought.....you decorate your house with holiday items for the entire month of December even though it's not Christmas every day.  So why not let my entire month of my Project Life album look festive too?  You'll see in my upcoming posts that even though I'm using holiday colors, my album will still look fairly neutral at times.
The weekly inserts will continue as this is a fun way for me to get all scrappy.
I've also been experimenting with the Phonto app on my iPhone.  When I have a few minutes here and there I've been adding journaling right to my photos.  I save them to my photo album on my iPhone and my journaling is done.  I'm definitely going to continue this idea + it's fun to add chipboard letters or stickers along with the photo journaling.
Some 4 x6 inserts with smaller and multiple photos.  A great way to get scrappy and use up those fun holiday products.
For those moments when I take a bunch of photos, I'll be using the Diptic photo app on my iPhone to make collages.
I've been converting a lot of photos to black and white.  These photos of the girls were somewhat blurry and the night time lighting was awful but you can't tell as much when they're converted to black and white.  I like the contrast to all the colors, especially with a mix of holiday colors coming up in December.
More Phonto journaling on a photo + stamping + Washi + stitched on accents.  This December I am planning on using red thread for most of my stitching.
Here I combined the Phonto journaling on the photo with a wood veneer arrow.  Just a little pre-planning and you can have some really creative inserts.  I'll also be giving the typewriter a work out.  I love that I can fit a lot of stories in by typing vs. using my somewhat large and loopy handwriting all the time.
The Week in Review inserts.  I'll be making these in advance so all I have to do is type or write in the events.
Some 3 x 4 slots will have photos, some will have journaling cards.  I'll be using lots of labels from my shop for typing journaling + shop items like my manila tags that are so easy to run through my typewriter. And date stamps.  There are so many that have fun sentiments along with the dates.  I love them.
Here I had an extra 4 x 6 photo that I just didn't want to crop down.  So I used (2) 3 x 4 slots and just trimmed my photo in half.  I used the Photo app on this photo too.
Fun graphic inserts where I perhaps didn't have a photo or particular story to tell.  This is a great space to just up more of your fun holiday supplies. I think I might need more chipboard alphabets.  Making a note to self.
Okay that was it for the main PL spread.  Moving on to the smaller inserts, here's what the 3 look like between the PL pages.  For me, it's very important that the 12 x 12 main spread be visible.  So all of my inserts will be smaller than 12 x 12.  Doesn't matter what size...6 x 6, 5 x 7 , 8.5 x 11, 8 x 10.....just smaller than 12 x 12.  I have to say I love my weeks where I have inserts because I know there are lots of good stories in between those pages.  
Here, I turned the first insert over to reveal the next inserts.
And again, I turned the page to reveal the next set of inserts.  Can you see where I'm going with these inserts?  These will be the guts of my December Daily portion of my Project December.  These will hold all those extra holiday moments and stories.  They'll just blend in with my regular PL pages.
Here's the last insert on the left, below.  I'm not really going to worry about if my December Daily portion is actually "daily".  I'm just looking to capture the events of December.  I have lots of numbers for 1-31 for the month of December which I'll be using as accents so if I do take a photo daily I'll use them.
Here's an insert that is a traditional scrapped layout.  I don't do many of these because they are more time consuming, take up a bunch of space in my album and quite frankly, big pages intimate me a little. I prefer to work with card size inserts probably because I've been a card maker for so long. But I do love a good layout once in a while.  This is an 8.5 x 11 page of having 2 high schoolers now.
I like to fill traditional layouts with larger photos like the 5 x  7 size I used on this layout.  Less space to fill up.  Typewriter journaling on textured vellum + lots of fun embellishments.  I'll probably use my favorite photos in December to create a few traditional layouts.  There's just something about a giant photo that I love.
I love the mixy matchy look of chipboard alphas & stickers.  It's kind of a good plan because then it looks like you planned to be all mixy matchy from the get go....especially when you are nearing the end of December and start to run out of specific letters.
Woohoo, a second traditional 8.5 x 11 layout. This week took me forever, I tell ya.  This was another favorite photo that I snapped of Josey in her bed.  So many wonderful details about my teenagers that I wanted to capture.  This would be a great idea for a layout you might do in December of your living room all decorated...you could make notes about each little item, etc.
More chipboard letters, tags from my shop for little typed details, stapled on journaling spots, etc.
This is a Project Life insert of when Jordan got her braces off.  In December this might be for one event or I might have a photo from several days here.  I'm just gonna go with the flow and see what happens.
All of the inserts were photos except one which I got a little scrappy with.
Below shows 2 inserts, side by side.  Again, these might contain just 2 separate stories in December or they might hold photos from several different days and events.
I'll save at least a few inserts to get scrappy and add some journaling.  Here I used papers, embellishments and a tag from my shop.  So easy to keep the tags on hand to run through my typewriter.  For me though, I want to keep the photos front and center. I don't want my album to look like a decorated Christmas tree, drooping with embellishments.  Keeping it simple, friends. But with a little holiday bling here and there.
Here I added 2 scrappy inserts for journaling + an additional photo on each.  I much prefer these smaller inserts than a giant 12 x 12 layout.  I've still captured all the stories.  So glad I took that pressure off of myself that I don't have to do big layouts all the time. Remember, there is no norm to follow.  Do your own thing and be satisfied with it.
This insert looks kind of like a traditional layout....but it's not.  Great compromise, huh?  Just imagine that these photos and embellished inserts will look holiday-ish in a few short weeks.
Neutral papers with graphic designs are a great way to add pattern to your inserts without too much color or themed holiday designs.  Anything with grids or a ledger pattern is A-okay in my book.
My library cards are another great shop item I carry that I'll be using for journaling or stamping.  They're just the right size to run through a typewriter.  Picture that stitching in red for the holidays.  It's going to tie all the little elements together.
And, the end.  I know this post was like reading a book but I wanted to give you the big picture of what's to come.  There are lots of you out there that are wondering what to do with your Project Life and Daily December albums too.  I think I have the perfect solution for me....and perhaps for you too.  Thanks for stopping by and I'd love to know your thoughts or tips or suggestions for what you're doing this year.  And Lisa.....my heart was happy to know that you pulled over in the Starbucks parking lot to read my post.  I've spent a lot of time compiling these posts to share with you all so it's good to know that they are useful.  :)  Speaking of sharing.....I have the super duper fun posts coming up now.  I have journaling card inserts, pocket pages, Week in Review cards, embellished envelopes and more to share all throughout the month.  So come back soon.  

August 19, 2012

Creativity...the process vs. the product

Wow, I'm finally able to sit down to work on a blog post. This past week was filled with purging and getting ready for a big garage sale we had yesterday. SO, so glad that is over. I'm energized now to purge more and get my house more organized. I have some more thoughts on this but that will be for another blog post.

Today I have some projects that are the result of a stamping session that happened all for the sake of creativity. Now that I'm not currently designing for a company that sells stamps, papers, embellishments, etc I am afforded the opportunity to just create. To just see what happens down in the craft department. It's been nice to see what happens and to see what evolves when there's no pressure to use a certain product.

And that brings up my main thought for today.....the process versus the product. What happens when you don't focus on using any certain products? Have you sat down and created something that isn't for a challenge or to see what other people think? If you're a blogger, have you created with the mindset that this project is for me? Not for anyone else to see on my blog? I think that sometimes we are so caught up in what we should be creating or how a project should look or what products we should be using that we forget about our own true style. That we forget about how fun and nurturing the creative process is in itself.

So with all that said, I'm going to share my projects with you today. But keep in mind that these cards were created with the idea that I just wanted to create something. Nothing else. You might enjoy the thought process I share along the way.....and I hope you are inspired to create just for the sake of making something.

For my projects I used a collection of My Mind's Eye papers, stamps and embellishments that I recently ordered from 2Peas. Please leave a comment if you have any questions about a certain product.
I also had this sketch laying around that I created so I used it as a creative starting point.
First up I just wanted to be creative. I had lots of fun patterned papers to work with but I wanted something that looked handmade and a little artsy. I reached for a striped MME stamp, 3 colors of inks and a small misting bottle full of water.
Here's what I ended up with. Fun strips of striped patterns that have a water colored look to them. I just inked up my stamp with the lightest yellow, then the orange then the dark pink color......then misted with water....then stamped the image on strips of cardstock. Again, just for fun, just for the sake of being creative and to see what I could come up with.
So next I got started with my first set of cards. In keeping with the sketch, I used a large Papertrey label die that I cut from patterned paper + a neutral cardstock. I'll end up using one half from each for my cards. The main focal point of these cards will be the large label image with some stamping and lots going on in the foreground.
Once I had my labels kind of pieced together, they didn't stand apart from the base card very much. So I decided to stray from the sketch a bit and created a background using ledger paper from my stash + a few scraps and some Washi tape. Just layered quickly onto the background piece and then stitched. This got me very excited to just take a creative session to just make backgrounds. Again, the creative process came into play much more than any product I was using. So fun!
And here's 3 finished cards that I made, using the sketch + my handmade water colored strips + some fun accents and popped up stamp images. I really do like how these turned out.
Those scrappy little backgrounds got me so intrigued that next I wanted to create some cards that focused more on the background than a large focal image. These came together very quickly by just adding some of the leftover watercolor striped paper I made, some Washi tape, some scraps of paper and a few Small White Tags.
When working on the first cards, I felt a little confined to my detailed sketch. So this time I just rolled with whatever popped into my head. I reached for some Dainty Doilies, stamped up a few Grid Paper Labels and then stamped some MME flowers onto punched circles. I didn't quite know how my cards would come together but I just let the creative process take place. I knew these cards would just go into my stash so whatever came about was just fine.
And here's the end result. I love how quickly these came together versus the time it took me to put together the cards using the sketch. But I loved working on both sets of cards. Sometimes it's detailed that you want, other times it's quick and easy. Notice that I also made a coordinating envelope using some Washi tape and Studio Calico stamp (which I cut apart to fit my liking).
For a final set of cards I wanted to explore the handmade backgrounds a little more. I like the idea of starting with a piece of "something" that has a pattern on it. Above I used my ledger papers and this time I reached for some Library Cards. I didn't have a plan for the card design but I liked the idea of using the stamped Grid Paper Labels again along with some tiny stamped labels.
I started out by laying on strips of paper and Washi tape on the base card. They needed a little pattern to start off with. Next I just worked on layering stuff to the library cards. At this time they are not attached to the card fronts. The fun part of this process is that you can work on the background piece and get it all finished before attaching to the card.
This way you can layer and wrap tapes around the back of the piece and even machine stitch and staple on the piece without it all showing on the inside of the finished card. You can look at the above photo and then how I added more layers and stitching to the piece in the photo below. This might be a new favorite way to make cards.....all because I just let the creative process flow with no finished product in mind.
And heres's my two cards. I topped the layered background with more Washi tape, the stamped Grid Paper Label, hand cut/stamped flowers and some Studio Calico wood veneer hearts. Notice how I let the small "memo" label hang over the edge of the library cards. The labels look like they flow from one layer to the next. That's an easy way to tie the background layer and the main base card together.
And one more thing that was was fun to do....I cut tiny strips of Washi tape and used them over and under my flowers and veneer hearts. I love this look and will be using this technique again soon. Amazing how you discover little creative tidbits when you sit down to just make something.
And that's it for today. I really enjoyed this creative session because it was just fun and I had no deadlines, no criteria to follow....it was all about the process. I hope you give it a try. :)

This week:
The girls have more volleyball practices and then it's back to school later in the week. Both my reds are going to be in high school now....and driving.....and dating boys....OH MY! I have to say that I really love teenagers (if they're not bratty and annoying, that is). They make me feel young again and full of adventure. I'm looking forward this school year!
Related Posts with Thumbnails