Showing posts with label Quilting. Show all posts

June 29, 2014

Catherine Quilt Progress...piecing a block improv style

I thought I would share some more of the process of my Catherine Quilt.  Today I'm sharing how I pieced together my improv blogs.  Kind of like a messy log cabin but just totally random sizes.  No measuring, I just started cutting pieces of fabrics.  I staged each block like this, putting together colors I liked mixed in with some of the linens.  
Starting with my first two pieces of fabrics that are similar in size I sewed them together then pressed open the seams. 
I trimmed the edges to be straight using my ruler and rotary trimmer.
Next I found the adjoining piece of fabric that was similar in size to my stitched together pieces. 
Each time I sewed on a new piece I pressed open the seams and trimmed the edges straight.
I kept sewing each stitched piece to the next piece close in size until I had enough blocks completed for the size of quilt I wanted. 
Here's the majority of my blocks spread out on my bed.  I ended up creating 16 blocks approximately 18" square in size for my quilt.
I was so happy to see this progress taking place.  The color and patterns just started to pop.  Next up, I'll be sharing how I sewed all the blocks together to form a quilt top.  Stay tuned....

May 21, 2014

Project Update: Catherine Quilt (piecing a #4)

While working on my Catherine Quilt blocks I thought it would be cool to incorporate a number 4 somewhere in my quilt.  The #4 represents the four of us.  My family.  When I see a #4 I think of us and it makes me happy.  
I wanted to keep my "no measuring" rule with this quilt so I just started cutting strips and piecing together a #4 like a puzzle.
Once I started sewing together the pieces, I knew it was so incorrect.  So, so against all things right with piecing blocks.
But I didn't care, I just kept on sewing together the pieces.
And I like it.  Actually I love it.
I'll be sharing the inspiration for my Catherine Quilt soon.  I'm sure you've all been wondering who Catherine is?

Question: I've gathered up some pretty terrific products for quilting.  Are you interested in seeing my favorite tools with links of where to buy?

May 14, 2014

Project Update: Catherine Quilt (Improv Quilting)

I've been making progress on my Catherine Quilt so I thought I'd share some photos today.  If you remember in my last project update I was just starting to piece together random fabrics to form quilt blocks.  Here's the first two that I made.  
This type of quilting starts with scraps so it's a great project for those who keep  all their scraps, big and small.  I didn't have many scraps so I started with all new fabrics + a large bundle of linen that I purchased at a thrift shop.  
Some simply call this type of quilting "scrap quilting" or "wonky log cabin" but after much research on the Internet I found that this type of quilting actually has a more formal name.  It's called "improvisational quilting" or "improv quilting" as I will call it from here on out.  It can be very simple in nature by just sewing together random scraps or it can become a very artistic expression using fabric and intricate designs.
I decided to use this improv quilting method but I had no idea what it was called or if there were many others doing this kind of quilting.  Why am I interested in this type of quilting? When I took my first beginning quilt class several years ago the quilt had 9 square blocks that had traditional type pieced patterns.  The patterns had to be so precise, it involved measuring and matching up corners and making triangles.  It was a bit stuffy feeling to me and I felt like the dear ladies at the quilt shop silently critiqued  every little mistake.  Of course they didn't and were nothing but super helpful and nice...but still I felt that maybe this type of quilting wasn't for me.  It was too perfect.  It didn't settle well with my mixy matchy, scrappy style that I was used to in my paper crafting.
So I decided to venture out on my own and just see what I could come up with.  I had a few ideas brewing about when I started my Catherine Quilt.  First, I wanted to pick fabrics with patterns and colors that I loved. I think my quilt really does reflect my style, sort of like what I would select when paper crafting.  I also knew that I wanted to dig into this beautiful stash of linen that I had been saving for a special project.  I loved the idea of using the soft tans of the linens as my neutral instead of a white fabric. Next, I knew I didn't want to measure anything.  I know that sounds crazy but it's just like my paper crafting...I don't measure too much. It's so stifling to have to be that precise.  So I started cutting strips without measuring any of them.  Then I started laying them out as you see in my photos today.  Next I just started stitching them together and trimming them down.
One issue I had was deciding if I wanted all my blocks the same size.  I initially thought about using my 12" ruler to square them all up but in the end each and every block I created was a different size, about 18" square approximately.  I thought by doing this, my quilt would have a more organic look, without perfectly spaced squares.  I thought it would be unique if the viewer of my quilt had to look twice to see how I pieced all the pieces together.  The more I worked on piecing the blocks, the more mixy matchy they turned out.  I'm very happy with the results so far.  

Since I started quilting my preferred way I looked up improv quilts on Pinterest.  I've added lots of quilt ideas to my Quilts board and my Catherine Quilt board.  I've found that the Internet has endless inspiration for improv type quilting.  If you're like me and think perhaps that the traditional type quilting blocks are a little too much for you at this time, I so hope you'll give this style a try.  

May 6, 2014

Project Update: Catherine Quilt (piecing the blocks)

Thought I would pop in today with a little progress on my Catherine Quilt.  If you've followed along you'll remember in my last update that I was cutting all my fabric strips.  With this update, I'm knee deep into my fabrics now, piecing together the random blocks. 
 I work with my fabrics all in little piles and small ironing board to my right with my large cutting mat and sewing machine to my left. I randomly choose fabric strips and lay them out in basic block pattern that suits my fancy.  No rhyme or reason.  No measuring!
 Lots of sewing together individual fabric strips.  Then pressing.  Then trimming. Then sewing together more fabric strips.
 Before you know it I have lots of blocks starting to take shape.  No exact finished size although they've been finishing up around 13"square.....with some of my later blocks being around 18" square.
I love how these first few blocks have turned out.  The colors of the Sweet as Honey fabric from Bonnie Christine + the few I've added from my stash are just the look I was hoping for.  Combined with the 5-6 various linens I've worked in, I love the softness and the pretty patterns.

I'll be back again to share more of my Catherine Quilt.  I've been posting lots of peeks on Instagram and  Twitter which has inspired a lot of you to get back to your quilting.  Feel free to share your links with me, I love show and tell.  Thanks for stopping by and have a great day!

April 28, 2014

Project Update: Catherine Quilt (cutting random strips)

So I took over the dining room table and here we go with my new quilt.  I gathered up all my supplies and just dug in.  I started by grabbing a fat quarter and just started cutting strips.  
 There is no measuring in the style of quilt I'm making.  I purposely did not want to have to measure much or cut intricate pieces. There is no pattern to the quilt I'm making.  I just kept on cutting strips in random widths. Note: The ruler grip by Omnigrid is so awesome.  It keeps my long ruler in place and is  easy on my hands.
 I just kept on trimming.  It was an easy task to do while dinner was in the oven, or while drying clothes, etc.
 I finally had all of my chosen fabrics trimmed into random strips.  This is such a pretty sight on my table.  I also have all of the linen pieces trimmed too.  Boy, it was hard to cut into those.  Now I just need to keep the hunters from dumping their camo gear on my nice, clean fabric strips.
Now, I'm ready to start piecing together the parts of the quilt.  I've started on this and that will be my next blog post.  If you want to follow along with the progress of my Catherine Quilt from the beginning just click on the "Catherine Quilt" label at the end of this post.  It will take you to my very first post of this project.

Note: The fabrics I'm using are from Bonnie Christine for Art Gallery Fabrics and the line is Sweet as Honey.  I purchased mine at Fat Quarter Shop.  A few of the patterned fabrics are from my stash as well as all of the linens that I'll be using. 

April 22, 2014

Project update: Catherine Quilt...some new supplies

Today I'm sharing some of the new supplies I recently purchased to get going on my Catherine Quilt.  

I'm constantly in awe at the plethora of information you can find on the Internet if you just take the time to search...and search...and search.  A recent favorite tip I learned is that all cotton thread is good to use if you're using all natural fabrics like cotton and linen.  All of the fibers should shrink fairly the same when laundered.  Who knew?
 As I go through this quilt project, I'm excited to learn more tips and tricks.  I can sew fairly well but I'm in awe when I listened to seasoned quilters.  There's always...always....something new you can learn.  I'm excited to start putting together the pieces.
 My sister told me about this ruler grip.  I finally picked one up at JoAnn's.  I think it will be great for squaring up 1/2 yards of fabric and hopefully my ruler won't scoot around.  I also suggest getting the biggest cutting mat your work area will allow.  I found a really large one at Walmart and I love it. It's probably like 30 x 36, big!
 I'm really excited to try my hand at hand quilting for my Catherine Quilt.  Never done it before but I'm excited at the thought of just sitting in my big comfy chair or out on the front porch, just stitching away....and probably pricking my finger and saying, "Dammit, I did it again."  That's where you come in....do you use a thimble, metal or leather, what fingers do they go on?  See, total newbie here.

I picked up these all cotton, size 5 bundles of thread at JoAnn's.  I'm loving the thicker yarns on some quilts I've pinned lately.  I'm thinking long stitches, rather simple and straight in nature.  Nothing intricate for me.  You can see some samples on my Catherine Quilt Inspiration Board and my Quilts Board.
 I told the helper lady at JoAnn's what type of hand quilting I wanted to do and she suggested these Crewel needles because they have a larger eye and are a bit thicker in size.  That is great because my failing eyesight needs bigger everything. Note to self: get some reading glasses before I start hand quilting. 
So here's my plan for my Catherine Quilt.  I'm thinking of just taking over the long farm table in my dining room.  Awesome natural lighting and I'm not stuck in the basement.  My mother is scheduled for a knew replacement surgery in May and I'm thinking I might just set up shop on her dining table too.  That way I can stay and help her for long periods of time but also have something to keep my hands busy.  Totally excited.  I think I need to visit my local quilting ladies and neighbor lady who have a lot more quilting under their belts for some more advice.  Either way, I'm cutting in to my fabrics this week.  I'll be back to share another project update of the fun quilting method I'm going to try out.

April 15, 2014

The Catherine Quilt Project...

One of my goals for 2014 was to take time for projects that were just for me, just for the sake of creating.  One of the ventures on my list was sewing and the other was cooking.  So you'll be seeing more posts about these + my usual paper crafting on the blog.  I hope you enjoy following along with me on my many ventures.  

Today I'm excited to share my newest crafty venture....the Catherine Quilt.  I'll be sharing more on the inspiration for this quilt, the style of quilting I'll be doing and just what I envision this quilt to become.  I'll be sharing posts in the form of quick, project updates with just a few photos here and there.  For today I'm sharing the brand new fabrics that just arrived for my Catherine Quilt.  Aren't they so pretty?

The line is called Sweet as Honey and is from Bonnie Christine for Art Gallery Fabrics.  You can find Bonnie Forkner's sweet blog here, full of fun projects, recipes and simple living ideas.  To see more of Bonnie's post about the Sweet as Honey fabric line just go to the end of a blog post and click on the "Sweet as Honey" label & all of the corresponding posts will show up.  You'll definitely want to find the Sweet as Honey Blog Tour which features 25 bloggers' projects using the Sweet as Honey fabric line.  
If you're already in love with this fabric from the first glance, you can order the fabric online or be lucky enough to have a fabulous shop near you that carries it.  I ordered mine from Fat Quarter Shop and had great customer service.  Below, the top row is the Spring Harvest fat quarter bundle and the bottom row is the Autumn Harvest fat quarter bundle.  I may have ordered some additional yardages of my favorite prints too.  
From my own stash, I'll be sprinkling in these fabrics.  
 So here's what my fabric mix up will look like. That pink tone is really not that bright though. 
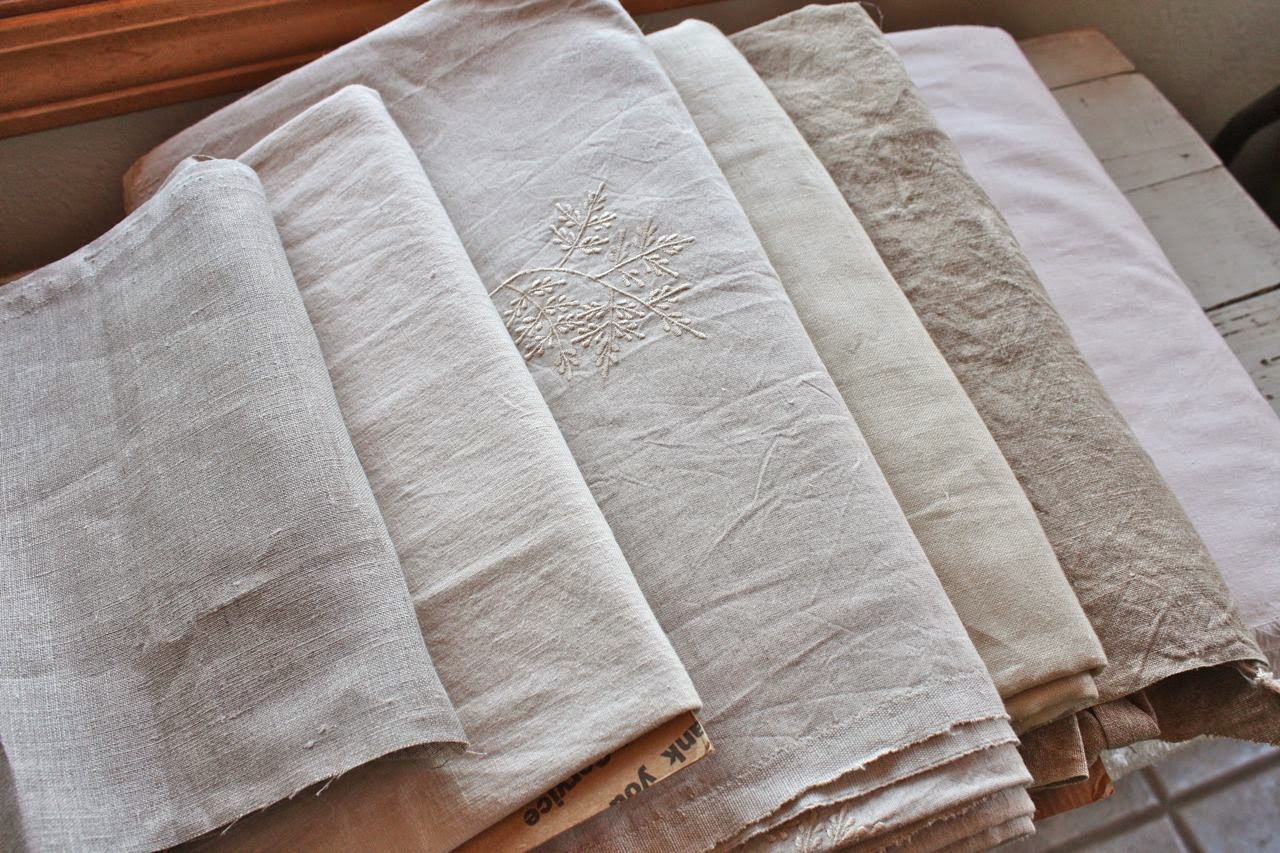
Instead of white backgrounds, borders and sashing, I'll be mixing up these beautiful linen pieces that I've been collecting.  Just gorgeous, right? 
I'll be back with more inspiration on my Catherine Quilt soon.  For today I'll leave you with a link to my Catherine Quilt Inspiration Board on Pinterest.  I've spent countless hours pinning some wonderful quilting samples, hand quilting ideas and samples from the Sweet as Honey line. I'll showcase some of my favorite inspiration pieces here on the blog too.  In the meantime, I hope you are inspired to create a beautiful quilt of your own.  Thanks for stopping by.

November 3, 2011

We've got quilts to make.....

I hinted in some previous posts about a surprise that my dad got my mom before he headed off on is trip to China. I'm always finding ways to entertain my mom while my dad goes on his wordly adventures. My mom doesn't care to travel much so she doesn't mind staying home at all. But it can get rather boring without Dad so I always try to find ways to entertain my mom. I thought a new sewing machine would be perfect for her. She's been needing a new one but would never make the purchase.

I did a little research and found this Brother SQ9050 at Walmart. My sister has the previous model just before this one and she loves it. So much so that she thinks it's just as good or better than our Baby Locks that we purchased at the quilting shops for much more. I'm going to get it all set up for my mom and give it a test drive.
I'm hoping that my mom will dive right in with me and tackle two quilts that I want to complete for Christmas presents. I'm wanting to use the fabrics shown below to make 2 lap quilts for the girls' lounge room. To complete the quilts, we're going to have to work quickly. There won't be a lot of time for intricate quilt designs and patterns. My goal is to have 2 machines set up and working. I will do all the cutting and will get Mom started on simple sewing. She used to sew all the time and was very meticulous in her work. I know she'll do a great job. And she does the best binding...and likes to hand stitch it all. Awwwwlright, I lucked out there!! Wish us luck.
If you're in the market for a new sewing machine, here's what the box looks like from Walmart. A Brother SQ9050 is what you're looking for. Price range is $200 + tax. I might even consider this one for Jordan so she'll have her own machine.
It's got oodles and oodles of fun stitching functions. I'm excited about this sewing font because I think it will be great to make quilt labels. I've read that you should put your full name, date and place where the quilt was made on a label and stitch it to you all of your hand sewn items. I know that I would love to see those labels on some of the old quilts I've saved from the auctions and thrift shops.
As for the quilt designs I'm thinking of, I don't really want to use a pattern. Or if we do use a pattern, it needs to be very simple. Here's a few links to some quilt inspiration that I found on Pinterest:

I'll be sure to pop in with our progress. I'm hoping to keep these quilts a surprise for the reds. That means that Mom and I will have to sew during the day and then put everything away before the girls come home from school. That will be the tricky part.

February 4, 2009

Let the fun continue....

Oops, had to edit to add a link for the bag pattern.

OKAY GIRLS, I'VE SELECTED A WINNER OF MY TOTE BAG AND GOODIES. IT'S KRISSA BROWN!! CONGRATULATIONS KRISSA AND THANK YOU TO EVERYONE WHO LEFT A COMMENT. IT WAS FUN READING THEM ALL.


Krissa, please email me at stamplady@satelephone.com with your snail mail address.

Krissa Brown said...
WOW, love the colors on the bag...TOO CUTE! In my purse I have...work keys, car keys, 2 diapers, small pack of wipes, kleenex, nail clippers, wallet (wish it had money in it..LOL), 2 bottles of Window Chalk from decorating the car for my oldest daughter's cheerleading competition last weekend in Dallas, and last but not least Tylenol. :) Thanks for the chance to win...LOVE your stuff!!


If you're interested in the pattern for this tote, you can find the information in THIS post, where I showed my quilting bags. I improvised the pattern for this bag and just made it on my own, using 2-1/2" squares.

First, I wanted to thank you all so much for your comments yesterday. Your heartwarming messages meant so much to me and were very touching. You certainly made me feel better. Thank you for sharing your stories and thinking of me. It's so evident that our friendships reach so much further than a simple computer screen. I wish I could give you all big {{{HUGS}}}.

On to the fun stuff.......Nichole has a very exciting Papertrey announcement today. I'll let you read all the details on Nichole's BLOG but I'll give you a few hints......it involves shopping....a fun challenge.....a cute tote.....a gihugic shopping spree......YOU MUST CHECK IT OUT!

I thought it would be fun to play along with Nichole's challenge so I created this fun little, patchwork tote. It uses Moda and Amy Butler Fabric.

An adorable little tote, finished up with Papertrey Berry Sorbet ribbon handle and a fancy little bow and heart embellishment.
Completely lined and oh so cute! Well, I think so.With a little somethin' inside.....Butterfinger and Reese's Hearts (I've eaten two from the pack already, my faves!).....snippets of ribbon on a wooden clothespin(available at Dollar Tree)......
....and a little signed by mwah. Card uses Kraft and Vintage Cream cardstock, Berry Sorbet Swiss Dot ribbon and ink, buttons, Simply Stationery stamp set and some cute embellishments I made HERE using Heart Prints(a must have Valentine set!). I tied one onto the bag also.

And guess what? I'm giving it all away to one of you! Now I have to tell you that my little Jordan was NOT happy to hear this news. She LOVES this little tote. Really wants it BAD. Thinks you all are spoiled! But don't worry, she felt much better after I told her that good ol' Mom cut doubles of the fabric so that we could make another one.

So how do you win my fun filled tote? Leave a comment on my blog telling me a little something about an item in your purse. Do you carry a camera? Are all your gum packets empty because your kids take it? Do you wish your dear husband would carry his own man purse to contain his George Costanza wallet(did you see that episode?), cell phone, sunglasses and car keys? Let me hear it girls, whatcha got in that purse???????

Now. If you comment here, you're going to win MY PRIZE. If you want to win Nichole's prize, you must enter at HER blog. You can enter at BOTH places though. Good luck!! My prize drawing will close at 12:00pm EST on February 6th. Winner of my prize drawing will be announced on my blog sometime Friday. Good luck!!

January 2, 2009

My Sewing Bags

Look what I finished over Christmas break! I made two bags, one small tote and one gihugic tote to carry my quilting ruler and cutting mat. The outer portions have 5" squares that I pieced with my sewing machine (Baby Lock Audrey, and she's awesome!). The tops have giant ric rac sewn into the lining. I know, I know.....I'm getting pretty fancy. Watch out Vera Bradley, right?
Here's my fun fabrics, all 30's reproduction fabrics. I don't know who made them, I forgot to check.
Here's the inside, FULLY LINED, portion of my small tote. With a pocket! I tell ya, I'm getting better and better at this sewing stuff and could actually read the pattern. I totally improvised the big bag, just using my smaller pattern as a guide of sorts.
Here's my gihugic tote that will fit an 18" x 24" cutting mat and 24" long ruler. It is fully lined and has a pocket for smaller, square rulers. I will be the envy of of my fellow quilters, right?
I'm sure there are patterns out there and pre-made totes for quilting and sewing supplies. I just went for it and made my own though. I can't share the instructions with you due to copy right but the pattern is by Bunny Hill Designs, Litte Charm Totes #1088. I found the pattern at a local quilt shop and I'm sure you can find it online somewhere.

Oh, what fun that was!!! The small tote took me weeks because I was slow and couldn't find the right thickness of interfacing I needed. But I tackled the big tote and finished it almost a day! Now I can't wait to go to quilt class this next Friday. Trudi, my instructor, will be so proud of me!

Related Posts with Thumbnails