October 7, 2014

New Gossamer Blue collections + coordinating shop items coming soon...

I get really excited when a crafty company releases a line that I absolutely love.  The kind of products where I just have to have every single item in the collection.  I'm so tickled that Gossamer Blue has released not one but two awesome new lines that I'm going to share with you today.  Well actually three because there is the Get Happy line also which is definitely going to make it's way into my December Daily this year. But today I'm sharing two of the collections...I'll share more on the holiday line in a future post.

First up is Gramercy Road designed by One Little Bird.  The colors in the collection just call my name. I thought you might like to see some real life photos of the products.  That always helps me when I'm making decisions on purchases.  This is the entire collection of the embellishments which include label stickers, alphabets, enamel dots, chipboard accents, cork accents, paper embellishments and a stamp set.  
 Here's some of my faves.  Isn't everything just so wonderfully coordinated?  I love the florals in this line too.
 Rose Gold is right on trend and this alphabet sticker sheet is gorgeous.  So shimmery and perfect.
 Here's the entire collection of the papers.  You're seeing fronts and back here.  Dreamy, right?
 Here's my faves from the papers.
I love this collection so much that I knew I wanted to use it all for some upcoming holiday gifts for friends and family.  I love to make notebooks and card sets to give as gifts.  While in the city last week, I took some time to stroll through the craft aisles and just had a good old time selecting items that coordinated with Gramercy Road.  I'll be using this new stash of goodies right along with the Gossamer Blue products. 
 Look at this beautiful fabric I found! It coordinates perfectly and I can't wait to cut into it.  I also found some fun cork, floss and shimmery burlap.
 Lots of ribbons and tags and clips that look so cute against the patterned papers.  Look for some fun shop items to be popping up in my shop soon.  I'll have plenty to share.  Of course there will be new blog posts with lots of ideas of what you can create with the all these fun products too.
Next up is On My Desk designed by Paislee Press.  I'm such a fan of Paislee Press so it's super exciting to have these products in the house.  Here's the line up of embellishments which include tab stickers, flair buttons, wood veneer, star stickers, gold foil transparencies, puffy stickers and paper embellishments.  
 Here's a few of my faves.  Hello, puffy stickers!
 Here's the entire line up of the patterned papers. You're seeing both sides here.
 So colorful and whimsical.  Here's some of my faves.
 Check out this floral gold vellum.  Gorgeous.
I also did a little shopping for this line too.  I was tickled to find such a mixy matchy group of fabrics.  Plus I got paint, fun tags, clips, beads, and more. 
 This little combo of fabrics is just waiting for me to cut into it.
 Lots of little embellishments. You'll be seeing items from this assortment in my shop soon too.
All of the new collections have been selling like crazy and Lori just restocked the Gossamer Blue store with refills.  Items sold out quickly the first go round so don't delay.  Gossamer Blue is a manufacturer now so you can also find our products at other retail and online stores.  Happy shopping and be sure to stop by often for lots of inspiration using the new products.  I'll be sharing more of the Get Happy holiday collection when December Memories time rolls around.  You're gonna love this mini album kit for the holidays.  

October 6, 2014

Halloween Cards...

Today I'm sharing lots of Halloween cards created with items from the October Gossamer Blue Themed Add-on Kit.  The kit is now sold out & I hope that those of you who purchased a kit will get some inspiration from today's post.  You can read all about my process for making the cards over at the Gossamer Blue blog.  
 There are lots and lots of embellishments in this kit so it's easy to create many cards.
 I worked in production line style to create my stash.
 I started with a neutral base A2 cardstock for the card.
 I then added dictionary paper as the base layer.
 Then I just started adding a main embellishment to each card and layered on lots of smaller elements. I finished all the cards with some Halloween baker's twine.
Hope you enjoy!

September 30, 2014

Tray Tuesday...Apple Cider

It's Tray Tuesday and today I'm sharing some of my front porch Fall decor and a special little set up for some apple cider sipping when the weather cools down a bit.  Ahhh, I just love Fall.  I wish the colors and beautiful weather lasted just a bit longer before the cold Winter settles in. 
I love welcoming our friends to our home for Fall activities like hay rack rides, bonfires in the timber, Gator rides through our carved out trails and just old fashioned visiting.  I set up a pretty display using mostly thrifted items.  The table was a find from my favorite thrift shop over the Summer. 
 This orange tool box called my name one day.  I didn't get it but I drove back to the thrift shop for it and I'm so glad I did.  The chippy orange color is perfect for Fall and Halloween.  The woven throw draped inside is a recent thrift find.  The jars are some I got from my sister that I filled with corn from my dad's field.  Pumpkins were grown by my folks.
 I love just using what you have on hand for filling up canning jars.  I snatched a few gallons of corn from my husband's stash that he feeds the wildlife with.
 My watering cans are front and center no matter what the season.  I just love them so.  I was so happy to stumble upon a giant vine of Bittersweet while on a buggy ride with Charlie.  The corn was picked from my dad's field before harvest time.
 I found this old wire hanging basket at a thrift shop and it's perfect for storing items you want to see.
Just this morning I added this apple cider tray to the set up.  I pulled out a drawer in the table and used it for the holding spot for a large tray.  On the tray, I nestled 4 ironstone mugs, 4 vintage spoons, an old Depression glass shaker full of cinnamon and some apples from my friend's tree.  
 I love how the drawer offers the apple cider as an extension of the regular Fall set up.  When the weather gets just a bit colder I'll throw some blankets over the chairs.  We purchase our cider just down the road at the apple orchard.  You can also get all kinds of fresh apples, local honey and apple slushies.
 Just a perfect little place to watch the world go by.  I hope you can find a little area where you live to set up a cozy little spot.
The tray I used today for my apple cider set up is one of these.  This Set of 2 Cream & Gold Trays is still available here. 
I think that shiny red apples and the same set up would be cute on these red and black trays also.  You could throw out some red and black Pendleton blankets and some red mums for a red theme.  
There's a few more trays in my shop also.  I just love all trays....they're perfect for setting up temporary holiday displays and transporting items from spot to spot.  Hope you enjoy!

September 26, 2014

Shop update.....

I'm excited to share some brand new items that I just added to my shop.  First up is a kit to create some pretty Fall packaging.  Sometimes you just need a little something special.  This Fall Leaf Gift Sack Kit features my brand new paper clip flags which are are sold in a separate kit.  You get all the items you see below in this kit.
Here's a sampling of what you can do with the kit items.  Pretty Fall colors with a fresh twist. 
 So many pretty details, the packaging just might be as good as the gift tucked inside.  You can tuck in candy bars, a giant baked cookie bar, little fat quarters of fabric, crafting goodies, notepads, a few handmade cards and more.
 Next up is a Halloween Gift Sack Kit.  Very simple with those classic Halloween colors.
 Here's a sampling of how you can assemble the kit items.
 I love the Halloween themed twine and the glittery pumpkins.  Use tiny letter stamps or your typewriter to add a name to the metal rimmed tag. Kit pumpkins are black.
Brand new to the shop are my Indian Summer Paperclip Flags.  I've hand cut and then stitched fabric to paperclips for a unique embellishing item.  Clip them to sacks, notepads, cards, scrapbook pages and more.  In this kit, you'll get started with XL manila tags, shipping tags and 4 paperclip flags. 
 Something fresh and new just in time for Fall.  See the Fall sack above for packaging idea.
 Thanks for stopping by.  Kits are in limited quantities, look for more versions of the Paperclip Flags soon.

September 16, 2014

Tray Tuesday: Shopping your stash....and can it help determine your style?

Note: I just rambled off thoughts while writing this post.  I hope you make it all the way through and let me know what you think.  

It's Tray Tuesday and I have a post today that will hopefully generate some thought and discussion. I'll be participating in May Flaum's Supplies On Hand class where you'll learn more about making the most of your crafty stash. Click on the link and you'll be able to read all about and sign up for class.  It's 10 full days of 35 new, never seen before projects.  

While preparing for the class I got into a really thought provoking conversation with myself. So instead of feeling like a whacko, I thought I'd share my thoughts here on the blog and see what you have to say.  Shopping my crafty stash is really one of the most fun things I like about crafting.  I have an entire craft room that is full of wonderful crafty items that I've purchased or have gotten from being on Design Teams.  Plus I have the items that I keep on hand to sell in my online shop. 

It seems that when I get new crafty items, I tend to let them "season" a bit.  I don't know why but I like to look at the items, admire them, arrange them on cute trays or set them out to view for a while.....but I never seem to tear into that brand new item.  Maybe it's the hoarder in me, maybe I fear that the item will become extinct.  Maybe it's like a new pair of tennis shoes and that I just want to keep the items looking new.  Whatever the case, when I DO go back to those supplies after a while, I get really excited.  

Fast forward to preparing for May's Supplies on Hand class. I was assigned my techniques to cover then I went to work shopping my stash.  First, I thought it would be fun to make a shopping list of the supplies I wanted to gather.  

My list looked something like this:
ledger paper
washi tape
seam binding
stamps
manila tags
patterned paper
flowers/nature stuff
clothespins
watercolors/paints
stencils
glitter
paper clips
buttons
office supply items

Then when I shopped my stash, it looked something like this:
Then I got to thinking.....hey, these supplies look just like my style.  Like the colors and patterns on these patterned papers.  Some of that October Afternoon is "vintage" era and it's still my favorite.
Office supplies, yep these always make it onto my projects.  Love to use manila tags of all sorts, paper clips, ledger paper, book paper.
Then these goodies came out...vintage buttons, small clothespins, and washi tape.
Glitter of all colors came out too...
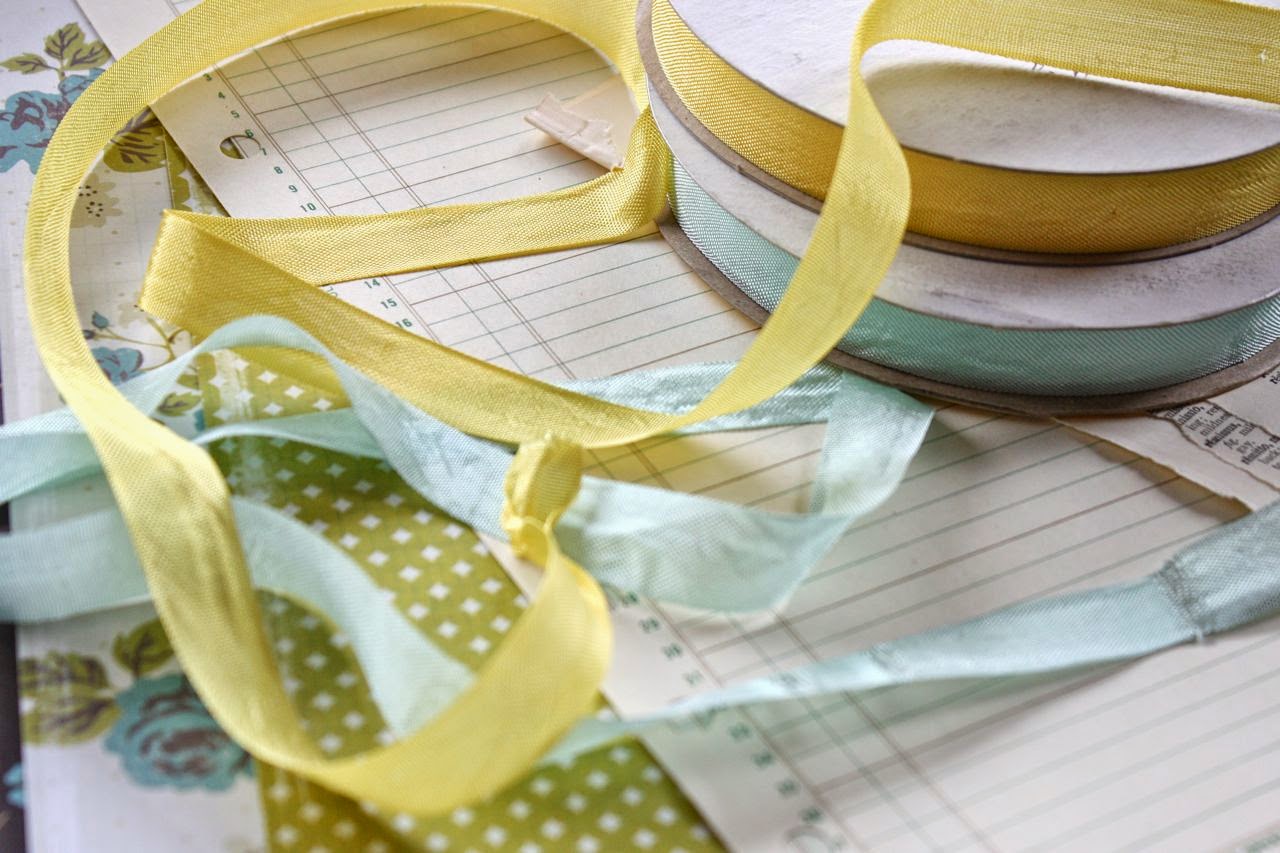
Ribbons, especially seam binding...I have this stuff for years.
Then the art supplies....paints and brushes.
When I took a look at my shopping tray (instead of shopping cart), I really saw "my style" just sitting right there in front of me.  The colors, the patterns, the types of products....they all make up my style.  Who knows really what that style is because I just tend to make what I like.  A Mish Mash, I guess is truly my style.  But I do love the florals, certain colors, white or neutral backgrounds, light ribbons, paints, office supplies......these items tend to pop up on my projects all the time.

So then that got me to thinking.....can shopping your stash help determine your style?  Can it help reinforce your style or get you back on track to what you do best? I think so, friends.  Here's my thoughts. So many times we are purchasing the "next best thing". We get caught up in what is brand new, what Suzie Q is using or what is trendy.  Although this is fun and exciting and I certainly do it too, does it help us stay true to what our style is or what we do best with our crafty supplies. Although I like to change things up at times with crafty projects, it seems like I have found my little niche.  I have found the products that I love to use the most.  I have a color palette that I tend to stick to.  I have my go to supplies that are always being pulled out.  I tend to make kit items work for me and that look like "Mish did this."

By shopping my stash, it was a great creative exercise that really opened my eyes as to what products I love, what products I use the most.....what my style is like even though I'll stray once in a while.  I think shopping your stash and using your supplies on hand could help you too.  Are you looking to define your style?  Maybe clean out some of the bulk in your crafty stash? Do you sometimes feel like you try to be just like "so and so" and it gets frustrating because it doesn't work out?

Here's a few tips I have to offer that I jotted down one night in bed just after shopping my stash for May's class.  I hope they're helpful and that maybe this shopping your stash exercise can get the creative wheels to spinning.

1.  Make a list of "things I like".  List the crafty supplies that you always reach for, that you love and always use.

2.  Go shopping in your craft room.  Literally shop your stash.  I love to keep a stack of empty trays, muffin tins and wood boxes handy just for this occasion.  By keeping a little shopping "basket" handy, you'll always have something to pile up products on and arrange them for little projects you're working on.  Grouping items together in one spot is good.

3.  Look at the stash of items you shopped.  Take a photo and study it like I did in my first photo.  Compare these items to your shopping list you made.  Do you see a pattern of what you use most often?  Do you see similar colors and patterns popping out at you? Are there repeat items that always end up on your projects.  Do you see your "style" shining through?  It's kind of amazing and gratifying to see your style develop right there on a vintage tray.

4.  Look through your older projects like a stash of cards or scroll through your blog projects.  Do those projects have some of the similar items you shopped for on them?  If so, that's your style shining through.  Don't worry about those who say, "Your stuff always looks the same".  It looks that way because it's your style. You do similar things when you've finally figured it out.

5.  Look at the items you didn't reach for in your crafty space.  What do you never reach for? Are those items just not your style? Or are they just items you want to keep around just in case?  Evaluate those items.

6.  Reduce your stash to items you really love and those other items you might use. If it's a definite NO, get rid of it, friends.  That stuff is weighing you down.  It makes you feel guilty.  Is it 10 years old and you love it?  Then keep it. Is it 6 months old and you'll never use it?  Get rid of it.  I had a talk with myself to GET REAL. It was time to get rid of some stuff.  When I did, I loved it.  It felt GREAT.  I started to do this in the rest of my house....talk about feeling free and light and totally awesome.  I might  share more on the household topic later.

7.  Stop shopping for items you don't love or won't use.  Think before you buy.  Just because it's trendy or Suzy Star is using it, doesn't mean you have to.  I used to shop for tons of patterned paper and supplies, not knowing what I would use them for.  Now when I shop, I feel totally satisfied if I find a few sheets of patterned paper or a new marker.  I know I'll use it and less is more when you totally love something.

8.  Sort and purge often.  You'll feel better.  Once you get over the guilt of spending that money on something, you'll be okay.  Sell it, give it away, whatever you have to do.  A good cleaning out is good for the heart and soul.  Getting rid of that visual clutter is so freeing.  It's okay.  Keep a basket or box handy that you can toss stuff into.

9.  Keep doing what you love.  If you feel you don't have a style, that's okay. Just make what you like.  Don't worry what others are doing.  It's not a competition.  Think to yourself, "Would I make this and like it if it was just for me?" So many times, we wonder what the social media world will think.  Who cares, just make stuff.  Create for the sake of creating.

10. I don't know.  I just feel like this list needs a #10.  I hope you find some thought provoking information today.  I hope you leave a comment and read through the others.  Otherwise, I'm going to have to go back to being a whacko and just talk to myself.  ;)  Enjoy your creativity, friends.  We have a wonderful thing going here.


September 11, 2014

Mini shop update.....

Edit:  Regarding the comment about not being able to open my shop link.  I've had one other person that had trouble but she finally got it to open.....this was a few weeks ago though.  I'm sorry, but I'm not much of a help.  Have you tried clicking the shop link at the left or entering madebymish.bigcartel.com into your computer? 

A few new items in the shop today.  Link is here.  


Related Posts with Thumbnails