May 12, 2013

May Gossamer Blue...Pan Pastels & Stamps

Happy Mother's Day.  Today I have a fun card to share that's all about having fun and relaxing, very suitable for this special day.  I used papers and stamps from the May Gossamer Blue Kits.  I also reached for my Pan Pastels and my Versamark ink pad.  You can see below how I arranged a big assortment of the clear stamps onto a large clear block.  
I was able to make quick work of some word bubbles by inking the entire block of stamps with Versamark clear ink.  I then used my Pan Pastels and sponged color over the inked images.  I used pink, aqua and yellow Pan Pastels.  It makes for a very soft background piece.
I used some black ink splatters over the top.  
For the rest of my card I used fun embellishments, all from the May GB kits.  I used twine from my stash to tie a double wrapping around the card front.  Then I tucked in a flag and resin flower.  Love that look.  The rest of the little pieces and parts are just layered and tucked in here and there.  This is what I love about the Gossamer Blue kits....there are just so many embellishments that there's no need for hoarding.  
Okay, we're off to celebrate Mother's Day.  So thankful that all of our moms are here to celebrate with us.  Time to load up the traditional flower baskets for them.  Have a great day everyone!

May 9, 2013

May Gossamer Blue....watercolored rainbows

I'm back with more watercoloring today and it's all about rainbows.  I chose some papers from the May Gossamer Blue kits that had a rainbow theme to use as a starting point for some birthday cards.  I used watercolors, brushes from my Mixed Media Kit, a spray bottle, my heat tool, 2 jars of water and cream cardstock. 
I always spray my watercolors first to get them moistened up. 
Next I used my patterned papers as a color guide when mixing my watercolors to get a good match.  
I started off with a wash of color, first wetting the entire paper surface with clean water.
Then I painted strips of color onto the wet surface so that the watercolor would soak in and spread out. I used the strips on my patterned paper as to how wide I made my brush strokes.
On this one below I went back in let more of the same colors run down the paper surface.
For this one I just painted vertical lines straight down from the zig zags of color.
While my watercolored papers dried I stamped some sentiment using Papertrey Ink stamps and gathered up some flags from the Gossamer Blue kits. 
Here's my final cards.  I kept them fairly flat and with minimal embellishments.  These will be gifts for our moms and they tend to like simple cards.  I just realized that the right card on the top has the watercolored paper adhered the wrong way & the colors don't match up.  And that's okay! ha.
I used Washi tape from the kits to secure the toothpick flags.  I then stamped stars from the stamp set from the kits and cut them out with my scissors.
The bottoms of my cards have the fun watercolored pieces.  
Hope you enjoy and have a great weekend!  I'll be spending a day with Dina Wakley in one of her awesome art journaling classes. I can't wait to get all painty....

May 7, 2013

May Gossamer Blue...mixed media cards

It's time to share some projects I created using the Gossamer Blue May kits.  I believe all of the supplies I used for today's cards are from the May Main Kit which is still available.  When you click on the link for the Main Kit, you'll notice that the colors displayed with the kit products shown are quite different from what you see in my product picks below.  

Tip: What I love about kits is that you can totally use to suit your style.  When I get a packaged kit the first thing I do is open the kit and flip through all the products.  I immediately turn the patterned papers over to which pattern I like best.  This helps me to get a feel for a kit.  Then when it's time to work on a specific project using that kit, I pick out a few papers at a time and a few embellishments, all in mixy matchy style.  I was totally able to keep my style in mind by choosing the floral paper, the whimsical polka dots, the bright green and some other mixed embellishments.  Give it a try, I think you'll get more bang out of your buck with your kits.  
Once I had my supplies spread out, I knew I wanted to create some cards.  I often will look at what supplies I want to work with then draw out a quick card sketch that incorporates those elements.  You'll see with my finished cards that I was able to stay pretty true to the sketch. 
 I'm all about altering items lately in an artsy fashion because I think it adds a totally unique look to your projects.  For my cards,  I chose to work with watercolors to alter some of the printed die cuts.  I used the floral patterned paper as my color guide and mixed up watercolors in my palette to match the pinks, reds, aquas and yellows.
 Next up I used Gesso from my Mixed Media Kit (now on sale in the shop) to brush on a swipe of white color using the small flat Studio Brush from the Mixed Media Kit.  You'll see on my finished cards what I plan to use the white space for.
 On the fun flashcards type die cuts from the Gossamer Blue Main Kit, I sprayed the water on top to dampen the paper surface.  I then used a round brush from the Mixed Media Kit and applied the watercolor.  I made sure to keep complementary colors away from each other so that I didn't get a muddy color mix.  The results was a soft rainbow mix of swirly colors.  This is a fun technique to try if you're starting out with watercolors.  If you'd like a stepped out tutorial, just let me know in the comments section.  I'd be glad to help you get started.
 I can't remember for sure but I may have need to swipe on the Gesso again to get a nice white layer of color.  Or you could totally do this part after the watercolor dries and not before.  So below you see what my rainbow painted tags look like against my inspiration paper. I like.
Here are the finished cards, my absolute favorites from all of my May Gossamer blue projects. You also see another mixed media card I created.  This got thrown into this photo and I'll do another post showing you how I used modeling paste from my Mixed Media Kit to create the fun sentiment area. 
 Here you can see that I used that fun swipe of white Gesso to create an area for an additional typed sentiment using my vintage typewriter.  I just got creative with other phrases that would make fun sentiments on my cards.  I followed my sketch and used buttons and enamel dots from the kits to add some accents.  The twine is from my stah.
 I love creating these bit notched pieces of patterned paper.  It's a fun way to create multiple, airy layers of several patterns.  I only stitched across the top of these pieces so that layers were kind of flippy, I like that look.  I also used a piece of simple grid paper as a base layer to add a bit more pattern instead of the stark white of the card base.
I really had a fun time creating these cards. I soooo wish I had more of that delightful floral paper. Okay, off to Jordan's softball game....I'm going to enjoy this marvelous sunshine and warmth.  :)

May 6, 2013

So I started an art journal...

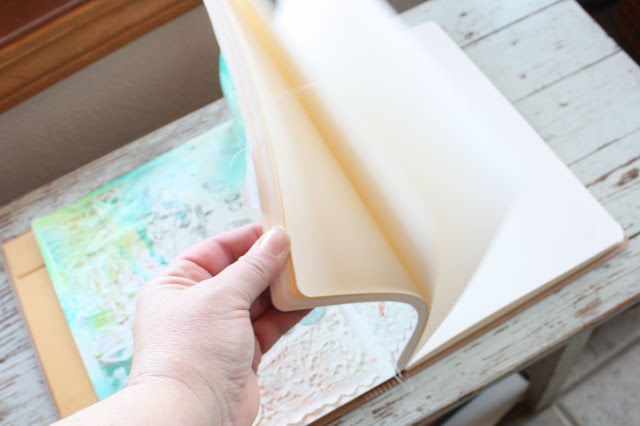
Okay, here goes nothin'.  Or something.  I'm finally sharing my first art journal page that I made in my Dylusions art journal.  You can see what the art journal looks like below. It's a nice big 9 x 12 size with very sturdy covers.  
Inside there is a manila pocket for storing whatever you like and a front cover page.
The inside pages are wonderful quality journal pages that are specifically designed to withstand art medium such as paint, gesso, mists and modeling paste.  This really is a good journal.  If you're interested I am putting them on sale for a short time in my shop.  
So.  I decided to start an art journal. I pinned so many art journal pages, watched a lot of videos, did a lot of research....and I still wasn't quite sure what an art journal meant to me.  I wasn't sure what direction I wanted to take, what I wanted to include.  So I just opened the journal...and it sat for quite a while.  Those nice big 9 x 12 pages stared at me and I stared back.  Then I just started laying down scraps, little pieces and parts that I liked.  Before I knew it I had a whole collage going on.  I really liked the way it looked.  Truth be known, I probably like the before better than the final product but I promised myself I wouldn't judge or critique my art journal.  
 But sometimes when starting something new, you have to take a certain path before you know which road you really want to take, right?  Such was the case with my first art journal pages.  I jumped in one day and just started spritzing and spraying and painting and adding gesso and more.  I kind of feel like I didn't know when or where to stop because I didn't know how I wanted my pages to turn out.  I couldn't help but critique the pages as a finished product.  That's what I'm used to doing...finishing a card, finishing a Project Life layout, etc.  It's hard to just create and dabble and not expect a big "tada" at the end.  But I know that I want my art journal to be just a mixture...not a finished product. So here are my first pages.  Love it, hate it....I'm not sure yet.  But the process felt great, I do know that!
 So I shut the journal and left it for a while.  When I went back to the journal I knew I needed to share it. I know that some of you might be feeling the same way or asking the same questions about why to start or what to do in an art journal.  I'm still asking those questions but I did come to some conclusions.

I will share in a future post about where I think my art journaling might be headed but here are a few thoughts.  I loved looking at these separate photos of the pieces and parts of my pages.  I could break down the techniques and really identify what I loved instead of looking at the entire 2 pages as a finished piece.  I loved seeing little sections and thinking, "hey I would like to try that on a card", etc. Like the Gesso with the aqua spray mist.
 I loved stitching and adding textural items to my pages like this vintage place mat I had in my stash.  I liked seeing how the spray reacted on this old book page.
 I love the white space with just a few splatters.  I loved adding fabric although it totally got muddied up.
 I liked adding in a tag I had made earlier.  I liked working with the color wheel and adding splashes of color to complement each other.
 Overall, it's okay.  Sometimes you figure out what you definitely don't like before you figure out what you definitely do like.
I've got more thoughts that I need to get down in writing.  I'm excited to turn the page and try again.  I think I have a plan and I'm excited to share it with you once I experiment a little more.  Thanks for joining me today.  I can tell you, I was so hesitant to share this but then I remembered...I'm not looking for a good or bad critique.....it was all about the process.  

May 5, 2013

Vintage finds for you...

Did a little junkin' this weekend.

You all know I love the vintage jello molds.  I have more than plenty for myself so I'm sharing these great finds with you.  I use mine in my craft space to hold buttons and little baubles that I'm working with but there are tons of uses for these little tin gems.  
Here's an idea from Pinterest using the tins in drawers.  

Vintage flower frogs have found new uses in the crafty world.  Once used in the bottom of flower vases to hold flower stems in place, they've been converted. We all love to stick in little cards and creations.  These two will be in the shop soon.  
Tool boxes are a hot item right now and I'm always on the look out.  This old, green tool box makes for a cute display box now.  It will be in the shop soon and will come with the 4 vintage jello molds.  

Check out these fun uses from Pinterest.....as a planter for succulents.  

As a pretty planter for Summer flowers.  Click on the photo source for a fun read all about tool boxes. 

How about this adorable little gardening centerpiece?  

Hope you enjoy my vintage finds.  The Spring season (although it's in the 30's here lately) is proving to be a good time to go junkin'!  Look for my items to be in the shop soon.  :)

May 2, 2013

Shop update......

Hello everyone.  I'll be having a shop update tomorrow, May 3rd (in the late afternoon or early evening as I'm waiting on a shipment still).  Most of the time a shop update means that I'm putting new items into the shop that I love and use too.  The new items are definitely things I love and will be putting to good use.  Look for blog updates all throughout May showing you how I'll be using my new products.  

First up is sequins.  I've been using some vintage ones here and there that I've purchased from my local thrift shop. But the time has come and I needed more colors....so I purchased what I like and just purchased a big quantity for the shop too.  
I'll have a neutral set featuring white, silver and gold.  
Then there's the rainbow sequin collection featuring a muted ROYGBIV color theme.  You get all seven colors in one package.  Each color is packaged separately so you can mix and match as you please.  The colors just make me smile. And who doesn't need a nice rainbow after a Spring snow shower.  Yep....not rain.....but snow!  
This vintage tassel packaging kit came about as a need for some graduation and Mother's Day packaging.  These feature ripped pieces of vintage linens.  I sacrificed a pillowcase just for you guys.  :)  I'll be featuring my finished packaging once I get all my gifts wrapped up.  These were inspired by Tara Anderson's lovely layering.  Many of the paper products are sold separately in my shop so it's easy if you want to customize some gift packaging of your own. 
These are cello gift sacks in pretty chocolate color that fit into a square base.  They're so cute with lots of goodies inside then tied up with pretty wrappings.  I'll put together some ideas for these too and will have them on the blog soon.  Great candies, lip gloss & makeup, pens/markers, etc. 
I dug through lots of baskets and bins to put together this vintage paper kit.  It felt good to not hoard all these goodies but rather share them with you.  There's sheet music, dictionary paper, old receipts, a used library book insert, playing card, recipe cards, a Bingo card and the awfully fun Round Tuit.  Totally fun for mixed media, collages, scrapbook pages, cards and perfect for layering.  This kit would go great with my Mixed Media Kit in the shop.
After having completed my first journal pages in my Dylusions Creative Journal, I have discovered that all the rave reviews are right on track.  It's a great journal and if you've considered starting an art journal, this is a good, good starting point.  
It's about 9" x 12" in size and is filled with nice, sturdy pages.  It holds up very well to paint, mists, Gesso, adhesives, modeling paste and more.  
I'll be doing a separate post soon but here's a sampling of my art journal work in the Dylusions art journal.  Eeee, that was fun!  See how cool all those vintage papers above would be in an art journal.  
I've still got some Mixed Florals Card Kits in the shop.  These are great to put together for upcoming Mother's Day cards or graduation cards.  I recently did a few blog posts HERE and HERE full of artsy techniques you can do on the cards using my Mixed Media Kit. 
Here's a sampling of modeling paste on the card and tag.  It's been so fun to add some new looks to my projects.  
In addition to all the goodies listed above, I'm still waiting on a shipment of fun paper items including some vellum and glassine products, card boxes, and a few more items......perfect to use with all the new sequins and perfect for layering & packaging.  I hope you'll me....I'll be gone most of the day tomorrow but feel free to email me with any questions, I'll have my iPhone with me and can reply.  I'll also give a Facebook and Twitter shout out as to when the update will happen.  

A note on shipping and shopping.....if there's anything you want to purchase now that is currently in my shop feel free to purchase those items now.  There's a lot to look at already in the shop.  Then when I do the shop update tomorrow with the new items, you can order again up until I start shipping packages out.  I'll be happy to combine the shipping and refund your PayPal account if needed.  Also, if you check out and your shipping seems excessively high I'll check the actual shipping costs and make refunds if necessary. 

See ya tomorrow!
Related Posts with Thumbnails