Hey there, today I have a rather long post about my Week 2 of Project Life. I have some very special inserts that I want to highlight + today I'm debuting a new feature on my blog called Pick & Choose. With the Pick & Choose feature I'll be selecting a few projects a month where I show you how I go about picking and choosing items from my stash + my kits from Gossamer Blue. My hopes is that maybe a few extra photos that show my process might inspire you when working on projects.
When I start a Project Life weekly layout, the photos are always, always my focus. You can see below that almost every slot is filled with a photo or two. I like to lay my photos out like this on top of my page protectors so I can get an overall feel for the layout. I look for colors or a certain theme that might stand out. For this week I don't really see anything that jumps out at me so it's kind of fair game as far as what supplies I want to use.
So I lay out items from my
Gossamer Blue kits for February. At this first glance there is a big mix of colors and patterns.
I finally end up choosing the products below for my weekly spread. The colors were actually chosen to coordinate with my inserts that I'll be doing this week. I have some photos of my dad with his John Deere combine so the greens and golden yellows really stood out for me. I knew that I could work some of the more neutral colors into my main 2 page spreads also.
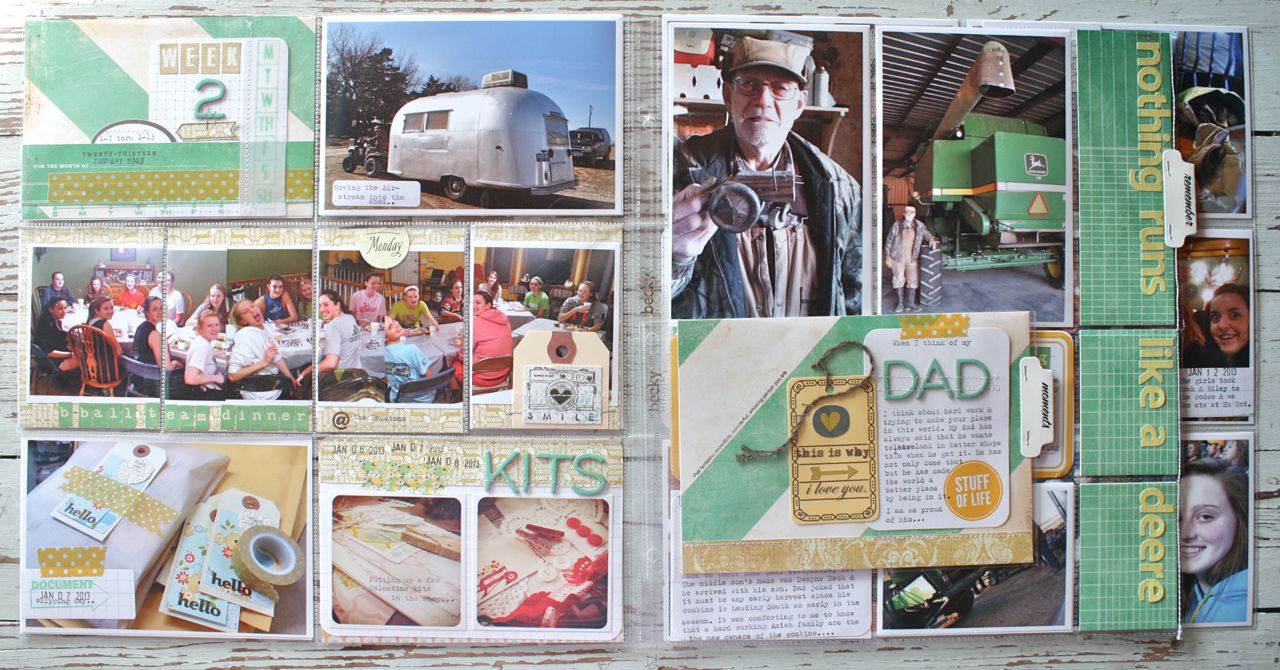
So this is my finished 2 page spread with my inserts sitting in between.
Here's the 2 page spread without the inserts. Not overly done with the greens or the golden yellows but these two pages tie in nicely with my inserts.
The left page.
The right page. You might notice there are lots of photos of people. Sometimes it's hard to coordinate colors and patterns with these types of photos since we can't color coordinate what everyone is wearing. I just go with the flow.
On to the individual inserts. I thought I might show some before and after shots showing you how I chose the specific elements and my thought process. This is the beginning of my Calendar Cards. You might recall that I'm now combining my weekly dated insert and my week in review insert onto one 4 x 6 card. I wanted the green theme to be predominant here so I chose the bold green striped paper. I really loved the January Studio Calico Project Life kit stamp so I used lots of elements from it + one of the back sides of a SC journaling card. To get my green letters, I used a chalk ink pad from a Gossamer Blue kit to color my chipboard letters.
And here is the finished insert. Lots of smaller elements like letter stickers, stamped vellum, typed labels, Washi tape and machine stitching. My Calendar Card is where I'm allowing myself to take a little extra time to get "scrappy" with my Project Life.
For my next 4 x 6 insert I'm working directly on a 4 x 6 photo. I used a simply
Grid Paper Label + an Evalicious stamp + typewriter journaling and some Washi tape.
Here is the finished 4 x 6 insert. By creating a small area for journaling right on the photo, I'm saving a 3 x 4 slot for an actual photo or other story.
The next insert has 2 small Instagram photos side by side. I ended up typing my journaling right onto one of the photos. I picked out a more neutral golden yellow patterned paper strip for the top of the 4 x 6 grid card then added some more inked chipboard letters + a little Washi and machine stitching.
Date stamps are usually the finishing touch to any insert I make. Below is the finished insert.
Here I have more information added right to the photos. On the left photo I used a
Starburst Grid Paper Label with typewriter journaling and stickers. On the right I cut out a portion of a business card and stitched it to the photo. Josey had her consultation for her wisdom teeth removal and then we had lunch before she went back to school.
Here is where I wish I had my new iPhone solely for the purpose of using the panoramic feature. I ended up taking several shots from a basketball team dinner then cutting them apart and piecing them together across 4 of the 3 x 4 inserts.
Here's what the final result looks like. Not too shabby for a homemade panoramic shot.
I had a blank spot in a photo so I added a trimmed down
Medium Manila Parcel Tag with a camera stamp image from Evalicious.
I placed a heart from a Gossamer Blue kit in the middle of the camera then stitched over the stamped image. By cutting down tags, you can add decorative elements without having to use the entire tag.
Next up I had a small photo and ticket stubs from a rodeo we took the girls and some friends to. I created a vellum pocket with typewriter journaling to tuck the bits and pieces into.
The girls took a cute shot of all of their cowboy boots and jeans. I used lots of the stamps from the Studio Calico Project Life set and stickers to create the journaling.
Here are those two 3 x 4 inserts side by side.
Now on to the extra inserts I had for this week. This year I pledged that I wanted to get more stories and capture more emotion for my Project Life. Well this one was a doozy. My dad sold off a lot of his farming equipment and will now have the work hired out. My dad has been farming for over 70 years so you can imagine the emotion that went along with him watching his farm equipment drive off into the distance. It took me a long time to complete these inserts because I was so overcome by emotion. I just had to stop several times because I was so sad for my dad. But I'm so glad I have these pages in my book for my girls and their families to enjoy down the road.
This is the insert which is a trimmed down 12 x 12 divided page protector. The final page size is 10 x 12. I stitched along the right side to create that 2" wide green border strip.
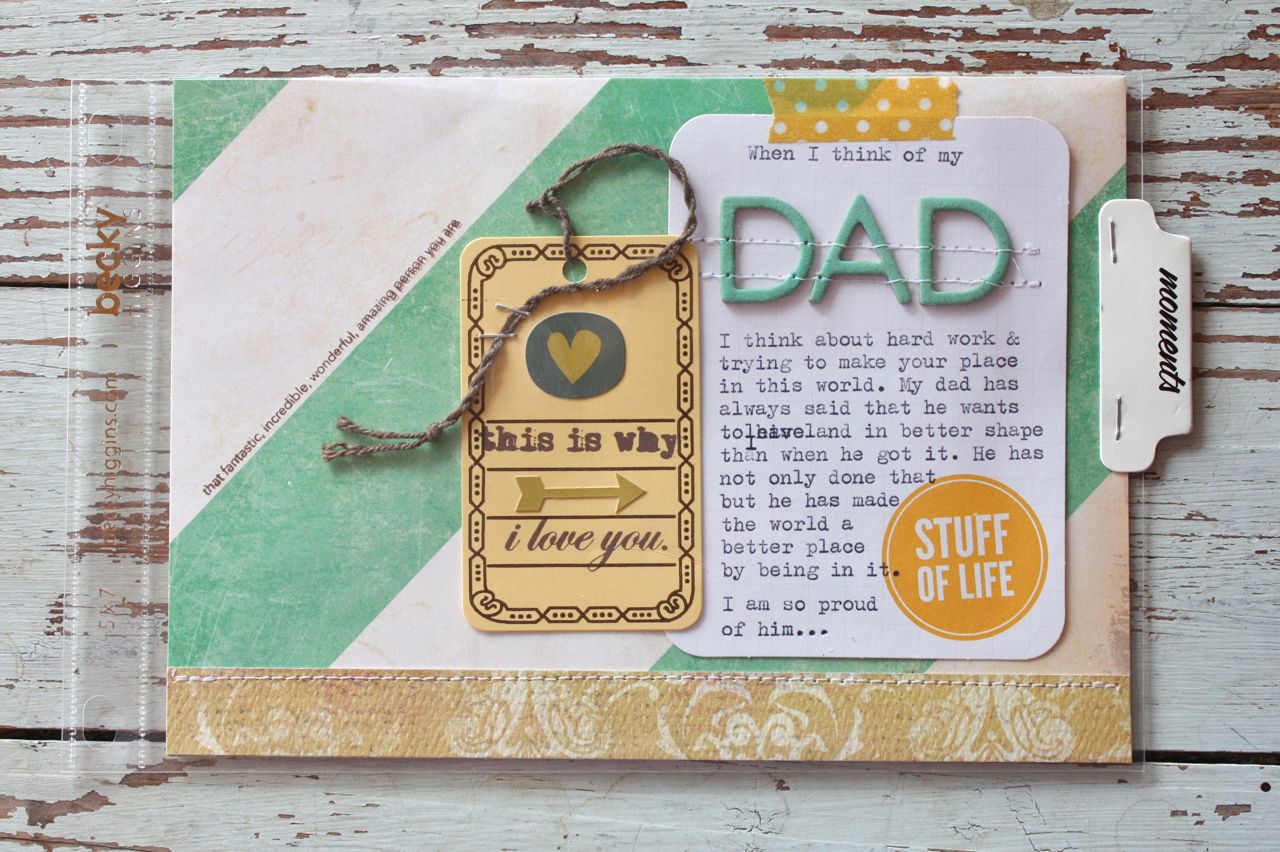
This is a 5 x 7 insert with somewhat of a title page. I used more of the striped green paper with the addition of a Seafoam Project Life card which has the typed journaling + I used a
Printed Hang Tag with added stamping & stickers. The color of this tag was a perfect fit for my inserts.
Turning the page, the left side is the back of the above insert. It holds a 5 x 7 photo which is so meaningful to me. This photos depicts a beginning and an ending for my dad. You can read the journaling included in the inserts below to get the entire story.
This insert shows my dad with his first toy tractor that he made. He was a young boy during the Depression era and his family was dirt poor. He had to make his own toy tractor and I was brought to tears when he told me he used a cracker box for a barn and cucumbers from the garden with toothpick legs for cows. It still brings me to tears as I write this. My dad has come so far and has made such a name for himself with his successful farming. I am so proud of him for his accomplishments.
Dad sold his big green combine to a 3 generation Amish family. They came on this cold January morning to drive it away. My mom and I were there with my dad. My dad was brought to tears as he watched it drive away.
One Little Word story.....my one little word for this year is
find. I have always told my girls that "things are things, but people are what really matter". Well on this day I
found that sometimes things represent who you are and where you came from. That little toy tractor that my dad gifted to me on this day
found a special place in my heart that I will treasure forever. And I
found that big combine that drove off was a part of who my dad has been for all these years. Things do matter.
For the journaling below I used my vintage typewriter on Seafoam journaling cards. I know that it's hard for lots of us to write in depth journaling. I'm so glad that I got the story down though.
For my green border, I used sticker letters to spell out the John Deere slogan. I don't know how many times I've heard my dad say this over the year. We are definitely John Deere people.
This is the back side of the insert with more photos and journaling. In the sunshine I spied this sprig of dried soybeans. It was the last remnant from the last crop my dad ever harvested with his combine. I took the sprig and safely put it in a mason jar to preserve for my dad. The rest of the photos show the combine being driven away. My mom and I just stood behind and watched my dad. It was a definite turning point in his life.
For the journaling, I divided 2 grid cards into four spots for typed journaling. I used a strip of patterned paper to make four quadrants. I used arrows to direct which journaling went with it's corresponding photo.
And I couldn't help but add in this photo of sweet Charlie. When I went home this day I was so tearful and sad for my dad. Charlie stayed right by my side with his little sad face just resting on my jeans.
And now I need another tissue. Who knew the second week of my Project Life would carry such a meaningful story. These are the stories that I want my family to remember. My folks are getting older and each and every day spent with them is a blessing.
Thanks for joining me today. I hope I've encouraged you to dig in a little deeper with your scrapbooking. Tell a story...get the words down along with the photos.






 Posts
Posts


