September 11, 2012

NEW Autumn Basket items now in the shop...

New to the shop today, I've added a fun selection of Fall and Halloween themed items. Perfect for cards, scrapbook pages, and packaging. Stay tuned for a fun blog post coming soon where I'll show you how to gather up Fall and Halloween themed items to create your own crafty Autumn Basket. If you've been following me long, my Autumn Basket will be very similar to my Inspiration Station posts. You can find some of those here along with other Halloween themed projects. I'll be using these same items for my own Fall and Halloween projects so be looking for new ideas on the blog. :)
Edited to add project:

Hi, I'm back again today to add in a little Halloween treat I created using items from the Autumn Basket shop update. Many of you have placed your orders already today and one thing I'm noticing is that you're mixing and matching the Autumn Basket items with other regular shop items. That is exactly what I love about the expanding collection of my shop items. They're all basic staples that can be combined with other shop items to create your own unique creations. All you need to do is add a few of your own finishing touches such as some fun new Halloween themed patterned paper and a homemade treat.

Here I have a simple and quick Halloween treat that would be perfect to set on a teacher's or co-worker's desk. Or add an iTunes card for your favorite kiddo. Before I give you the project details you might be wondering who Jack is and why did he call. These are a few of the giant flash cards I got at the old school auction. There was a one full card that has all of the words that are contained in the box. When I found the name Jack I knew he would work well with my Halloween themes. We have a fond liking of the movie The Shining. Such a classic and even though it's totally old and probably outdated to my teenagers they still like to watch it with us. And Jack is just creepy. So if he calls you, watch out. Remember, all work and no play makes Jack a dull boy. Remember that scene? And switching gears, I could totally place these two flash cards next to a pumpkin and you'd totally get what that was all about. :)

So on with the project. I started out by place a Reese's Halloween treat in a Clear Pillow Box. These boxes are of great, sturdy quality and are perfectly crystal clear. I know I'll be using them well into the Christmas gift giving season.
Next I shook out some of the vintage sequins and beads and grabbed a Rectangle Hang Tag. I adhered a strip of double sided tape to the tag and pressed the tag into my little pile of sequins.
The tape is nice and sticky so it picks up lots of the beads and sequins, leaving a nice dimensional look to the tag. I finished it up with some small alphabet letters.
Directly onto the filled pillow box I wrapped a strip of the Black Tape Measure Washi tape and a strip of the Yellow Star Washi tape. The two colors mix to create fun Halloween look without being too themed looking. I finished off the pillow box with some of the orange seam binding (now sold out) and then tied on my sequin embellished tag.
So, so quick and easy. I sat my little treat box on top of a Dripping Doily, the perfect finishing touch if you want to set the little treat at a place setting, on a desk or perhaps on a pillow for your hotel guests.....oh, here comes Jack again. Redrum.

And that's it for me today. Hope you enjoy and I'm sure you'll be seeing lots more of my Halloween and Fall creations. I just love this time of year. Off to volleyball!!

September 10, 2012

Project Life Week 27, 2012....July 4th & Josey's Birthday

I'm back today along with the Project Life Creative Team to share another week of Project Life. This is Week 27, which includes the 4th of July and that also happens to be Josey's birthday. I'll have some inserts to add into this weekly spread which show more of our July 4th celebration and Josey's big swim party.

This week's spread definitely depicts the holiday week with it's red, white and blue color scheme. I used colors and regular patterned papers to set the patriotic them instead of purchasing any new specific holiday papers.
This week in July always brings back familiar memories each year around this time. It's hotter than heck and dry but there's always a celebration....actually a double celebration with Josey's July 4th birthday thrown into the mix.
Love that I'm capturing this time in the girls' lives. Year to year it will be so fun to look back at the little July 4th outfits we dressed the girls in and now we get to see them nearly all grown up. Plus now we have Charlie in our holiday photos.
For the 4 x 6 inserts, I used an Instagram of some wild flowers and a flag that set the mood for this week. Torn Washi tape under the photo, an Elle's Studio card and stitched on letters complete this little mini layout.
I think this was the week for Elle's Studio in my Project Life. I had just received a new batch of the latest release items and the colors and stamps just worked perfectly. On this pie photo I added a punched out image stamped with Elle's True Happiness stamp. I also stamped a Grid Paper Label with Studio Calico stamps and then typed my journaling with my typewriter. Josey insisted on making the vent marks on the pie...hence the big "J". Hee.
Here's some of Jordan with her friends hanging out at the pool. I love capturing these photos of the girls as I remember those teenage photos were some of my favorites. I wish I had more. I typed on Starburst Grid Paper Labels and added a Studio Calico stamp.
Good ol' Charlie. I often find him with his head hanging over the top stair. He knows I'm downstairs and I'm sure he wonders what the heck I do down there for so long. Here I used another Starburst Label + some Washi tape + a Studio Calico weed veneer heart.
This week was all about reorganizing the craft department. I had brought in my new/old tables from the school house auction and was in major purge mode. An Elle's Studio card was used for the base 4 x 6 piece. A Small White Parcel Tag was used for journaling.
Here I used another Elle's Studio 4 x 6 card for the base insert. I have 2 scaled down Instagrams of Charlie with an added wood veneer arrow, a stamped Rectangle Hang Tag and a typed Grid Paper Label.
On to the 3 x 4 inserts. I made a Week in Review insert using a plain Project Life grid card layered with a cut out Elle's Studio stamp and stamped pieces of patterned paper. A screen shot from my iPhone of the hot weather is always an easy filler piece.
Jordan shot the photo of the cloud with silver lining on the way home from a shopping trip. I'm always pestering the girls to take photos and send them to me to use for Project Life. So when they actually do I try to be sure to add them into my albums. I really should note on the photo when it's the girls that captured the shots. They like to see that. On the right is a hilarious photo of Jordan. Her red, thick hair can do the darnedest things. She has a nickname of "The Fire" from her friends so this hair do is just perfect for that.
On these (2) 3 x 4 inserts I used an Elle's Studio 4 x 6 card which I cut into 2 pieces. I wrote the journaling about Charlie and his new kiddie pool on one and put the photo on the other.
For these 2 inserts I used a then and now theme, showing a photo of Josey from when she was about 4 years old on her birthday and one from the present. I absolutely love that with Project Life you can add in whatever you want and that it can be confined to (2) small 3 x 4 inserts.....but yet tell a story in itself. I used a striped sack to hold journaling about how Josey found this tiny baby onesie while shopping. It says "Mommy's Little Firecracker" and she knows that she got one similar to this from the hospital on the day she was born.
Oh how I love when I can post a new Project Life layout. Currently about 8 weeks behind and I really, really want to get caught up. I like to work in chronological order but I'm really missing adding in the journaling and the stories while it's fresh in my mind. I think that is the beauty of Project Life, capturing the moments in a timely manner before they all get tucked away in a photo box.

So how are guys doing with Project Life? What are you loving? What have you tried that is new? I would like to start adding in the insert pages and stories right while I'm working on a particular week. I seem to make a sticky note of what inserts I want to add and then I just don't get back to them. Those inserts are some of the best highlights, like extra photos of birthday parties, great photos that I want to make larger, big events like the girls winning State and the World Championship this summer. So that's one of my goals. How about you?

Thank you for stopping by today. Be sure to visit Becky's blog where she will have links to the other Project Life Creative Team blogs. You're sure to be inspired.

September 7, 2012

Becky Higgins Class Winner!

The winner of Becky Higgins' Big Picture Class is Angela, with her comment below.
Congratulations Angela!
Please email me at stamplady@satelephone.com and I will get the prize
information to you.
Thank you to everyone else for your insightful comments. It was so
encouraging to read about the hopes and struggles of our day to day lives.

Angela said...

I would love to get back into eating more healthy and exercising. I just had my

2nd baby and I'm looking forward to getting back into a routine of some sort.

Also, be sure to check the post below......

My Type of Friend Card Kit..more creations + cards as gifts..

TGIF everyone. Looking forward to our first home high school football game tonight. As tradition follows, there will be a big weenie roast before the game. Always a good time with small town football!

Today I'm sharing a few more creations made with the My Type of Friend Card Kit. I always like to show how you can take your kit items and "bling" it up a notch. I took one of the completed cards I made from the kit and added a little more stamping in the blank space on the bottom. Next I took a cream envelope that you can purchase separately from the main card kit and embellished it with a Dainty Doily, a Printed Hang Tag, Washi tape from Freckled Fawn and a Studio Calico wood veneer typewriter.
By decorating an envelop, I think a card makes a perfect gift all by itself. You can add in a gift card....or pair it side by side with a gift that has coordinating wrapping and you've got a nice little ensemble. If you prefer to mail your embellished envelopes, simply place them in a larger, padded envelope for safe shipping. "Approved" stamp is from Studio Calico.
If you purchased a kit, you'll see that the Elle's Studio journaling card has the top portion that will be trimmed off and used for the cards. You'll be left with a bottom portion that can be used on cards, as a tag....or for a notebook like I've created below. I used a piece of the Crate Paper patterned paper from the main kit and layered it onto my covered notebook.
On the top portion of the notebook I layered on one of the typewriter instagrams, a Studio Calico arrow stamp and tied October Afternoon buttons and stamped orange tab. I also adhered some of the tape measure Washi from the main card kit below the photo.
On the bottom of the notebook I used the last little morsel from the Elle's Studio journaling tag as a border. I used up each and every little piece. Base cover of my notebook is My Mind's Eye heavy kraft patterned paper. Notebooks are from Papertrey Ink. You just can't have too many notebooks, in my opinion.
I've noticed that many of you have purchased all three of the card kits I've had available in my shop. In this case, you're going to end up with a nice stash of cards in no time. I'll be offering card kits almost weekly as I have enough kits planned for the rest of this year so far.

So what do you do with all those cards? Do you mail them out as fast as you create them? One option that I love for the stash of cards is to use them for birthday or upcoming holiday gifts. I always do this every year for my mom, mother-in-law, sister and Eric's grandmother. They absolutely LOVE to receive a nice stash of cards and look forward to them each and every year.
Here's what I'm doing with my cards that I make from the kits. Remember, each card kit has 5 cards so the pile will add up quickly if you purchase my kits regularly. First I took some heavy chipboard that I save from packages that arrive. I cut these to about 3.5" x 8". I grabbed a few notebook paper labels (I've been using these and my vintage typewriter to label everything lately), typed on the recipients' names and adhered them to my chipboard dividers.
Next I gathered up the cards I've created so far from the kits. Here's a stash of 15 cards that I have to divide up so far.
I stuck the cards behind the name dividers, taking into consideration who would like what type of cards I made. I used a vintage wire basket I had on hand and will just keep this on a shelf in my craft studio.
By the time the holidays roll around, I'll have a nice stash of cards all ready to be packaged up. Usually I am scrambling around my craft studio about December 24th, gathering up cards that I created here and there. This year I will be nice and organized and will simply be able to gather up the cards behind the name divider, package them up and they'll be ready to go!
I hope you give this idea a try. In addition to my family, I usually give the teachers/secretaries at the school a small stash of cards. They love them too and can always use a thank you card or blank note card. I'll be packaging up some cards early for my mother-in-law's birthday coming up in October. Look for a special post on packaging up your cards for gifts soon here on the blog.

Inquiring minds want to know....
Are you interested in card kits that are specifically holiday themed.....for like Christmas/winter? I'm thinking some kits would be a great way to get some handmade holiday cards made up early this year.

Coming soon...
Autumn Basket goodies. A fun stash of Fall and Halloween supplies for you to use on your crafty projects. Look for a sneak peek this weekend. I'll have the items in the shop next week + a fun blog post is coming soon on how to organize all your themed supplies in one place. Stay tuned.....and have a great weekend everyone!

September 5, 2012

Project Life Week 26, 2012 + October Afternoon

Hello everyone. Today I have some fun things to share with you. First up is my Week 26 of Project Life. I recently got a fun stash of the October Afternoon 9 to 5 collection which I absolutely love. If you're a fan of October Afternoon's whimsical style + you love all things office supply, then this collection is for you. Orange and aqua are some favorite color pairings for me right now so I knew I wanted to have some Project Life journaling cards using the fun OA products. These came together really quickly, just little bits and pieces here and there with a few added tags from my shop, some wood veneer pieces and some stamps.
I've decided that I like to save most of the stamping on my journaling cards for when I actually do that week's layout. So most of my cards have lots of nice white space.
I paired the OA goodies up with some Washi tape, Elle's Studio goodies and lots of machine stitching.
My Week 26 of Project Life ended up having lots of October Afternoon products on the inserts, including bits and pieces from 9 to 5 + Woodland Park.
My week started out with jury duty. I was chosen among 150 other potential jurors for a huge case in our town. It was a case that involved a small baby and I was not particularly looking forward to serving on this trial. I spent 2 full days sitting in a chair, staring at a blank wall before I was finally released. I was very relieved to go about the rest of my week, without having to spend 2 weeks in a courtroom chair.
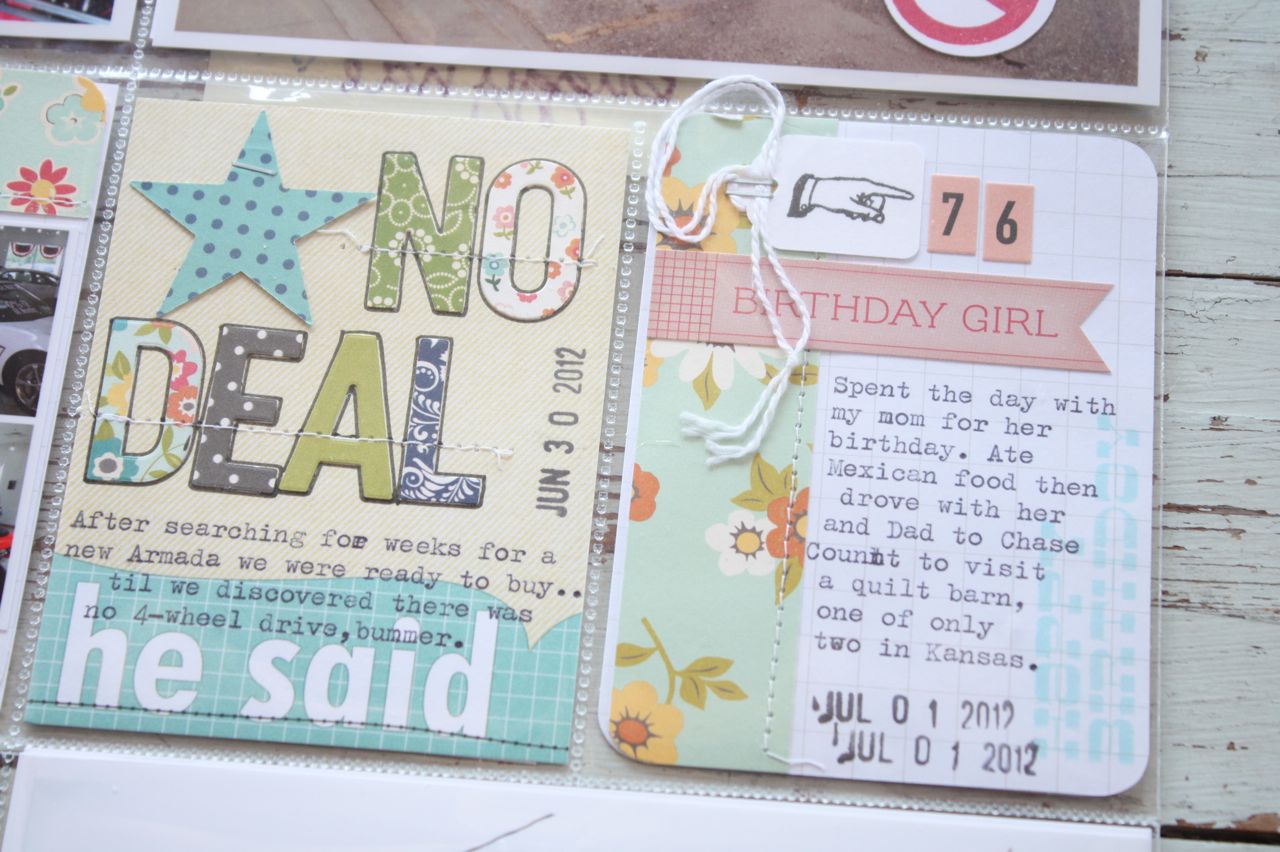
The rest of my week was all about our usual family happenings. We were winding up the Summer league volleyball and basketball, I was collecting the best pickings from our garden, we went new vehicle shopping and my dad and I took my mom out for her birthday and a little field trip to a historic quilt barn.
Once in a while I like to mark my weeks in my Project Life album so that I can reference where I'm at in the year. This was a great time to use the new, colorful stickers from OA Woodland Park. I added them right onto a Project Life journaling card that I turned sideways. I added this to a 4 x 6 piece of OA patterned paper then stitched & added Washi, chipboard numbers and a sticker border.
One of my favorite 4 x 6 inserts showing my before and after of a salsa making session. I used a Starburst Grid Paper Label to type some journaling and then added a Studio Calico stamp.
Here I used another Starburst Grid Paper Label directly on a photo.
A handmade journaling card + a small sack which hides some journaling about the trial going on.
More handmade journaling cards with tags, stickers, and Washi tape added. I used a portion of a Grid Paper Label to add more typed journaling.
Here I took an Instagram photo that I altered with the Diptic app and cut it in half, using one half on each of 2 separate journaling cards. I typed right onto the journaling cards with my vintage typewriter. I love to add tags like the Garment Tags behind strips of patterned paper. I need to go back in and write down Jordan's shoe size and how much her shoes cost for volleyball.
More of the colorful October Afternoon sticker letters on an Elle's Studio journaling card. On the right I added stamp to a Small White Tag.
And another week is in the books. Even though I'm behind I'm not worrying about that at all. Each and every chance I get to work on a week of Project Life is just another week of memories captured for my family. Still loving the process, still chugging along.

Some fun news:
Today I am very excited to announce that I will be joining the October Afternoon Design Team along with Mou Saha and all the other talented OA ladies. I have long loved October Afternoon since their very first products. When looking through my blog projects tagged with OA products, I have steadily used their goodies on dozens and dozens of projects. Their whimsical style and wide array of products is just so enjoyable to create with. I'll be debuting my first projects on the October Afternoon website later this month. I hope you enjoy!


Let's wrap up with an awesome prize package:

The fun continues today as I have an awesome give away for Becky Higgins' Project Real Life class over at Big Picture Classes. This is going to be a very fun class and I can't wait to take part in it myself. You can read all about it below.

To enter for the prize drawing:
Please a comment on this post, telling me something you'd like to implement in your life. Do you want to have more family time, more crafty time? Do you want to get more organized? Do you want to be more a part of your community. Let me know how you would like to cultivate a good life. :) I will select a prize winner on Friday, 8am Central Time. Winner will be announced soon after.
Project Real Life taught by Becky Higgins
12-week workshop for $99
See more at the Big Picture Classes site..
Class starts 10/4/2012

Class Description:
Come join Becky Higgins for a once-in-a-lifetime opportunity to spend some time with her during the last quarter of 2012. As Becky goes about preparing for the holidays, organizing around her home and documenting her family's story along the way, she'll be sharing ideas to inspire you, tips to motivate you, and real-life suggestions on how to cultivate the life you want.
Whether you're a long-time Project Lifer or you're just now hearing about Project Life, you will love learning about the guilt-free philosophy behind this system of memory-keeping. While Becky will give you plenty to think about and do during the 12 weeks of this workshop, she firmly believes that there isn't a person that exists who "does it all" — and it should be the last thing that we expect from ourselves.

Becky's class includes:
● An exclusively-designed set of Project Life cards (3" x 4" and 4" x 6") that will not be available anywhere else!
● Access to a pre-classroom with a presentation from Becky upon registration for class
● Colorful instructional handouts with step-by-step instructions for each lesson/project
● Voice messages, slideshows and videos throughout class
● Three live chats with Becky
● Welcome notes from Becky in the classroom
● Reminder emails when the classroom is updated with new materials
● Message board to share your thoughts with your classmates
● Private posting gallery to share your work and view the work of your classmates
● Supply list with live links to product resources

September 4, 2012

Shipping update....

Hi there, I'm back in the swing of things from the long holiday weekend. I just wanted to give all of you that ordered the My Type of Friend Card Kit and/or other products from my shop a head's up on shipping times. All orders that were placed up to Saturday, August 1st were shipped this morning. Orders placed Sunday through today will be shipped first thing tomorrow. A storm rolled through last night and knocked our local internet out of whack so I couldn't access the emails with your orders.....but the repairman has been here and all orders are now packaged and ready to ship first thing tomorrow morning. Thanks so much for your patience and thank you for supporting my little shop. I'll be back tomorrow with a new Project Life post and very fun give away. :)


September 1, 2012

My Type of Friend Card Kit

Welcome to the weekend! If you missed it, yesterday I had a big shop update with lots of new product. You can view all the new items in this blog post and all of the products are now in the shop too.

One of the most fun items in the shop update is my newest card kit called My Type of Friend. Below you can see all the contents of the kit.
In the kit, there is enough product to make 5 completed cards with wax paper packaging. The sacks are the packaging for this go round but many of you have already picked up a package of the cream envelopes that can be used instead of the waxed paper sacks. The line of cardstock and coordinating envelopes that I've found to use in my card kits is really good quality. I'm very pleased with the weight and feel of the products and I'm happy to use them on my personal cards.
My goal with the card kits is to keep the quantity small enough so that I can still mass produce them but also add in some speciality items. One of the unique items in this card kit is the 4 x 6 sheet of mini typewriter Instagrams. I've used this little image before on some projects and thought it would be so fun to add to some office themed cards for this kit. You can cut apart the square images and use 5 for the cards. You'll have one extra photo to use for a separate project. I'll have more to show you on that in an upcoming blog post.
I've also selected one of my favorite products from Elle's Studio to use in the kits. This fun Lil' Snippet: Notes card is just perfect for office themed cards. I'll show you some additional uses soon for the extra portion that you will cut off the card.
The kit will also uses one of my favorite Crate Paper patterned papers (I originally said it was October Afternoon, my apologies). With the kit you'll also get 5 yards of brown/white baker's twine and a full roll of Tape Measure Freckled Fawn Washi tape.
Here's what the completed cards will look like. Very suitable for any occasion with the inside of the cards left blank.
I'm a hug lover of the office theme, as are many of you. This is a great card design to add to your stash. And there's plenty of fun details like the added button and little strip of Washi tape. The color scheme with the golden yellows and olive greens are very suitable for the Fall season coming upon us too.
In lieu of a traditional envelope, the cards will come with the supplies to create these fun waxed paper sacks to hold the cards. I love it when the card becomes a little gift in itself. You could easily tuck in a gift card, small notepad or a few flat, packaged candies for the recipient of the card.
There will be enough Washi tape to wrap around the front of the waxed paper sack. Simply insert the card and fold the sack around to the back side, then secure with the Washi tape. Then tie a length of baker's twine around the card like a package, string on the tag and secure it with a loopy bow. So cute that the recipient might want to admire the package before ever opening the card. :)
Please refer back to this post for photos of how your cards will be assembled and for any special tips. I think the card designs will be easy enough to assemble just by looking at the photos but if you purchase a kit and ever need help, just shoot me an email.

Today's tip: Once you cut apart the Elle's Studio sheet, you'll notice that the bottom portion of the notecard has an indentation in the lined paper design. There's also the word "date". In my card design (look at the photos above) you can see that I've covered up both of those parts of the notecard. To do this, adhere the golden yellow paper strip over the portion of the notecard that has the indentation. Then using pop dots or regular adhesive, adhere the circle sentiment over the word "date". Just a little strategic placement of the embellishments to cover up those parts.
I hope you enjoy this card kit as I know it will become one of my favorites.

You might like some of these products to go along with your cards:
5 Cream Envelopes- In case you want to use regular envelopes instead of the waxed paper sacks for packaging.
Vellum Envelopes-These really show off your beautiful, hand crafted cards.
5 Yards Brown/White Baker's Twine-An additional bundle to have on hand.
Mini Typewriter Instagrams-Use for additional cards, notebooks, cute tags, packaging, etc.
Clear Card Boxes-All 5 of your cards and envies will bit in a clear box. Tie up with baker's twine and any tag from the shop for an instant gift idea.
Printed Hang Tag-These would fancy up the waxed paper sacks so much. I think they fit in great with the office supply theme.

Coming soon:
Cards as gifts........I'll be doing separate blog posts on how to use cards as gifts and how to get it organized. This might come in really handy for those of you who might like to give cards for Christmas presents.

Additional items made with the kit.....There will be a few extra items in your card kit. I'll show you a fun project using that extra mini Instagram + I'll show you a few ways that you can add extra embellishing to the card kit items to bling it up a notch.

Halloween shop items.....It's my favorite holiday to decorate and make gifts/cards for. I've been collecting some unique items to add to the little shop of horrors. I can't resist making some Halloween cards and gifts to send to friends and family. I'll share some of my new finds with you.


Related Posts with Thumbnails