November 12, 2010

It's a Banner Day

Hi Papertrey friends. It's time for another Design Team Group Post using a much anticipated grouping of products....the Banner Builder stamp set and coordinating dies. For my project I chose to use a sports theme to create some fun door decor for my sporty reds.

Using images from Piney's All Star Team, All Star Team Additions, and Have a Ball stamp sets, I created lots of die cut looking shapes. By embossing all of the images with black embossing powder the cut out images resemble items you'd pick up at your local scrapbook shop. Love. The notch tipped banners are from the new Banner Builder stamp set, along with the pinking shear looking banner topper. And check out those basketballs...they are punched from some textured basketball paper I picked up at my local scrapbook store.
For my banners for the girls I used the large set of notched banner dies. There are two nesting dies which make layering a breeze. I added black stitching to the banners with my sewing machine.
Note: You'll see many of the banner toppers facing downward on the banner. I wanted my toppers to face up so I took a scrap of cardstock and adhered 1/2" Scor-Tape....peeled the backing off.....then added 1/2 of the topper and 1/2 of the top of the banner to the adhesive strip. Makes for a really tight hold. 
To create my banners I simply added all of my embellishments to the banner dies using pop dots. You can really zoom in and see how cool the black embossing looks.
I made two similar banners, one for each of the girls.
I found these great basketball pieces at my local scrapbook store. I thought they would make for some great door decor and a nice backdrop for the banner pieces. Jordan was kind enough to let me use some old shoe laces from a smaller pair of basket ball shoes. These were used to hang the banners over their doors.

Here's a shot of Jordan's door decor. The girls loved them....especially since they usually don't get to tape stuff to their doors or walls.
I also made some cards for the girls using more of the same supplies listed above.
For the background paper I used Pine's Halloween Prints. The black and white stars were perfect since our school colors are black and white. I also used some Cork Paper to place all the miniature banner elements on. I think it resembles a bulletin board that you stick sports pennants to. As a personal touch I added the girl's jersey numbers to some punched circles. The numbers are included in the Banner Builder stamp set.
On the inside of the cards I used lots of quotes from the All Star sets. I thought it would be for Eric and I to add some encouraging comments on each game day. The girls really loved these cards!!
I can't wait to use my Banner Builder accessories more. In the meantime check out the other PTI designer blogs for more banner inspiration:

November 10, 2010

More holiday pouches....

Hey there friends. Today I have some more adorable holiday pouches to show you...once I start making these pouches I just can't stop!
The chipboard elements, papers and stickers are from the Mitten Weather collection at Cosmo Cricket.
I also added lots of goodies from my Etsy shop like the Small Metal Rim Tags and Dainty Doilies.
All the ribbons I used are from Papertrey Ink. When I get some free time I'm hoping to list some of the unadorned Pretty Paper Pouches in my shop. They're just too fun!
You see lots of tags on my projects lately...they're just so easy to embellish and tie onto projects. I love them! For my pouches I used Medium Red, Green and White Parcel Tags. I also have a special addition to my shop this year for the holiday season...a Small Holiday Tag Trio featuring a smaller bundle of tags to use on your projects. This year I'm skipping the Walmart gift tags and will be using simple tags like this to adorn my presents.
Coming up this Saturday, I will be featuring my next round of projects for my guest designer spot at Cosmo Cricket. I'll be using lots of goodies from this Winter Crafting Kit that coordinates nicely with Cosmo Cricket's Mitten Weather line of papers and embellishments. I can't wait to show you my cute projects!! There's still a handful of kits left in the shop so be sure to grab one before they're gone.
And.....as I type I am anxiously waiting for my delivery truck to arrive. I have some of the cutest items arriving today that I can't wait to put in my Etsy shop. Stay tuned! And last but not least, be sure to check Nichole's blog for the Papertrey countdown this month. Super cute stuff coming up! Enjoy all the excitement!! :)

November 6, 2010

Cosmo Cricket Mitten Weather

Edit: Thanks for all the nice comments. :) Five new colors of Wrinkle Ribbon and a Winter Crafting Kit are now up in my Etsy shop. Enjoy!

Hi friends. Today I am sharing some projects that I created for my Cosmo Cricket Guest Designer spot. I'm using the adorable line called Mitten Weather. Totally suitable because it's definitely getting to be mitten weather around my neck of the woods.

For my projects, I created some of my Pretty Paper Pouches and have stuffed then with cute litlte journals and notecards. They're fully embellished with goodies to match the purples, reds and frosty blues of the Mitten Weather collection of papers,stickers and chipboard accents.

My Pretty Little Pouches (coming to my Etsy shop soon) are all wrapped up with Wrinkle Ribbon and have a Dainty Little Doily tucked over the pocket. Glittery chipboard accents that have been adorned with tied buttons rest on top to create a chilly feel.
Small Metal Rim Tags are tied to the Wrinkle Ribbon with purple twine.
This pocket uses some red accents and Wrinkle Ribbon.
The Cosmo Cricket chipboard accents are so easy to work with. They are adhesive backed so all you have to do is peel and stick. Red Baker's Twine was used to attach the circle tag to the Wrinkle Ribbon.
Here are the journals that are tucked inside the paper pockets. I kept the embellishments simple so that these could be tucked into a tote without getting scuffed up too much.
My Medium Purple Parcel Tags coordinate perfectly with the purples in the Mitten Weather collection of papers. I used a label stamp and die and adhesive paper to make a sticker and then stamped it with sentiments from the Get to the Point stamp set. The *things to do* sentiment was stamped on additional patterned paper and cut with notches to add a fun accent. Vintage Buttons were used to accent a Small Clothespin covered with purple flock.
The journals were created with sheets of graph paper, some vintage ledger papers, and a piece of Mitten Weather patterned paper for the cover. The finished size of the journals is 5.5" x 8.5. Simply stack the papers together and stitch down the middle with your sewing machine. Cute stickers liven up some of the inside pages.
I also made a small notecard for each pocket. These use Papertrey's Kraft envelopes and were adorned with Dainty Doilies cut in half, a PTI sentiment and more of the chipboard elements.
Cards go together really quickly when use the Cosmo chipboard elements. Simply add patterned paper to the card front then add chipboard tags that have been tied with Wrinkle Ribbon and red baker's twine.
I added glitter to the tags for a little winter sparkle.
Perfect little cards that can be used for thank you notes, Christmas cards, etc.
A FUN little pocket of goodies that the recipients will LOVE to receive.
Thanks for stopping by. Check out the Cosmo Cricket blog to see the other Design Team members projects.

Note: Ellen Hutson has a great selection of Mitten Weather and other Cosmo Cricket products at her shop HERE.

Note: I will have some Wrinkle Ribbon that coordinates with the Mitten Weather collection in my Etsy Shop soon. Also, I've created a few fun kits that would go well with the Mitten Weather goodies too. Enjoy!

November 5, 2010

Jolly Little Jellies

Hi friends, I'm here today with another episode of Make + Save for Papertrey Ink. With my Make + Save posts, you'll get great gift ideas that you make at home...and save money. Today it's all about the jelly. I love to can fruits and veggies, especially if they are harvested from our summer gardens. This year we had a bumper crop of jalapenos. Gallons and gallons and gallons, they just never stopped producing until the cold weather came. I used up my last few jalapenos and green peppers just last week while making homemade jalapeno jelly. I love to see that festive green color shining through the jars.
Homemade jellies make great gifts for the holiday season. Whether you need a hostess gift, teacher gifts or maybe you just want to take a great appetizer to a holiday party....my decorated jars and gift sack will be unique and much appreciated.
I found some really cute jars this year at Walmart in the canning section. I picked up some of the 1/2 pint jars and adorable gingham lids and white rings. They're cute enough by themselves that I didn't want to add too many embellishments.
I die cut some Rick Rack felt and tied little snippets up in Pure Poppy and Chartreuse Vintage Buttons with Rustic Cream Twine. These were adhered to the jar lids with pop dots.
To make labels for the jars, I die cute Papertrey Adhesive Sheets with the label die from Tea for Two. The *homemade* and *jelly* sentiments are from Just for you and Fruitful. I've been using the adhesive sheets a lot because they already have adhesive on the back that you peel off and they're also thinner than cardstock and will mold around curved items like jars.

The word *jalapeno* was stamped with individual letter stamps. So that the lids could come off with ease, I finished the jars off with Luxe Satin Ribbon just below the lids. So cute and quick too. Love.
For the packaging, I used a Large Coffee Sack that I embellished with more Luxe Satin Ribbon, some craft store ornament sprigs and a Small Clothespin from my Etsy shop. The stamped portion was made using Tiny Treats: Christmas (the gingham print matches my jar lids so well). I used the mistletoe image and drew in some jalapeno peppers on the sprigs using a fine tip Copic multiliner pen. Those are great for getting a fine line width that matches the stamp set. I colored these with Copic Sketch markers in red and green.

Using felt and a new Limitless Layers: 1-3/4" Circle die, I layered my stamped image onto the die cut gingham label image. These were adhered to a Dainty Doily from my Etsy shop and then adhered to the bag front with pop dots.

To make the gift complete, I always include a stack of crackers and a block of cream cheese along with the jar of jelly. To serve the jelly, simple lay the block of cream cheese on a decorative plate or tray. Dump the jar of jelly on top and serve with crackers. If you want to be really generous, you could also give the recipient a pretty plate and a spread knife along with the food goodies. Tip: Thrift shops have lots of plates, trays and silverware that you could stock up on all throughout the year.
I hope you enjoy Jolly Little Jellies. For a complete supply listing, instructions and one click supply shopping visit the Make + Save section at Papertrey website. This link has all of my Make + Save projects to date. Thanks for stopping by!

Note: Jellies like this one are plentiful by doing an Internet search for jalapeno jelly. There are lots of variations using berries and different seasonings.

November 2, 2010

Twinkles and Tinsel Packaging Kits

Flipping over to that November calendar page means that the holidays will soon be here. I'm kicking off my holiday happenings here on the blog and in my Etsy shop. I've got some new kits all wrapped up and ready to go.
My Twinkles and Tinsel Packaging Kits are the perfect way to jump start your holiday gift wrapping. With the kit, you'll get all the supplies needed to create two each of the pretty little packages below. Kits require some assembly and you will need pop dots to stick on the tag elements. For each tag, you'll get a label with an adhesive backing....simply write the recipient's name, peel and stick and you've got yourself some cute packaging. Assemble the tags ahead of time and you'll be all ready for gift wrapping once it gets closer to Christmas.
These kits are very unique to my Etsy shop and will be sold in limited quantities. If you miss out on a kit and would like to create your own gift boxes, many of the supplies can be purchased separately from my shop such as: Kraft Boxes with Tissue, White Boxes with Tissue, Green Parcel Tags, Red Parcel Tags, Twine and the Mini Clothespins.

Shop update: I've got a some more Jolly Jingle Bells in stock. :)

Please remember that any of my kits may be reproduced for personal use only....you know I love to share...... but may not be replicated and sold in Etsy shops, etc. :)

October 31, 2010

First Fruits Revisited

Another Halloween is behind us but I love for the Fall season to linger. As our thoughts turn to Thanksgiving and the holiday season, it's only fitting that the Papertrey's Senior Team challenge was to revisit First Fruits. It's such a timeless and pretty stamp set, featuring autumnal elements of nature.

My first project that I created with First Fruits is a set of blessing cards for the girls. I thought it would be nice for them to take a few minutes this Thanksgiving and write down what they are thankful for. I created these large hanging tags by die cutting paper with the Library Card Tag. The top layers were made by layering a Dainty Doily (more in my shop soon) with a die cut from Tag Sale 2 and First Fruits patterned paper. The pretty acorn images were stamped onto another PTI die and then layered with the words. I put all the elements including name tags created with Small Metal Rim Tags onto metal rings. These will hang nicely from an autumn centerpiece on our dining room table.
Under the doily and smaller tag, I added some old ledger paper and more words from the First Fruits set. This is where the girls can make a list or write a short paragraph about the things they are thankful for this Thanksgiving season.
Next up, I used the same tag elements and papers to create a Thanksgiving card. I added some burlap under the doily for some textural appeal.
With the addition of a brad, I created a swivel card instead of hanging tags. A unique twist to make a fun card.
For some pretty packaging I used a Brown Paper Sack tied with Satin Luxe Ribbon in Terracotta Tile tied with a Small Metal Rim Tag.
Hope you enjoy! Be sure to check out Nichole's and the other Senior Team blogs to see their beautiful First Fruit creations:

Holiday Bookmarks

Edit: Tami asked what the die is under the metal tags.......those are from Papertrey's Tea for Two die collection. The label fits a stamp image from the Tea for Two set, however I use it for lots of other projects. A good staple die to have. :)

Happy Halloween! Hope you have a spooktacular time tonight and get lots of treats. Today is Design Team Saturday at Cosmo Cricket. The design team does some great challenges every Saturday....and today there is a formal announcement about my guest design team spot. You can check it out here. I'll be starting my official guest spot next weekend.

I also have some fun projects to share with you today.....bookmarks. Using the Copic Sketch Marker colors below I first created a pretty bookmark using Papertrey's All Booked Up stamp set.
Bookmarks are so easy to create when using Papertrey's bookmark die. The base paper for my bookmark is Cosmo Cricket's Circa 1934 patterned paper.
I added my punched image to some die cut felt using Papertrey's Limitless Layers 1-3/4" Circle Collection.
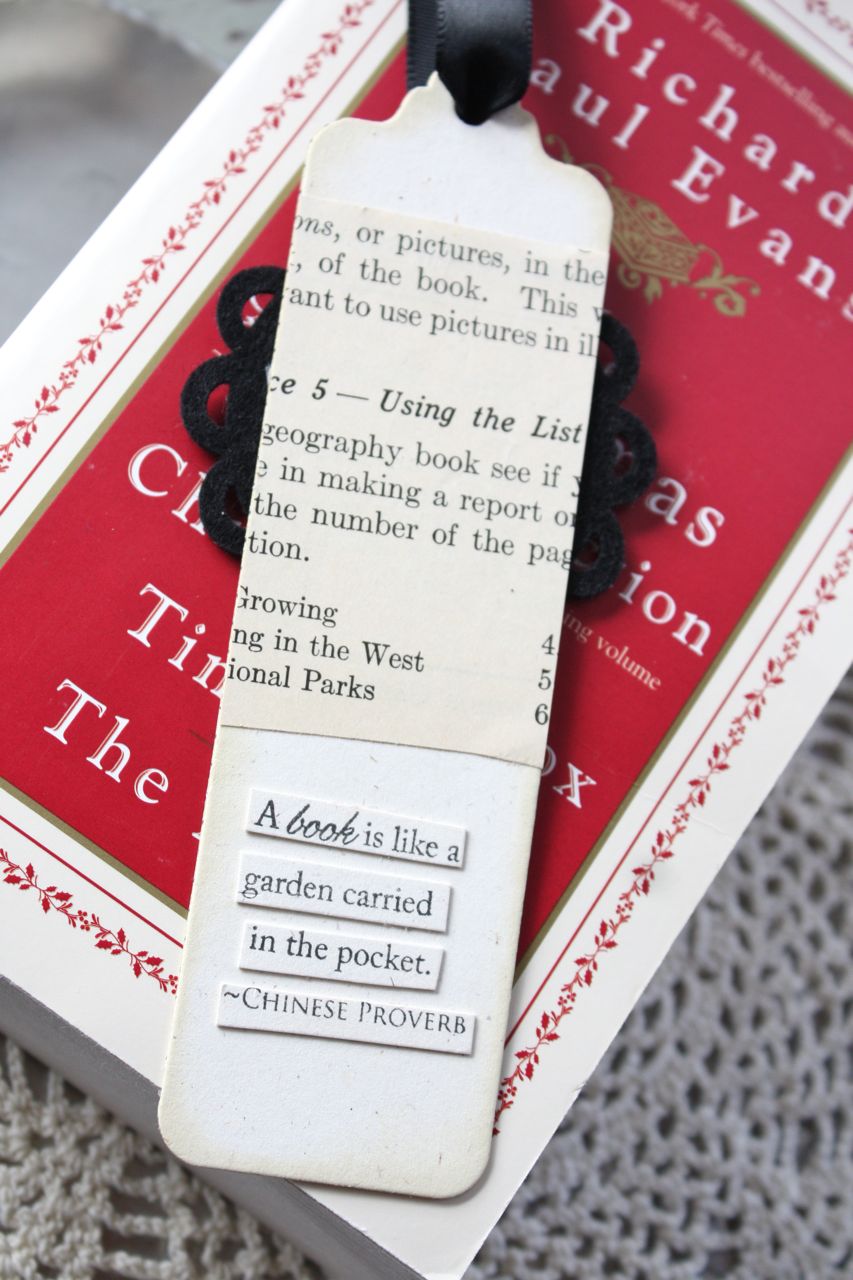
The back of the bookmark has another layer of solid cardstock, some old book print and a pieced sentiment from the bookmark set.
This next ensemble features more bookmarks made with All Booked Up and the coordinating bookmark dies from Papertrey. If you're looking for a fun gift idea this holiday season, bookmarks just might be the ticket.
This bookmark trio features more of the Cosmo Circa 1934 patterned paper and some darling images from an old school book.
The tops of my bookmarks feature a new Etsy item from my shop. I'll now be carrying Small White Metal Rim Tags in sets of ten. Perfect little accents for bookmarks, cards, tags, scrapbooking, jars, and gift packaging. A 1" circle punch is perfect if want to fill the centers of the tags with patterned paper....or shimmery paper stamped with sentiments like I did for my bookmarks.
Wanna create some fantastic bookmark gifts? My new Bookmark Slicks will be great. Bookmarks slide right in to create a visible gift that is oh so cute. The Bookmark Slicks are sold out at this time but I'll be adding more to the shop within the next week or so. I love being able to add unique items to my shop like this.
To embellish my bookmark packaging, I used a Red Sparkly Spring, another embellished metal tag, some red and white baker's twine from Papertrey and a Holly Jolly Jingle Bell(more will be added to the shop soon).
I also made some book plate stickers to add to the inside of book. I die cut these using Papertery's full size adhesive sheets. You just peel off the backing and stick them inside a book. Such a personalized gift. The book plates fit perfectly into my Short Sleeves. I'll be adding more of these to my shop soon too if they sell out...along with the Long Sleeves.
So if you're looking for a creative gift this holiday season, I think books are a great gift. If you want to give a gift early, give a gift of a Christmas themed book. These delightful stories always warm my heart around the holiday season. Nothing like curling up in my big fluffy chair....sitting by the fire....and reading a heartfelt holiday story. By adding in some bookmarks with my cute Bookmark Slicks and some personalized book plates, you've got a nifty little gift. Hope you enjoy!

Note: I have been seeking out some very unique items for my Etsy shop and will be adding them a little at a time over the holiday season. Be sure to check back often....many items are selling out quickly but they'll be back. Feel free to send me an Etsy conversation if you have any questions about items in my shop, larger quantities, etc. And as always, I really want to thank all of you that support my Etsy shop. Your continued loyalty means so much to me and I'm enjoying the conversations I have with many of the repeat customers I'm getting to know.

October 29, 2010

Happy Halloween

Edit: Here is a link for witch's finger cookies. As for the scavenger hunt, clues are given out on a sheet of paper. Teams are formed and you're given a certain amount of time to return to home base. You drive all around to find the clues where certain items are hidden. Some of the clues are just to find items that you may have in your car or purse or at your house. Points are given for each found item. Winner takes the pot of money. Extra points are given for wearing a costume. It's a great time.

Lots of fun happenings around here for Halloween. Tonight the girls are attending a Halloween costume party and dance at school. The girls' costumes are cute!

Jordan and I made these witch's finger cookies a few days ago. They were creepy!
And all my treat packages have been delivered and mailed off to teachers and friends.
Tomorrow we're off to a yearly scavenger hunt. Adults pair up with kids and we drive all over to find scavenger hunt clues. One of the best events of the year!! Hope you have a frightfully good time this weekend!!

Note: There are some new items up in the shop just in time for the holiday season. I would like to take a minute to thank all of my wonderful Etsy customers. Many of you are repeat customers and I love to see your name pop up on my email. I wonder what you do with all my goodies and I hope you continue to enjoy my creative goodness. I am striving to make my shop more and more unique with items that have the can't miss *Mishie Made It* look. Thanks so much for stopping by friends.
Related Posts with Thumbnails