March 30, 2015

1970-Something Kit Projects

Today I'm sharing a few projects that I made with my new 1970-Something Kit.  The colors and patterns in this whimsical kit will take you back in time.  First up I embellished a glassine sack with items from the kit.  Just a little creative layering and you've got the perfect gift sack for candy bars, small notepads, pencils, art supplies, etc. 
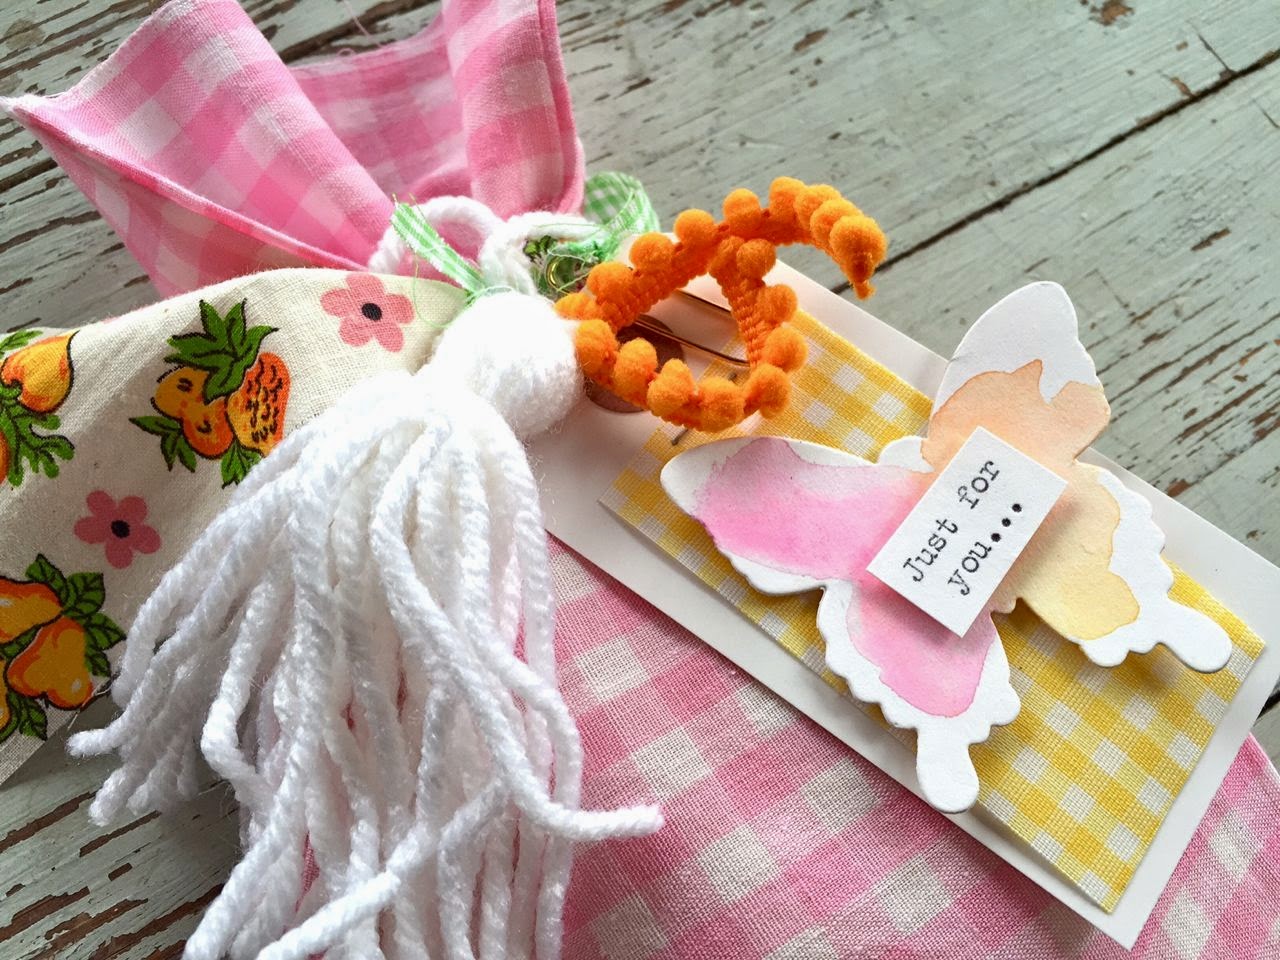
 This project features the hand sewn gingham bag from the kit.  I tied the bag up with the cute vintage fabric strip then added a handmade tassel from yarn.
 I finished the sack off with the gingham tag, ball ribbon, watercolored butterfly and a sentiment I typed using my vintage typewriter.
Kits are still available in the shop at this link.  Individual sheets of the typewriter Instragrams are available in blue and green.  Enjoy!

March 27, 2015

Project Life 2015.....Week 4

Today I'm sharing Week 4 of my 2015 Project Life.  Here's the two page spread. 
The left side. Lots of One Little Bird and Gossamer Blue products this week.
The right side.
For the main, dated 4 x 6 insert I used a One Little Bird digital printable with word overlays.
Love the circle card with the Gossamer Blue wood veneer piece on top.  I created a little messy nest of thread and adhered that below the wood piece.
Journaling under the date stamp.  An easy way to get more than one day's worth of journaling onto one journaling card.
Thanks for stopping by today!

March 24, 2015

It Was 1970-Something Kit.....new to shop

Hi everyone.  It's been a while but I've added a new kit and some cards to my shop.  I've been collecting these 1970-something inspired items for a while now and just couldn't resist putting them into a kit any longer. There's a hand sewn bag that can be tied up with the handmade pom poms.....gingham tags made from vintage gingham ribbon....gingham fabric paperclips.....
 These vintage playing cards are so cute and colorful.
 I've added a few strips of vintage fabric, perfect for tying around a jar of homemade peach jam or around a vellum sack full of goodies. Pom pom ribbon will be cute for finishing off a package.
 Yellow gingham tags....a watercolored, die cut butterfly.....a mini instagram of my vintage typewriter.
So many fun elements to add to packaging, cards, scrapbook pages, Project Life and more.  Join me back here this week as I show you some projects made with my new kit.  Quantities of this kit are in limited supply. Thanks for stopping by!

March 18, 2015

Project Life 2014.....Week 44

This is Week 44 of my 2014 Project Life.  I used One Little Bird printable journaling cards and digital overlay for the week number card.
This week was Halloween week so lots of decor and traditional Halloween colors.
Tailgating at the football game with lots of friends.
I love adding the digital overlays to photos.  I use One Little Bird, save to Drop Box, open on my phone and insert into my apps.
Love this journaling card.  The black and white is a nice contrast to all the color.
Still plugging away at my Project Life.  I'm way behind but just am enjoying the process when I get to work on my albums.

March 14, 2015

Using mixed media on cards...

Hi everyone.  Sorry for the absence.  My whole family came down with the crud and we've been down for over a week.  Man, that was a bad virus.  We're on the mend though.

Recently on the Gossamer Blue blog I shared a fun way to add a little mixed media look to some cards. I started out with these products from the March release.  
This shimmery cardstock was in a kit too and I love how it shimmers.  I typed my card sentiments on some scraps.
I prepared my card fronts to see where my sentiment pieces would be placed.
My mixed media of choice today is modeling paste.  It's thick like frosting or toothpaste and I like to use a palette knife when working with this medium.  Spread out a dab like frosting then scrape up a bit onto the palette knife.
Spread it onto the paper making uneven swipes.  You don't want your layers too thick because they will take longer to dry and will warp your paper more.  I like to use a tea towel and iron over my finished pieces to flatten them out a bit.
Let dry and assemble cards.
You'll have some unique cards with a textured, artsy look about them.
I also used some watercolor on the envelopes then stamped the artsy stamp.
I hope you give this technique a try.  Have fun!

March 4, 2015

Butter Crisp Pie Crust + sweet & savory pies

This is the year that I'm trying out lots of pie recipes to find that perfect pie crust and the best sweet and savory pies around.  My Jordan has been requesting a homemade cherry pie forever so it made it to the top of the list.  

I found a cherry pie recipe and thought it sounded pretty good.  It's called The Best Cherry Pie Recipe....how could I go wrong?  The blog post with the recipe is here and the Pinterest link is here.  The pie filling did not fail.  I  did tweak it a bit to add my own special touches but the original recipe is pretty darn good.  Thick and sweet and tart.  It beats canned pie filling any day.  I started with these canned Oregon cherries.  
 I made the pie filling just as the recipe called for and it turned out beautifully.
 Now on to the pie crust.  I've tried several crusts over the past few months and just wasn't totally satisfied with them. I finally found the pie crust that my mom uses.  She makes the best pies so I was hoping this crust would be the one.  I gave it a try and filled my pie to the brim.
I even cut out a cherry shape to top my pie.
The crust baked up so nice and brown.  My mom always brushes her pies with milk and then sprinkles on sugar. This makes the pie brown nicely and it has the sweetest little crunch to it.
I'm thinking this looks pretty good and at this point we couldn't wait for the pie to cool.
Tada.  It was good, folks.  The crust was flaky but tender.  The pie filling was so thick and sweet and tart.
We all gave it two thumbs up.
I also tried the crust out in a savory pie.  This is Pioneer Woman's back and egg quiche from one of her cookbooks.  It was equally as good and the pie crust was buttery and crisp and yummy.
So I think I've found my perfect pie crust....for now anyway.  I needed about a half more of the recipe to fill my larger pie plates so I suggest doubling the recipe and keeping the leftover crust for little sugar and cinnamon roll ups, etc. I'm not sure if pie pans were smaller back in the day or what but this recipe was a little hard to get a full pie out of it. This pie crust is unlike any other recipes I've seen as it has milk in it.  I think next time I'll try the butter flavor shortening to see if that makes a difference in taste.

Here's my mama's recipe:

Butter Crisp Crust

by Michelle Wooderson

2 cups flour
2/3 shortening
3/4 teaspoon salt (or to taste)
3 Tablespoons butter
1/3 cup milk (plus a little more for brushing the top of the pie)
Sugar for sprinkling

Mix flour, shortening and butter together until consistency of cornmeal.  Stir in the milk.  Chill dough in refrigerator for easier handling. Assemble pie and brush top with milk.  Sprinkle with sugar.  Bake for 20 minutes at 425 degrees then lower the oven temperature to 375 and add a pie crust shield to protect the outer edges of the crust from burning.  Bake for another 30-40 minutes, until the crust looks nicely browned and the juices bubble up thickly.  Remove from oven and let cool for several hours before eating.  Recipe is for a two crust pie but I suggest doubling and saving the excess for another use.

Let me know if you give it a try.  I can't wait to try more pies now!
Related Posts with Thumbnails