Showing posts with label Sleeves. Show all posts

January 31, 2011

Now this is a fun gift.....

Need a fast but oh so sweet gift for Valentine's Day? It's coming up soon. :) Candy is the ultimate quick and easy gift and with a little fun packaging, you'll have a basket full of gifts in no time.

Here I've used my long Notebook Slicks to package up two regular size Reese's candy bars and 4 Ghiradelli raspberry filled chocolates. The entire family can enjoy this sweet little package. You could also fill the Notebook Slicks with items like Pixie Sticks, packages of gum, licorice whips....lots of possibilities for the goodies you can tuck inside.
Using a Medium Manila Tag + some Crate Paper patterned paper and sticker + a Dainty Doily + a lace Yo Yo, I created a beautiful tag that is finished off with machine stitching. Attach with some fluffy ribbon around the filled Notebook Slick and you're good to go. I love that the goodies can be seen through the clear packaging.....instant gratification when the recipient sees this one. :)
Thanks for stopping by today. Stay warm!

December 31, 2010

Love Songs Revisited

Happy New Year friends! Welcome to my first blog post of 2011! It's gonna be a great new year, I can just feel it. The Papertrey Senior Team girls are kickin' off the new year with a post featuring Love Songs. It's a great set chock full of images and popular love song sentiments.

As tradition follows, I make a notepad for just about every occasion. Here I have a fun sample for you using White Notepads and Pine's Happy Spots patterned paper. I've also created a second little gifty item that features my favorite Mark-It markers. It will be the ultimate gift for those who love markers and notepads and all things office-y.
For the notepad top, I used the darling little envelope image and a scalloped circle die from Limitless Layers: 1-3/4" Circle Collection.
The bottom portion of my notepad features the word *love* spelled out on a stitched piece of cardstock. The word *notes* completes the notepad and is layered onto a Tad Bit Bigger Tag from my Etsy shop. The alphabet set used is from Hero Arts.
To package up the little bonus markers, I slipped some patterned paper into a Bookmark Slick. Two markers fit perfectly. I tied up the bundle with some Rustic Cream twine and an envelope embellishment. The small scalloped circle was die cut from the Love Lives Here die collection.
Here's the inside of my notepad. I made it with two notebooks, one adhered to each side of the cardstock cover. I am beginning to include an extra piece of cardstock that is the size of the notepads. This is great when using the Mark-Its so that the ink doesn't bleed through onto the next sheet in the notepad.
A little snippet of a Dainty Doily was slipped under the love accent piece. Such a cute little ensemble.
To package up the two gifts, I tucked them into a Brown Paper Sack. I layered a heart doily (coming soon to my Etsy shop) and a Dainty Doily onto the sack and then tied a Sweet Blush ribbon around the sack.
Another circle embellishment created from Papertrey supplies was slipped under the ribbon. A little pink, vintage bee that I scored from a thrift shop was secured around the ribbon.

December 16, 2010

12 Days of Christmas...Day 10

Hi friends. We're on Day 10 of Melissa's and Mishie's 12 Days of Christmas countdown. Today we have two sspecial guests joining us. We thought Dawn McVey and Heather Nichols might enjoy playing along with today's theme...Stocking Stuffers and Gifts for Girls.
Now. You're gonna get all jumpy in your seat because of this next photo. Cuz I know you love the office supply stuff like I do. Especially markers. Especially when they come in a set of 36 colors.
Especially when they come on this cool fold out portfolio case that screams *take me back to when I was 12 and where was THIS?*
And even more so when you see a delightful rainbow of colors. When I was a kid, I would have wet my Hee Haw overalls that I received one Christmas over something like these markers. Oh how I love to collect stickers and pens. My favorite pen was one that had five colors in one. It was white and you clicked each color at a time. I know you know the one. Stuff like this just wasn't available though. I also remember making a line of perforations on paper with a needle so that I could make my own pretend checks. Back then you ripped the check off of the side and that little flap stayed in the check book. Remember those? And the stationery that was in little plastic folders with pockets. One side had the envelopes and seals and the other side had sheets of stationery. Oh! Those were the best.

Well now that I've taken you on a trip down memory lane, how about creating that same wonderful memory for our girls this year for Christmas. My girls are nuts about these Bic Mar-Its and they've requested a set of their own for Christmas. We first saw them on display at Staples where you could purchase each pen individually. I think those kiosks are no longer set up but they do sell the Mark-Its in sets like the ones I've shown. There are different sets with less number of Mark-Its that I've seen at Wal Mart too.

A story: Josey had her friend Brittney over last summer and we ran some errands in town. We went to Staples and I bought each of the girls 3 of their own Mark-Its. They got to pick the colors. We then went to Taco Bell and the girls had a great time writing all over napkins. When we went to clean up all of our trash, the girls discovered that everything they wrote on the napkins bled through and marked on the tables. It wouldn't scrub off and Josey got a big laugh when Brittney told her that the next time she went to Taco Bell that her and Josey's names were still on the table. Ha ha! Good times. That's what it's all about.
Sooo, these Mark-Its will hopefully make it into the girls' stockings this year. Or maybe under the tree if Santa brings them a big enough set.

Jordan and I love to play our own little game of Pictionary. We go through notebooks of paper playing our little game. The Mark-Its are great fun!
Josey likes to take the entire set of Mark-Its into her room.....just like any teenager, she wants to be alone...and make posters and quotes about softball and sports. She has lots of papers like these taped to her wall.
This summer for Jordan's birthday party, each party girl got a blank white gable box filled with prizes. One prize was a Mark-It that they got to use to sign each other's birthday box. Kind of like an autograph book but in 3-D form. This was Jordan's box. (You can purchase Gable Boxes from Papertrey HERE). I see that she made a color chart of the Mark-Its too. So like me. Love.
So in hopes that Santa pulls through with the Mark-Its, I wanted to create some fun notepads for the girls to scribble and scratch on. I had lots of this cute Cosmo Cricket Pixie-Licious paper, etc left over from my guest designer month so I thought it would colorful and perfect for the girls' notebooks.
I also pulled out some stickers and chipboard accents. I love to have an entire collection of something....makes it so easy to pull together a project.
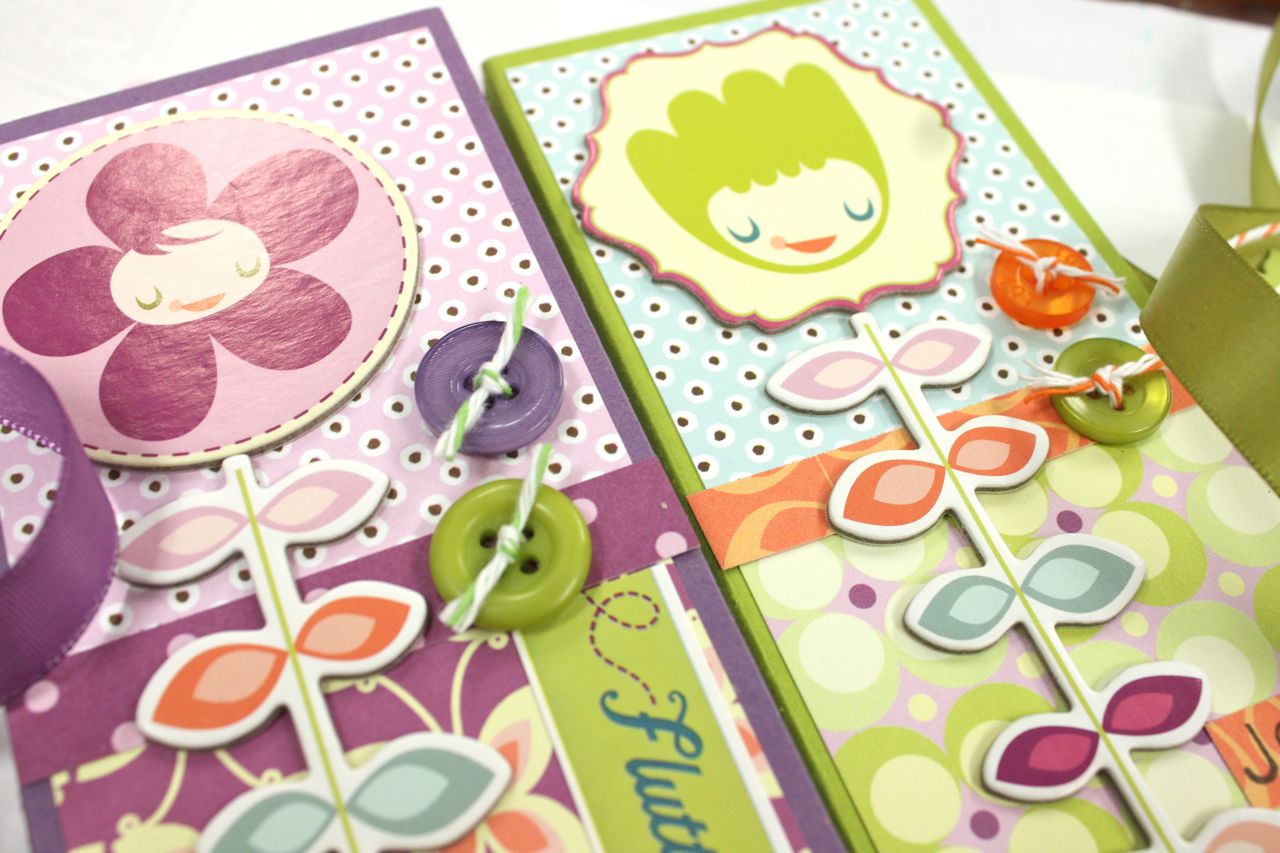
Jordan likes purple and Josey likes this Chartreuse green so went with those two color schemes for my notepads. Here I've selected my Papertrey cardstock colors, my Cosmo Cricket patterned papers and cardstock stickers.
To give the girls plenty of paper, I made the notebooks double thickness. I used two White Notepads and put a strip of 1/4" Scor-Tape along the top. Then I covered that with Happy Spots paper.
I also love to personalize items because everyone loves to see their name on something. Here I've used Hero Arts alphabet letters to spell out the girl's names for tags and on their notepads. A fun tip that I use: Use capital letters for consonants and lower case letters for vowels. It gives a mixy matchy look that I so love. The die I used for the tag is Papertrey's Limitless Layers Collection.
Next, I added my base layers of patterned papers and then my cardstock sticker accents.
Oh so cute and colorful. Papertrey Vintage Buttons tied with baker's twine finish off the notebook fronts.
Here you can see the girl's names. Love.
And so that we don't have anymore Taco Bell incidents, I added a blank piece of cardstock in with the notepads. This way the girls can draw and write notes with the cardstock piece under their paper, preventing the ink from bleeding through onto the next sheet. I can add new cardstock pieces when these get all messy.
And here's the sah-weeet notepads in all their fancied glory. I used Long Sleeves from my Etsy shop so that the notepads could stick out of the top. Notebook Slicks would also work for packaging if you want to enclose the entire notepad.
I tied Papertrey Ribbon around the Long Sleeves and then tied on the glittery name tags. Oh oh I loved making these for my reds. There's nothing more fun that creating a gift for someone special. I hope you enjoyed my stories today. I hope that have fun reminiscing about your childhood favorites. And I hope you get all crafty and make something fun for a loved one this holiday season. I think I'll go play with my Mark-Its now. Maybe write Eric + Shell just like I did in high school. :) (Did you know that only people in blog land and my paper crafting friends call me Mish?....I am definitely not Mish to any of my family or friends.....I guess it's my stage name, ha!)
But before I go, I had to snap a photo of Josey's whiteboard that she has in her room. She stole this from me because *it would be perfect for her room*. She writes down each week's happenings and then draws little scribbles and pictures. So adorable. So teenager-y. Have you taken time to check out your kids' rooms lately? Sneak in there while they're at school and check out their little world. Pretty cool stuff.
We all have this whiteboard obsession at our house along with the markers. I see that Josey has also permanently borrowed my silver tray of whiteboard markers too. Maybe Santa needs to bring everyone their own whiteboard markers too. :)
I have fun ideas to share with you about how to use your whiteboards for homework, chores, lists,etc.....and a little bit how color evokes learning in kids. I'll share that post on another day.

Be sure to check out Melissa's and Dawn's and Heather's posts today too. I know they have something girly and cute up their sleeves. :) Thanks for stopping by today!

Now for my recipe today. Pioneer Woman has a section under her recipes called Cowgirl Food...totally fitting for today's girly post. I am going to try my hand at these chocolate truffles...oh how I love truffles. And with sea salt...yum.


(Photo courtesy of Pioneer Woman)

November 22, 2010

Day 1 of 12 Days of Christmas

Edit: The next 12 Days of Christmas post will be after Thanksgiving. Have a great turkey day everyone!

The much anticipated day has arrived. My sweet friend, Melissa Phillips is joining me for 12 wonderful days of Christmas blogging. Welcome to Day 1! Here is the link to Melissa's post for today.

We're not quite past Thanksgiving yet but we wanted to kick off this week with a special post. We know you all love the notebooks, especially the holiday planners. So our theme today is notebooks. I can't wait to see what Melissa has created, I know it will be swoon worthy. I think a holiday planner is a must during this busy time of year. I like to give my creations to friends and family a bit before the holiday rush begins. Thanksgiving gatherings would be the perfect time to give out these wonderful paper treats.
I wrapped my holiday planner up in a Long Sleeve so that part of the notebook peeks out. I used Wrinkle Ribbon, a glittery holly sprig, baker's twine and a vintage silky threaded ornament to fancy up my packaging. There's nothing prettier than a fancy package.
Here's the front of my holiday planner. I decked it out with papers from Papertrey and The Girl's Paperie. The notebooks themselves are from Papertrey.
I couldn't create a holiday planner and not use my Take Note set from Papertrey. I added a word sticker from The Girl's Paperie to the top of my circle accent. Underneath the circle accent are lots of Papertrey dies and more sticker accents from The Girl's Paperie.
Here I've added some Wrinkle Ribbon tied up with a button, baker's twine and a Small Metal Tag stamped with *no peeking* from Friendship Jar Holiday Fillers and some chunky Martha Stewart glitter. Under all that are some fun banner shapes die cut from Cork Paper and patterned paper.
More word stickers are along the bottom. I love that these have some of the letters colored in.
Here's the inside of my double padded notebook. I covered one side with patterned paper so that nosy little redheads can't see what's inside.
More letter and border stickers. I love those things! And of course, an embellished clothespin that has patterned paper, chunky glitter, and a button tied with jingle bell and baker's twine. Those are perfect for holding recipe cards, little notes and coupons during the holidays.
More word fun with the stickers...
Double sided patterned paper makes for easy work on this cover sheet.
I hope you are inspired to create some holiday planners of your own. Be sure to check out Melissa's sweet creation. Before I go for today, Melissa and I have another surprise for you. Each day of our 12 Days of Christmas countdown, we'll each be posting a recipe. That's a total 24 recipes, peeps!

Today I'm sharing a soup recipe that I made over the weekend for guests. It was the best dish of the night. My nephew ate 3 bowls and said *Awesome Aunt Michelle*. Gotta love that from a teenage boy! The girls said *Mom, we should not just make this when company comes, it's a keeper*. Double bonus points from the reds! Seriously, if you make one soup recipe this winter make this soup. It's creamy and yummy and the best comfort food evah! I served mine with some crusty bread that I drizzled with olive oil, sprinkled with cracked black pepper...and we topped it with cream cheese and some of my candied jalapenos that I made a while back. Heaven in a soup pot, I tell ya! Hope you enjoy!
Of course I had to make a recipe card. The above photo is the front of my 4 x 6 recipe card. Below is the back side of the recipe card. Papers are from Wild Asparagus and My Mind's Eye.
Here's the recipe that you can copy and paste, enjoy!

Potato and Onion Chowder

2 cans chicken broth
1 cup water
½ cup yellow onion, chopped
2 bags frozen, shredded hash browns
½ teaspoon parsley flakes
2 cups cured ham, chopped
1 can celery soup
1 can onion soup
1 cup velveeta
1 small tub cream cheese with chives
half and half, 1 pint
cracked black pepper to taste

Brown onion and ham in large soup pot in a little olive oil. Add chicken broth and water and bring to a boil. Add hashbrowns and cook for 15 minutes or until potatoes are tender. Add parsley flakes, soups, cheese and cream cheese. Let dissolve and cook for 20 minutes. Add enough half and half to create desired consistency. Add pepper to taste. I like to serve with a crusty bread that has been sliced, drizzled with olive oil, topped with cracked pepper and warmed in the oven. The ultimate comfort food and soooo yummy on a cold day. from Michelle Wooderson Nov 2010.

Edited for questions: Both soups were the cream versions...Cream of Celery and Cream of Onion (not French Onion Soup) and I don't know what size the hash browns were...not the giant bags.

October 31, 2010

Holiday Bookmarks

Edit: Tami asked what the die is under the metal tags.......those are from Papertrey's Tea for Two die collection. The label fits a stamp image from the Tea for Two set, however I use it for lots of other projects. A good staple die to have. :)

Happy Halloween! Hope you have a spooktacular time tonight and get lots of treats. Today is Design Team Saturday at Cosmo Cricket. The design team does some great challenges every Saturday....and today there is a formal announcement about my guest design team spot. You can check it out here. I'll be starting my official guest spot next weekend.

I also have some fun projects to share with you today.....bookmarks. Using the Copic Sketch Marker colors below I first created a pretty bookmark using Papertrey's All Booked Up stamp set.
Bookmarks are so easy to create when using Papertrey's bookmark die. The base paper for my bookmark is Cosmo Cricket's Circa 1934 patterned paper.
I added my punched image to some die cut felt using Papertrey's Limitless Layers 1-3/4" Circle Collection.
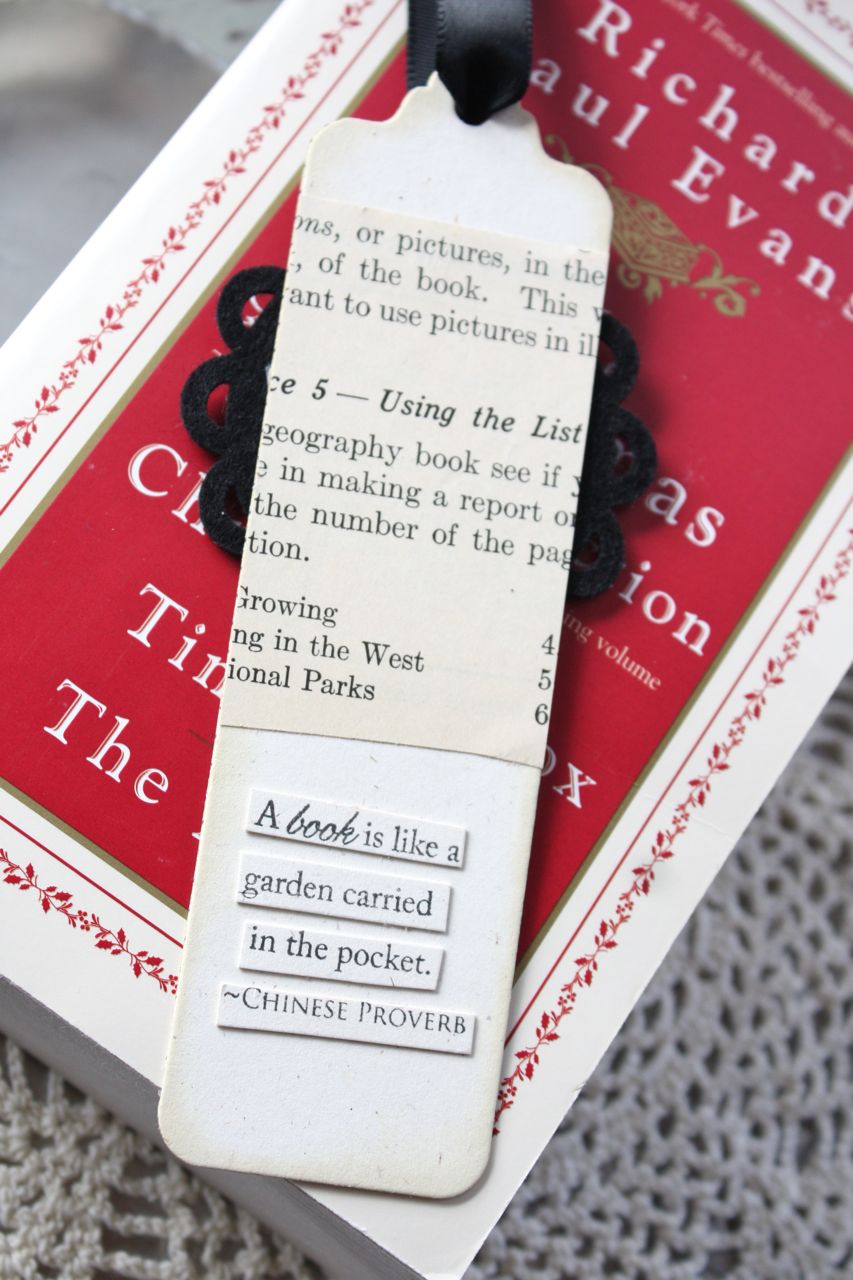
The back of the bookmark has another layer of solid cardstock, some old book print and a pieced sentiment from the bookmark set.
This next ensemble features more bookmarks made with All Booked Up and the coordinating bookmark dies from Papertrey. If you're looking for a fun gift idea this holiday season, bookmarks just might be the ticket.
This bookmark trio features more of the Cosmo Circa 1934 patterned paper and some darling images from an old school book.
The tops of my bookmarks feature a new Etsy item from my shop. I'll now be carrying Small White Metal Rim Tags in sets of ten. Perfect little accents for bookmarks, cards, tags, scrapbooking, jars, and gift packaging. A 1" circle punch is perfect if want to fill the centers of the tags with patterned paper....or shimmery paper stamped with sentiments like I did for my bookmarks.
Wanna create some fantastic bookmark gifts? My new Bookmark Slicks will be great. Bookmarks slide right in to create a visible gift that is oh so cute. The Bookmark Slicks are sold out at this time but I'll be adding more to the shop within the next week or so. I love being able to add unique items to my shop like this.
To embellish my bookmark packaging, I used a Red Sparkly Spring, another embellished metal tag, some red and white baker's twine from Papertrey and a Holly Jolly Jingle Bell(more will be added to the shop soon).
I also made some book plate stickers to add to the inside of book. I die cut these using Papertery's full size adhesive sheets. You just peel off the backing and stick them inside a book. Such a personalized gift. The book plates fit perfectly into my Short Sleeves. I'll be adding more of these to my shop soon too if they sell out...along with the Long Sleeves.
So if you're looking for a creative gift this holiday season, I think books are a great gift. If you want to give a gift early, give a gift of a Christmas themed book. These delightful stories always warm my heart around the holiday season. Nothing like curling up in my big fluffy chair....sitting by the fire....and reading a heartfelt holiday story. By adding in some bookmarks with my cute Bookmark Slicks and some personalized book plates, you've got a nifty little gift. Hope you enjoy!

Note: I have been seeking out some very unique items for my Etsy shop and will be adding them a little at a time over the holiday season. Be sure to check back often....many items are selling out quickly but they'll be back. Feel free to send me an Etsy conversation if you have any questions about items in my shop, larger quantities, etc. And as always, I really want to thank all of you that support my Etsy shop. Your continued loyalty means so much to me and I'm enjoying the conversations I have with many of the repeat customers I'm getting to know.
Related Posts with Thumbnails