December 8, 2010

12 Days of Christmas..Day 7

Edit: Just wanted to add this photo below for reference. Forgot to add it earlier.

Welcome to Day 7 of Melissa's and Mishie's 12 Days of Christmas.
Today you're in for a sweet treat!
It's all about the candy. Our theme for today is Candy Land Cuties...embellishments with a candy theme in mind. Recently I've seen these wonderful, fabric pinwheel flowers but had no idea how to make them. Shimelle has a great video HERE that shows you how to make them. So simple and easy.

Since I love red and white at Christmas time, I immediately thought of peppermint candies for today's project. I had a stash of red and white candy cane striped fabric so I made flowers just like Shimelle showed in her video. I wrapped my spirals with clear cello wrap and tied them off with red and white baker's twine. Aren't they just the cutest little peppermint candy embellishments? Jordan immediately went to work making her own when she saw mine.
Today I'm pairing my peppermint candy embellishments up with candies of the real variety. Reese's Trees are always a holiday favorite of mine and this year we're enjoying these Ghiradelli Peppermint Bark candies, so yummy. I packaged the candies into my new Clear Pillow Boxes. I have a limited supply of these in my Etsy shop for the holiday season but will be carrying them as a regular item soon. They're perfect for tucking in a few candies.
I fancied the packages up by placing a Dainty Doily on top of the Pillow Box. Then I secured a patterned paper strip around the Pillow Box with Scor-Tape. My peppermint candy embellishment is secured to the top with pop dots. Aren't these the sweetest little gifts? I think they'd make a great teacher gift or perhaps a fun little gift for a co-worker. Who wouldn't love to see this sitting on their desk?
I'm going to use these for place setting favors this year for Christmas dinner. I have challenged the Reds to a Christmas Dinner Throw Down this year. They each have to come up with one appetizer and one dessert item, complete with shopping lists, grocery shopping and cleanup! It should be a fun time.

Here I've used a peppermint candy embellishment on a Short Sleeve glassine sack. I love how the favors look so cute sitting on top of vintage crocheted pot holders and my creamy white plates. I've been collecting the potholders all year long, hoping some good idea would pop into my head.
I would love to make a holiday table runner and some cloth napkins using my vintage fabrics I've been collecting.
Ohhhh, I can't wait for our actual Christmas dinner using these pretty place settings.
Hope you enjoy my peppermint twist on some fun embellishments. Look for the Clear Pillow Boxes to be up in the shop soon along with a few fun kits using more pinwheel flowers. And don't forget to check Melissa's blog. I am predicting sugared candies, whaddya think? Also, she has a sweet surprise announcement that you will be giddy about this month. Congrats, sweet friend!

Now for my recipe. You all know how I love to make my white chocolate covered popcorn, right? Well check out this recipe from Our Best Bites for Peppermint Bark Popcorn! Definitely going to make this for the holidays. And Our Best Bites is coming out with a cookbook early next year. A must have for me.

Photo courtesy of Our Best Bites.

Edit: I almost forgot to add this link. You must check out this beautiful wreath that the girls from Our Best Bites made using the fabric pinwheel flowers. So adorable, I must add this to my list of items to make. HERE'S THE LINK.

December 7, 2010

Make + Save: Creative Card Packaging

Hi there. Today I have another Papertrey Make + Save project for you. It's all about Creative Card Packaging and some tips on creating my signature Tent Topper Cards. (Note: If you click on the *Tent Topper Cards* label at the bottom of this post, you'll be directed to all of my blog posts that feature Tent Topper Cards). My Make + Save feature is exclusively for Papertrey Ink. I'll feature the projects here on the blog and links will be provided for the project supplies over at the Papertrey website. You'll be able to easily access all my Make + Save projects in one place. And for your convenience, you'll be able to order the supplies right from the Make + Save links.

On to today's project. Today's Tent Topper Cards feature the Rustic Snowflakes Patterned Paper and the Signature Series Cupcake, Flower and Dress form stamps and dies.
I began by stamping and die cutting the dress form, flower and cupcake images. I also die cut some XL Pure Poppy Felt, cut some Aqua Mist Twill Ribbon and cut strips from the Rustic Snowflakes Patterned Paper. Tip: At this time of year I choose to use colors that could easily be used for the holiday season...but could also be used for every day occasions. Notice that the colors used in my projects contains red and greens, but that I didn't use any actual snowflakes from the patterned papers.
To create Tent Topper Cards, the idea is that the card base is a smaller square and some sort of image sticks up above the card, thus creating a topper to the tent folded card. My card bases are usually 4.5" square when folded. The topper can be any size you want depending on what you will be using for embellishments on the square. If you zoom in, you'll notice that I used Guide Lines I Grid Sheets to add some visual appeal. If you want your Tent Topper Card to stay an A2 size card you just need to make sure that the finished card height is not more than 5.5" tall. I keep a ruler handy when making my Tent Toppers and adhere the topper portion slightly below the 5.5" measurement.
I chose to make 2 of each Tent Topper Card design. The basic layout is the same for each card. The tent topper part has a raised die image, some twill ribbon, tied Vintage Buttons and a stamped sentiment. All of the stamps are from the Signature Series sets. The base cards have various Rustic Snowflakes patterned paper along with strips of patterned papers and the Rick Rack felt borders.
Here I've taken photos of each design. The cute dress forms....
The flowers.....
And the sweet cupcakes.....
All of these cards are generic enough in nature that you can use them for a variety of occasions including birthdays, thank you notes, etc. This little stack of 6 cards with simple white envelopes would make a great gift for someone who loves homemade cards. And I haven't met a person yet who doesn't go ga-ga when they get a gift like this.
What makes giving cards as a gift even more special is the packaging. Using Papertrey's Clearly Creative Card Boxes are one of the easiest ways to package up pretty cards. And since they're clear, your beautiful work shines through. You don't need much else to make the finished packaging look really nifty.
The six cards and envelopes fit easily into my box. Just be careful that you don't use too many dimensional elements on your cards if packaging them into the clear boxes. I used some Aqua Mist Swiss Dot Ribbon to tie around my card box. Then I added a stamped and die cut cupcake that was fancied up with glitter, buttons and baker's twine. A simple eyelet through the top of the die allows it to be tied to the Aqua Mist Ribbon.And that's it. These little gift boxes travel well and look so cute tucked in with other presents under the tree. I hope you give them a try. Tip: Save a few cards from each stamping session and store them in a nice basket. When you need a gift, grab a variety of cards and tuck them into a clear box, all dolled up with ribbon and a fun embellishment. It makes for some very easy gifts that are always appreciated.

Remember, the links at the top of my post will lead you to supply lists and one stop shopping, all in one convenient place. Thanks for stopping by today. :)

December 6, 2010

12 Days of Christmas..Day 6

Welcome to Day 6 of Melissa's and Mishie's 12 Days of Christmas blogging extravaganza. We are back today with another fun post. Thank you for joining and I hope your holiday plans are coming along nicely. We got all the decorations on the tree last night so it is sparkly and beautiful in our living room.
Todays countdown theme is clever uses for BUTTONS. I think I'm safe to say that a good portion of us crafters love buttons of all kinds. I was excited to work on today's project and was inspired by a couple of new items.

First up is this stash of new fabrics I got a while back. A local quilt shop was having a big sale and I got lots of goodies. In fact, I should go back for more goodies.
This book was a real find for me. I spied it in a box of old books at an auction recently. I was pretty certain no one would find it as special as I was but you just never know at an auction. I got the whole stack of books that this one was in for a $1 or so.
It's got pages and pages of directions and splendid little illustrations of patterns and models. Totally heartwarming to me. I'll have to show you more photos another time. I love this section of the book that tells how to become more familiar with pattern envelopes.
Some of my favorite buttons lately are the white variety, especially the molded lacy looking buttons. Oh they are sweet.
And not to mention the gallons of other buttons I have in jars all over the place. I think that hoarding thing is coming into play again.
And the button cards. Simply cute as a button and they have the best graphics on them. Love. I can't bear to use these so they sit all pretty in a little basket.
So after I got out all my buttons and fabric and was totally inspired, I went to work selecting some patterned papers that would coordinate with a few chosen fabrics. I like these three patterns below. Kind of Christmas-y colors but could be for every day occasions too.
Then I chose some buttons. I knew that I could only part with a few of my vintage buttons in the lovely lacy pattern so I chose some Papertrey Vintage Buttons to coordinate.
Using a Medium Blue Parcel Tag, I cut a snippet of my fabric with pinking shears and sewed it onto my tag. I chose the buttons I wanted to use to create a fun twist on a button card. Tags are perfect for creating button cards. I also selected some Wrinkle Ribbon and vintage green lace to match.
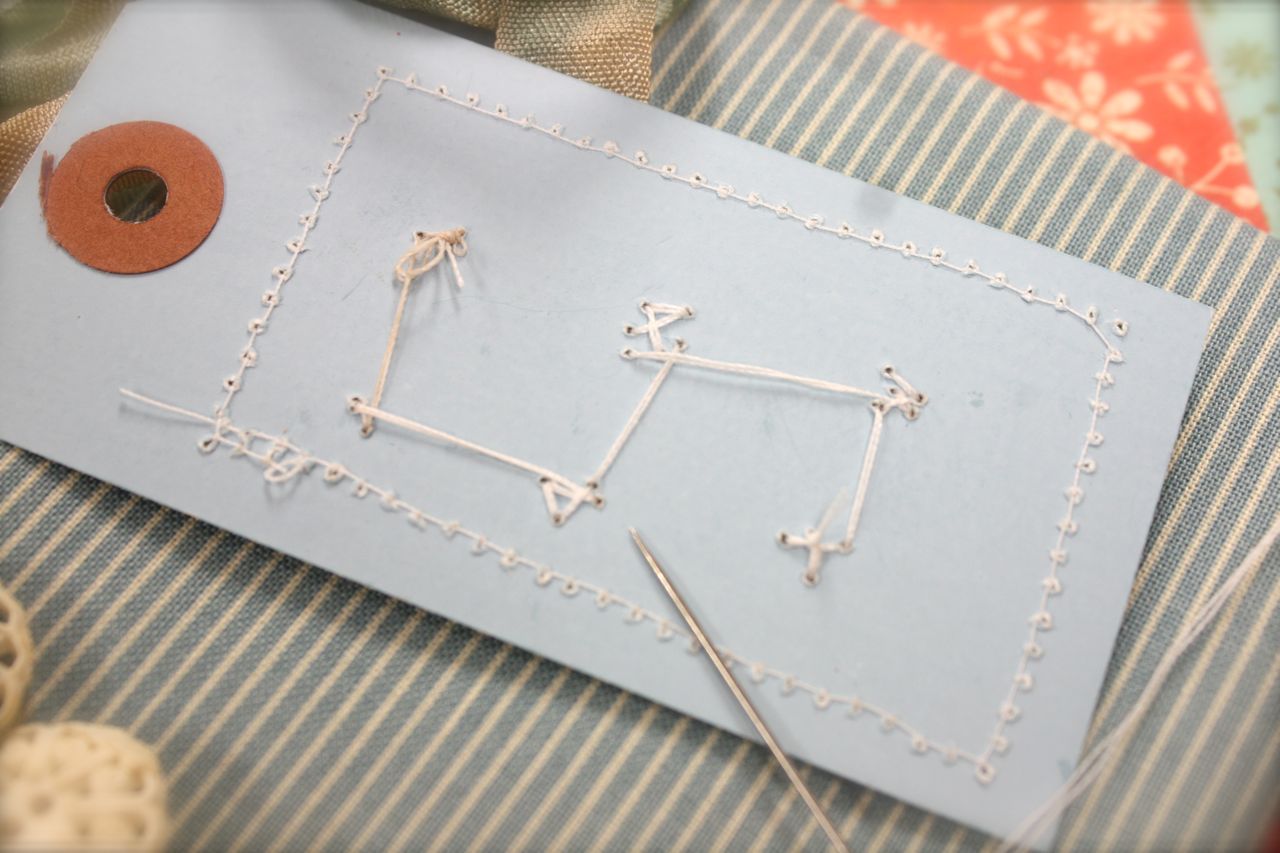
When creating button cards I like my buttons to look like they would as if sewn to a shirt. No ends of string showing. So I use a long piece of regular sewing thread and needle to sew on the buttons. By using a long strand that you double and tie at the end, you can zig zag around the tag and not have to tie off each button. Story: This photo reminds me of when my Grandma Wheat taught me how to embroider. She would quickly inspect the front but then turn to the back of my work and check for neatness. It was equally important to her.
So after completing my button card, I went to work on my card front. I cut strips of patterned paper into different widths and adhered them to my card front. I also stamped some cute pattern piece images from Crafty Secrets on the card front.
Next, it was all about assembling my card elements.
I added a stamped Tiny Tag from my Etsy shop (sold out right now) and a Dainty Doily under the completed button card.
So pretty and dainty. Lots of elements that bring together a perfect sewing themed card.
I used some of the leftover patterned paper and Dainty Doilies to line the inside of the card and the interior of the card envelope. The inside sentiment reads *Cut from a pattern I love.* Perfect little sentiment for a friendly card.
Hope you enjoy my creation today. Be sure to check Melissa's blog for her wonderful take on buttons.

And back in my Etsy shop today: Long Sleeves, Short Sleeves, Notebook Slicks and Bookmark Slicks. I'm loving the uses you're coming up with using my packaging goodies. Enjoy!

DaNg, forgot my recipe again. Melissa and I think alike a lot. I have a fun recipe that I'm dying to try from Our Best Bites. It's so cute in the little jars and I'm craving peppermint this holiday season. It's called Peppermint Fudge Cupcakes. Enjoy!

December 3, 2010

12 Days of Christmas..Day 5

Hello Friday Friends. Welcome to Day 5 of of Melissa's and Mishie's 12 Days of Christmas. Melissa and I are so happy that you're enjoying our holiday blogging event. We'll be taking a break over the weekend but we'll be back Monday for Day 6.
Today's them is so fun...doilies. Doilies are such pretty little things. I always love to pick through the real doilies at the thrift store and think about the teeny tiny little handiwork that some wonderful woman did. To me doilies make me think of Victorian settings...tables covered with a doilies and lavish silver tea groupings. Fancy little things. Today, doilies are making a come back in the sewing and paper crafting world. They're fun to add to purses and handmade items to give a vintage and feminine feel. For paper crafting, the paper doilies are nifty little embellishments.

Today, I'm showing you some gift tags I made using Medium Parcel Tags, holiday patterned paper and a Dainty Doily. Cut patterned paper to fit onto the tag fronts. Cut a Dainty Doily into fourths.
Adhere patterned paper and doily pieces to tags using just a small strip of adhesive. Using your sewing machine, stitch around the patterned paper rectangle. Sewing with the Dainty Doilies always lends a home spun feel to projects.
Using red baker's twine, adhere some felt snowflakes to the tags. I layered Papertrey snowflake dies, punched circles of paper and a wood button. These tags coordinate very well with the wrapping paper I chose for this year. You can see that in yesterday's post.
Now for some gift wrapping. I have loved to gift wrap since I was a kid. And now so does Jordan. Many times I have a larger gift to wrap and I often give away cards or some smaller gift along with the bigger wrapped packages. How about creating some matching paper sacks to match your gift wrap?!! I know. Get out, right!? Using my Brown Paper Sacks (which will be back in stock next week), I stitched on a piece of my snowflake wrapping paper. Love. To finish up the pretty wrapping, I folded a Dainty Doily over the top of the folded sack. I wrapped several layers of brown string around the sack, tying a bow. To that I tied one of my completed tags and a Tad Bit Bigger Tag so that I can write the recipient's name. Oh how I love this! I can see doing this with other wrapping papers like baby papers, guy themed papers, birthday papers, etc. And wait til you see what I do with some fabric that I just purchased. Note: If you take care to stitch close to the edges of the sack, regular A2 cards will still fit into the Brown Paper Sacks.
Next up, I wrapped up some Christmas presents with my matching snowflake paper. I added a Dainty Doily to each package simply by wrapping my brown string around the package several times then securing a bow. Gold foil bows finish off the packages. Eek, so cute.
And look at the little matchy-matchy gift ensemble. How cute will these be under the tree? Heck, they're so cute I might just leave them on the kitchen table as a centerpiece! I hope you try this out, it gives gift wrapping a whole new meaning.
And speaking of kitchen table centerpieces, how about a little peek into some of my holiday decor this year?

A story: I was recently at my favorite antique shop and made my way around the entire shop while the store owner worked diligently at a table. By the time I got all the way around to where she was working, she said *All done*. This two tiered , vintage letter tray was sitting in the middle of a beautifully decorated table setting, completely filled with silver and fancy glasses. I gasped at how beautiful it was and said *I'll take the letter tray*. She smirked and said *I just finished this display*. I replied *And you did a wonderful job*......and then thought *Now wrap me up that letter tray Sista*. And to my house it came to live happily ever after. The End.

At Thanksgiving I used it to hold soup bowls and small plates for a family soup night. Eric thought it was rather cool. I think the dark wood is kinda manly like. For the holidays, I've added some of my favorite holiday dishes and mugs that I have collected. My mom and I would shop Dillard's after the holidays and seek out any of these holly pieces I could find. Very special memories.
To create a darling but very useful hot cocoa tray, I lined the top tray with three doilies that I purchased at the thrift shop or auctions. I nestled in a few mugs along with some old silver spoons and candy canes for stirring. Giant marshmallows are nestled in vintage jello molds. A tea light candle sits nicely in a zinc jar lid while vintage ornaments sit all pretty like. Oh how fun this will be to have hot cocoa on a cold winter's night....sitting by the crackling fire....watching the pretty tree lights......as the girls shake and rattle their presents. A thought: This would make a fun soup bowl tray too. Life is so good for us here in the country. We are blessed. I hope you have a blessed holiday season too.
And these sweet little morslets might just end up in my hot cocoa tray too. So simple...but sweet and crunchy and marshmallow-y. One of my favorite holiday snacks.

Crunchy Peanut Bark

2 pounds white chocolate coating (also called almond bark)
1 cup peanut butter
3 cups Rice Krispies
2 cups dry roasted peanuts
2 cups miniature marshmallows

Melt chocolate. Stir in remaining ingredients. Drop by heaping tablespoonfuls onto waxed paper or divide between two greased 9" square pans. Makes 10 dozen.

Now don't forget to visit Melissa's blog for her sweet doily post. I'm on the edge of my seat just waiting!! Happy Weekend Friends!

December 2, 2010

12 Days of Christmas..Day 4

Edit #3: Sorry guys, but my vintage jello molds are not for sale. Remember that hoarding thing I have going on? I just love them too much to part with them.

Edit #2: Can I just add that I am totally envious of you that have all your shopping done!? I'm going to the city on Saturday with Eric before his company Christmas party. I am going to be organized with a list and conquer! Now don't even ask me about homemade Christmas cards.

Edit: Tracy Y wrote: At this season of thankfulness, I just wanted to tell you that I visit your blog every day, even though I don't post often, I am ALWAYS inspired by you and thankful for all you do!!! Blessings to you and your family!

I just want to thank you guys for nice comments like Tracy's. It takes an extreme amount of work do keep up with the blogging and to come up with fresh, new ideas. Your comments are SO appreciated and it's really what makes it all worth while. I read them all. I know it takes extra time to leave the comments so I thank you for taking those few extra minutes out of your day. I need to do the same when I visit blogs. :)
Welcome to Dat 4 of Melissa's and Mishie's 12 Days of Christmas countdown. Today's theme is Altered Baking Tins. While I'm focusing more on ways to use baking tins for storage, I'm sure Melissa will have a beautiful project that we will all want to recreate for ourselves.

Today I'm going to show you my holiday wrapping station using baking tins for some creative storage. (please excuse the less than perfect photos...there is no natural lighting in my basement so I had to use the flash).

You've seen me use my favorite jello mold tins for years here on the blog. Oh how I love them. I thought you might like to see my ever growing stash. Every time I see these I just have to snatch them up. My mom picks them up for me too. I fully intend to share them in my Etsy shop but then I just hoard them for myself. They come in so handy, I never want to be short handed. Hoarding problem?
But they're so dang cute full of buttons.......
On to my gift wrap station. This is something I do every year in the basement. I have a nice big table that I clear off that transforms into a Santa's workshop of sorts. It all starts with the wrapping paper. Each year I buy wrapping paper on sale for the next Christmas to come. It's always fun to open my wrapping paper box to see what's in there. Looks like this year we'll be using red, kraft and cream. Love.
A couple big bags of shiny bows also make it into the sale stash. Here, I've got lots of gold bows with a few brown ones in the mix. I think the tags that I make this year will have the reds and a touch of brown thrown in......and then I'll use some brown twine to tie it all together.
To fancy up packages I have an old wooden berry basket filled with all kinds of little embellishments, tinsel ribbons, tags and more. The key to easy and stress free gift wrapping is to have a plan....have everything that you need in one spot. And then keep it organized.
I found this muffin tin one day and fell in love. The beautiful, worn blue and brown splatter ware enamel is so pretty. It's a little rusty to actually use for baking but it's perfect for storing crafty embellishments. And it fits perfectly in my berry basket as it can slide back and forth. This would make a wonderful centerpiece too, using the muffin spaces for little tea light candles.
On the opposite end of my berry basket is a waffle textured bread tin. I use this all the time to store Etsy kits, little projects I want to work on in front of the tv, etc. Baking tins are so utilitarian and are perfect for all kinds of storage. Here, I'm using this one to hold my vintage tape dispenser and stapler.....scissors and pens, etc.
And for added fun, why not spray paint old baking tins that are a little rusty and past their baking prime? I pick these up at Goodwill, yard sales, and thrift shops for usually less than a $1.00. I use this Chartreuse green color for most of my tins. Krylon spray paint is abundant in lots of colors at Walmart. Just spread out a large piece of paper and spray outside where the ventilation is good. Here I've used two sizes of bread tins and a fluted jello mold to hold tags and cards I've made, smaller bows and an empty one to hold tags that I intend to make soon for packages.

I love how these tossed away items take on a whole new look when spray painted. They all match and look great in a little grouping.

And here's a little glimpse of a smaller spray painted bread tin that I keep in this basket. This is my *junk drawer* of sorts. It houses all the supplies I use almost daily at my desk. And don't just leave it at spray painting the baking tins. I have spray painted lots of old wicker baskets and my whole office area is now coordinated. Love that.Now. All I have to do is go shopping for gifts and I'm ready for some wrapping! How are you coming along on your shopping? The girls just informed me while waiting for the bus that they're exchanging gifts with all their friends this year. Now we have even more shopping to do. Fun times! :)

I can't wait to see what Melissa's cooking up on her blog. I know it will be drool worthy. In the meantime, here's a wonderful recipe for you. Nothing like a good brownie...but even better with a gooey peanut buttery filling. Enjoy!


Big League Brownies
“An out-of-the-park flavor combination”

Brownie:
1 pkg brownie mix (for 9 x 13 size)
½ cup oil
¼ cup water
2 eggs

Filling:
¾ cup peanut butter
1/3 cup butter, softened
1/3 cup sugar
2 Tablespoons flour
2 eggs

Heat over to 350 degrees. Prepare brownie mix as directed on package, using oil, water and eggs. Set aside. In small bowl, combine peanut butter and butter; beat until smooth. Add sugar and flour; mix well. Add 2 eggs. Spread half of brownie mixture in greased 9 x 13 pan. Carefully spread peanut butter mixture evenly over chocolate mixture. Spread remaining chocolate mixture evenly over peanut butter mixture. Bake at 350 for 30-33 minutes. Cool. Enjoy!
Related Posts with Thumbnails