September 12, 2010

Calendar Basics

I can't wait for you see all the fun project that the Design Team makes with Papertrey's new Calendar Basics stamp set, die and pre-printed blank calendars. I will be blog hopping right along with you all! For my calendar project, I chose to use the 8.5" x 11" pre-printed blank calendar pages to create a fun calendar that can rest in plate or framed photo stand.

To keep my calendar simple and uniform looking, I created a very easy design for each monthly calendar page. I first stitched around each sturdy white blank page. Next I used Kraft cardstock to create a blank rectangle in the open space of the calendar pages. I also punched out label shapes (from a Stampin' Up! punch) and stamped the month and year for each of the 12 months. I went ahead and adhered all the Kraft elements to my calendar pages. I'm ahead of the game already!
For my first calendar month of January 2001, I added some cheery, punched Papertrey patterned papers, a die cut flower tied with a Vintage Button and Rustic Cream Twine and a ric rac cut piece of felt. All from Papertrey. For my personal office calendar, I like to keep one that is totally blank and free from writing. That way I just have a decorative calendar to look at when I need to check dates for assignments, blog posts, etc.
Here is my first finished month for January 2011. All of the other calendar pages for the remaining 2011 months are tucked behind my January calendar page and are held together with Small Clothespins covered with cork paper.
Nichole also assigned the Design Team with the challenge of making a card using the Calendar Basics stamp set. I used elements from Dawn's fun It's Official paper pack to keep in theme with my calendar for my office.
By using one of the memo notes and a few sentiments from Calendar Basics, I created a fun card that could easily be duplicated for birthday, anniversaries, etc. By using the dates and months from the Calendar Basics stamp set, you can really personalize a card with those special dates. The felt and paper flowers are made with Beautiful Blooms II #3 Dies and are tied up with Vintage Buttons and Rustic Cream Twine. A strip of cork paper was used on the card too.
And just for fun, I'm going to incorporate my 2011 calendar into some challenges and inspiration ideas for you. Each month next year, I will be showing you my calendar pages in advance so that you can get ideas, join in on a fun challenge or recreate my pages for your own personal use. Each and every month, I will be inspired by my calendar and will have a fun idea to try. Hope you join in on the fun!
Thanks for stopping by and please take a look at the other designers' fabulous creations at their blog links below:

Grandmother's Parlor Halloween Kit

THE KITS ARE NOW SOLD OUT. THANKS SO MUCH AND ENJOY YOUR HALLOWEEN GOODIES!

Edit: The kits are now up in my Etsy shop. Enjoy! I have had lots of questions about sources and how to's for products in my Etsy shop and here on the blog......please read the new Sources and How To Questions page on the left side of my blog.


Hi friends. Today I have a kit going up in the shop that was inspired by these two photos. Jordan and I found them at the thrift shop. These lovely ladies were surely someone's grandmothers.....the poses so stiff and stoic....but lovely in their own simple way...with their formal black attire.....it makes me wonder who they were, where they lived.....and did they lead a secret life perhaps? I can picture these ladies living in Victorian houses way up on the hill. Perhaps they lived alone. Maybe children were scared to visit them. Maybe they sat in their parlor all day scheming of wicked ways. Maybe....just maybe.....they were witches. Or maybe not.....but it's fun to make up stories about these old photos. Which leads me to my Etsy kit for today. It's called Grandmother's Parlor and is full of items that might have been found in Grandmother's secret room. The kits are all ready to go and wrapped up with a fun tag for you to reuse.
Lots and lots of Halloween goodness in each little parcel....
A pile full of Halloween embellishments and trims.....
The aged looking paper accents could have easily been hiding in Grandmother's desk. Each cubby hole full of tags and writing papers......now faded and distressed with age.
Tickets to a carnival....aged orange tags.....and paper sacks.
Grandmother surely had a sewing kit full of buttons and baubles......and a clothesline to hang her witchy wares......
Spools of string and ribbon.....perhaps to adorn her Hallow's Eve costume........
Sitting in curlers, awaiting that frightfully fun night......where goblins appear and witches delight.
The kits are tucked full of Grandmother's goodies. Visit my Etsy shop to see a full listing of the kit contents.
And of course I was inspired to make a project with some of the kit contents. Using Friendship Jar, Friendship Jar Fall Fillers and the coordinating dies, I made a frightfully fun witchy themed card. Using my Copic markers, I colored the witch's feet using vintage looking colors. By using the jar die as a topper, I was able to use only a portion of this stamped image by enclosing it the jar.
Here's a closeup of lots of little accents that I gathered from the kit. A carnival ticket makes the perfect background for the little tag die cut and coordinating stamps from the Friendship Jar collection. Martha Stewart glitter finishes off the card perfectly. The bat punches are from Martha Stewart. Oh, and see the little goodies in the background photo above? I've been preparing my Halloween Inspiration Station.....coming soon to the blogaroonie.
And as I was sewing the little bats on the carnival tickets, I thought it would be fun to show you a little garland that could be made by stitching together embellishments. I might have to try this with more goodies from my Halloween Inspiration Station. Can't wait to play more!
Thanks for joining me today on my little trip to Grandmother's Parlor. The kits will be up in my shop this afternoon.....just wanted to give everyone a little advanced notice. The kits will be one of kind items and will not be offered again in the shop. :) Be back soon, time for lunch.

September 10, 2010

TGIF

Hi friends, TGIF. Busy here today finalizing my Papertrey projects for the month.....working on an awesomely hauntingly good Halloween kit and putting together my spooookyyyy Halloween Inspiration Station....working on more Wrinkle Ribbon in beautiful Fall colors.....I'll be back soon with it all! Stay tuned.

September 9, 2010

Pickled Jalapenos with Recipes

Hey friends. As Fall approaches, I become somewhat of a nester. I like to start thinking about warm pots of soup, hand quilting my first almost finished quilt top, snuggling up by the fire as I look outside the window......and making homemade gifts. I love to get a little stash of gifts built up early in the season so that the holidays will be stress free when the dates actually arrive.

I have been filling my Etsy with oodles of new gift packaging products. They are all very simple and affordable and will make your gift packaging so easy this holiday season...or any time. :)

Today I have a gift idea to show you using some jars of jalapeno pepper rings that we recently canned. The packaging is simple as can be, looks great because you can see the pretty canned jalapenos and I was done in no time. With so much going on with the girls' activities, simple and quick is the name of the game!

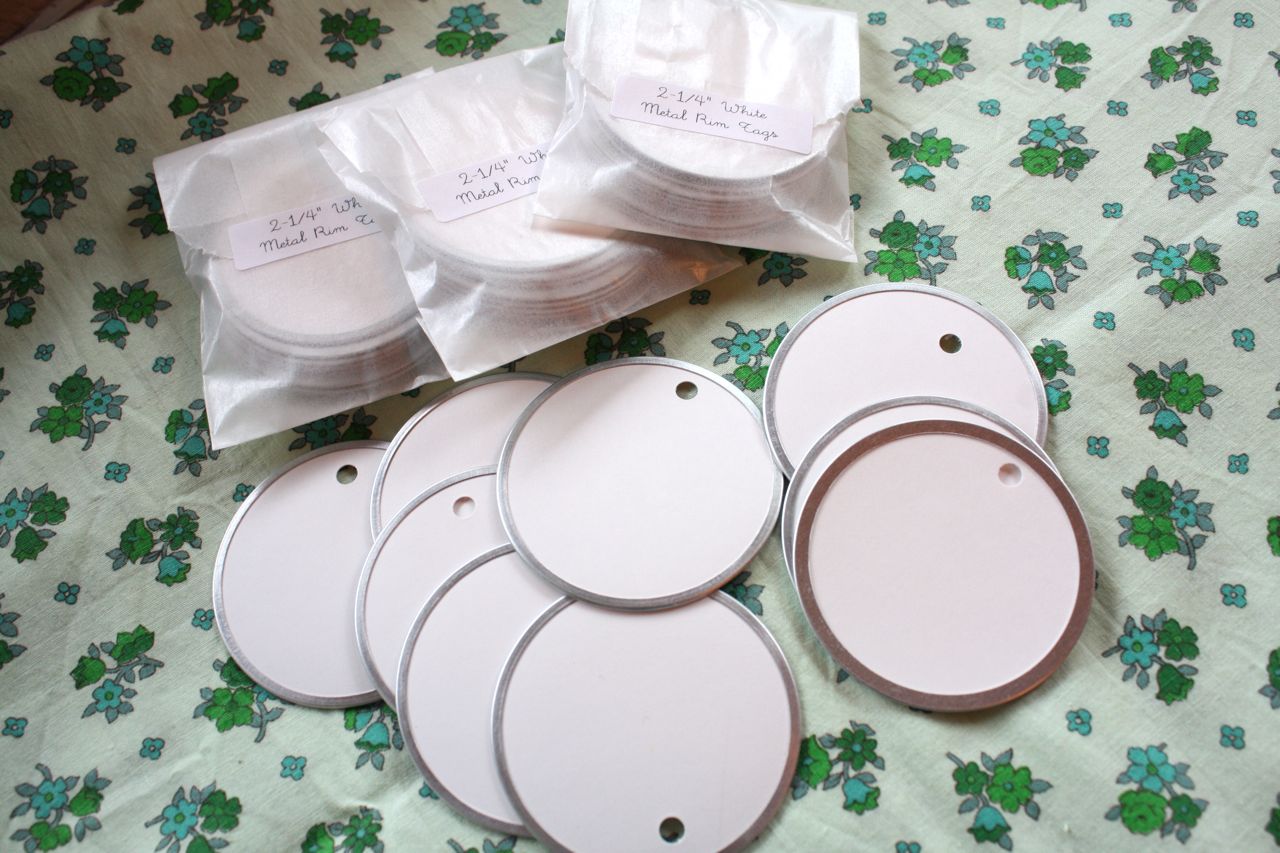
To fancy up my jalapeno jars, I used some new products that are now up in my Etsy shop. I added patterned paper to my new Metal Rimmed Tags then stamped *jalapeno peppers* using an alphabet stamp. I really prefer the hand stamped look over printed tags, so homespun looking.
I then tied my new Cotton Twine around the jars, securing the bottom with a little glue dot. I tied a simple bow at the top of the jars.
Next up I attached my stamped tags to the jars using my Small Clothespins.
Sooooo easy peasy. So quick. So cute. So simple.
Throughout the holiday season, I like to display my little gifty items in fun baskets and trays that I pick up here and there. These little goodies were ready in a snap. I think they hot sitting there all cute like don't you? Now when holiday guests arrive, I can send them home with a cute gift that is all ready to go.
The details: The Cotton Twine is packaged with 5 yards. Perfect for tying up little parcels, stacks of cards, wrapping around jars and boxes, etc. A great staple to keep in your supply stash.
The Large White Metal Rim Tags are packaged in a set of 10. You can keep them simple and clean by using as is....or use a 2" punch or circle die to cut out your favorite patterned paper. The tags can be used for labels, to hang off jars or boxes....on cards and scrapbook pages, etc. So many fun uses for these little guys.
The clothespins that I used on my half pint jar gifts are the Small Clothespins. They measure about 1-3/4" long....oh how I love them.
As a bonus today, I'm including three of my favorite recipes that I'll be sharing with my friends and family when I hand out my jalapeno jars as gifts. I recently came across this wonderful nacho recipe so I think for gifts I'll give a jar of the jalapenos, a bag of tortilla chips and some wonderful melting cheese. All three recipes are great with the canned jalapeno rings. GREAT gift that everyone will love. You could also take it a stsep further and make some handmade recipe cards. That would be super cute! Stay tuned tomorrow for some fun photos of how we made our jalapeno rings!!

Tip: If you like this gift idea but don't can, simply purchase the gallon size pickled jalapeno rings at the grocery store.....divide them up in cute jars......and your gifts will still look great!

To print the recipes, simply copy and paste into a word document or print directly from my blog. Enjoy!!

Crock Pot Nachos-Michelle Wooderson 9/10

These are not your typical concession stand nachos. Seriously kicked up a notch!

3 pounds rump roast (really any roast will do)

1 can diced tomatoes with chilis (10 oz)..I use Mild Rotel

1 whole yellow or white onion, roughly chopped

1 package taco seasoning

Optional add-ins:

Jalapenos

Sliced green pepper

Small can green chilies

Cumin to taste

Ground pepper

Tortilla chips

White queso melting cheese (I find near the cream cheese in a small tub)

More pickled jalapenos.

Cover all sides of roast with taco seasoning. Put roast in crock pot, adding Rotel and chopped onion. Dump other optional ingredients on top. Turn the crock pot on low for about 8 hours. Remove roast from crock pot. Shred roast into chunks with two forks. Put shredded meat back into crock pot with some of the juice. Reheat. Serve over tortilla chips with melted white queso cheese and additional pickled jalapenos. Meat is also good with soft tortillas and refried beans as burritos.


Mom’s Hot Cornbread-Michelle Wooderson 9/10

I grew up on this cornbread and have been making it ever since for my family. No cornbread compares to my mama’s. So soft it melts in your mouth. Go ahead and toss your other cornbread recipes out.

2 packages cornbread mix

½ cup oil

2 eggs

1/3 cup milk

1 large can cream corn

1 cup grated cheddar cheese

2 Tablespoons hot pepper relish (or chopped pickled jalapenos)

Mix all ingredients and pour into greased 9 x 13 pan. Bake at 350 degrees for 25-30 minutes. Serve with butter. Great with chili or Mexican food.


Pioneer Woman’s Restaurant Style Salsa -9/10

I finally found THE perfect salsa that tastes just like the restaurant versions. During the summer I like to make fresh salsa with home grown garden ingredients. During the winter months, this is perfect! I use tomatoes and jalapenos that we can from the garden.

1 can (28 ounce) whole tomatoes with juice

2 cans (10 oz) Rotel (diced tomatoes and green chilies)

¼ cup chopped onion

1 clove garlic, minced

1 whole jalapeno, thin sliced

¼ teaspoon sugar

¼ teaspoon salt

¼ teaspoon ground cumin

½ cup cilantro

½ whole lime juice

Dump all in a food processor. Pulse until you get the salsa to the consistency you’d like. Test seasoning with a tortilla chip and adjust as needed. Refrigerate salsa for least an hour. Serve with tortilla chips or cheesy nachos.

September 7, 2010

Etsy Shop Update

Hi friends. Back in my Etsy shop, by request.......Small Kraft Gift Boxes with Tissue. Stay tuned to the blogaroonie for the Papertrey September release......my Halloween Inspiration Station using lots of new Halloween goodies I'll have in my Etsy shop......and gift packaging ideas for all of the upcoming holidays. It's a good thing here in the blog hood.

September 5, 2010

Easy Card Layout=Simple Gift Idea

Edit: 7 down and 2 to go......the happy campers are on their way. They all had a great time and got along so well. When I peeked in the tent, Jordan had on a purple KSU t-shirt and a pink bra over the top of it. Definitely not her size so I asked who the unlucky girl was that got her bra stolen last night. Poor Kara. Kara also got Sharpied the night before because she stayed two nights. You gotta be careful around our house Kara. I tried to tell her to never ever be the first one to fall asleep. Anyway, headache is gone...tent is all picked up....dishes are one...laundry is up next.....and I used leftover hotdogs to make scalloped potatoes and weenies for a crockpot supper. Yummo! I got permission from Susan to post her layout that I used for my inspiration...it's at the bottom of my post. Thanks for stopping by.

Hi friends. I have nine girls in my back timber as we speak. They camped out last night....ohhhh, the weather was perfect! Eric and I decided to have an impromptu camp out for the girls since we have a long weekend. Eric made the phone calls and rounded up NINE giggly girls for the weekend. Then he gathered them all up and did the grocery shopping. A bonfire with hot dogs, chips, No Bake Cookies and S'mores, yummy! They played hide and seek in the timber til they all got a little chilly. This morning Eric brought them donuts and milk and stoked their fire again. Me? I've got the worst headache that I've had in ages so I'm hiding out with my computer. I'm sure I'll be on laundry duty here soon. Go
od times, great memories. :)
Needless to say I'm not getting much crafting done but I did work on a project last week. After gathering up my latest vintage finds, I realized that I must be on a yellow kick. Everything I bought was YELLOW. I think it must be this time of year. Summer is winding down but it doesn't quite feel like Fall. I think the mustard-y color of yellow just appeals to me this time of year.It made me want to create something using my new Marigold Rustic Clothespins.
So I set out to create some simple cards that I could use as a pattern for easy gifts. I sometimes forget that cards make the most wonderful presents. Everyone loves them and you have all the supplies you need already in your crafty stash. When I make cards for gifts, I like to keep the design simple so that I can mass produce with ease. I found great inspiration for my cards today from Susan Weinroth. She is a very talented scrapbook, crafter and seamstress...her blog is sweet eye candy. I was inspired by this blog post...particularly the third layout down titled Sweet Boy. I chose a few simple elements from her page layout to come up with an easy card design.

Here's the basic layout of the card as you can see below. For ease of mass production, you cut two squares that are 2" x 2" and one rectangle that is 1-1/2" by 4". I'm using that wonderful marigold yellow as the main color for my cards today so each piece of patterned paper has some yellow in it. Most of my papers are from October Afternoon. To assemble the cards, simply start by adhering one square to the bottom left corner of the card base. Then just fit in the other square next to it and align the rectangle on top. Soooo easy. This is a layout I'll be sure to add to my sketch book.
For the next part, simply add a strip of ribbon using 1/2" wide Scor-Tape. I notched the right edge of my ribbon with sharp scissors. The ribbon I'm using today is Harvest Gold Saddle Stitched Ribbon.

Then I made up a bunch of sentiment pieces using Pine's Fillable Frames #6 stamp and coordinating die. I used *just a note* on each piece which is from my Take Note stamp set. Flower embellishments were added from a little pack I picked up at Michael's. I glued sequins to some of the centers.
My cards were sooooo easily and quickly assembled that I could have made an entire stack. Seriously.....so easy but super duper cute, don't you think. Tip of the day: Let's not over think our projects. Keep it simple. Add some fun details. Limit the products you use so you don't get overwhelmed.

I ended up with six cards for this gift ensemble, using 3 different designs. This first one uses a fun row of houses and polka dots. The *just a note for you* combo of sentiments is fun....and makes for some good, generic notecards.
This next color combo is sooo pretty and lady like...again with the fun sentiments.
And here's my last two cards, using a thank you theme. Notice how I repeated elements on all six of my cards.....I used the same Fillable Frame for all six cards, the same *just a note* sentiment, the same ribbon, the same flowers just in different colors......and the patterned paper was all from one company. So easy to mass produce when you limit the supplies.
And here's a fun little idea for you to try. Swipe a sentiment with a Copic Sketch marker to tie in the sentiment with the rest of the colors on your cards. Here I used a yellow color...maybe Y21....to add a little burst of color.
My cards came together so quickly that I had time to create some fun envelope Label Wraps. You simply mask off the label....stamp the background...peel off the mask....then stamp the label. The two spaces leave room for you to write the recipient's address and your return address. Then you wrap the label around the envelope once it's all sealed up. What a way to fancy up a card! The cute stamp I used is from this set, available at Star Lit Studio.
And here's my completed ensemble of cards, envies and coordinating Label Wraps. I used a Mini Clothespin to adhere the labels around my set of envelopes.
Next I packaged all the cards and envies up in a Large Cello Gusset Bag. I love that you can see the cards through the packaging. Sooo pretty.
I closed the bag shut with a Marigold Rustic Clothespin tied with some Wrinkle Ribbon. A Medium Manila Parcel Tag stamped with *notes* from my Take Note set makes for a simple gift tag that I can write on when I know the recipient's name.
Okay, another gift ready and waiting in my stash basket. LOVE. Hope you enjoy! Remember....you can easily change up this design to make Halloween cards, teacher themed cards....or maybe you want to get an early start on Christmas cards. I just love this layout, hope you do too!

Well, my headache is going away a little bit.....think I'll go check out the Happy Campers and see what they're up to. I've already heard a few upstairs in the bathroom, trying to wash Sharpie off their faces. Jordan has struck! LOL!

Me again....Susan was so nice and let me post her layout here that I used for inspiration for my cards. You can see the blog design, the horizontal pennant element with frame....great inspiration! Thank you Susan.

September 2, 2010

Clothespin Love

Oh how I love the clothespins. I think they are one of the niftiest inventions ever. Did you know that the first clothespin was invented by David M. Smith in 1853? The Shakers actually used a version of a clothespin before that though. Wow, clothespins have been around for a long time. Growing up, we hung laundry out on the line any time that weather permitted. I remember my mother provided me with a step stool so that I could reach the clothesline to hang out clothes. I must have been a youngin' to have been that short. And every morning before school, it seemed that she had a fresh load of laundry for me to hang out. I can remember scurrying to hang the last items before the bus arrived. I was so embarrassed that my friends got to see my entire family's underwear hanging on the clothesline.

But somehow still today I have acquired a love of clothespins. I use them for hanging out laundry obviously.....but I also use them as chip clips and on opened ends of chocolate chips and crackers. Recently the girls ask me for clothespins on game days so that their uniforms stay on the hangers nice and even. You've seen my love for them on my craft projects too. Like the post here, and here, and here, and here, and here....and here. Wow, I use clothespins more than I thought! Any shape and size, I love 'em!
(Pictured: Mini Clothespins, Small Clothespin, Large Clothespin)

And recently our friend Greg installed me a new clothesline. A real clothesline with poles and everything. I was so excited for this surprise. The hubster finally came through for me. :) Now I can hang clothes and vintage goodies til my heart's content.
Just hanging on the line....
All pretty like...
Just a blowin' in the breeze...
All lined up in a row....totally makes me happy. It's the simple things in life, right?
And now I'd like to share my favorite little goodies with you. Along with my Rustic Clothespins, I will be carry Mini Clothespins and Small Clothespins in my Etsy shop.


These are the Mini Clothespins which measure about 1" long. Totally cute by themselves in a little jello mold or jar.....or use them to clip papers together, use them on cards, hang a cute pennant clothesline, hang photos, etc. I'll have some cute projects on the blogaroonie soon.
And here are the Small Clothespins that measure about 1-3/4" long. Use them for the same ideas as above.....or embellish and clip to treat sacks or a bundle of cards. Oh how I love them!
And here's a new color in the Rustic Clothespin lineup. The new color is Marigold. Ohhhh so pretty for this time of year. And there's still a few of the Rusty Pumpkin Rustic Clothespins available too.
The Mini Clothespins and Small Clothespins will be sold in sets of 10 and will be packaged in small glassine bags with a label. The Marigold Rustic Clothespins will be sold in sets of 5 and also packaged in glassine bags. Stay tuned for more fun projects using all sizes. Thanks for stopping by today! Time to go hang out some laundry.....oh and now.....I try to hang our underwear to the back just in case we have visitors. ;)
Related Posts with Thumbnails