
This post is very photo heavy so I'll try to keep the chit chat short. I recently had these Cottage Card Kits in my shop. I promised to show you lots of tips and tricks so here we go. Here's what the kit looks like. If you missed ordering a kit but want to play along, just grab some items from your stash. Items like the mini floral Instagrams, tags, clothespins, doilies and sacks are available as individual items in my shop.

Envelope Liners...
It's very easy to create an envelope line for any size envelope. Simply trace the envelope flap onto the liner material using a pencil. Here I used the vintage book page from the kit.


Embellished paper clips...
Here I used the strip of eyelet lace and a torn strip of the vintage fabric to fancy up the clips from the kit. I used about 3" piece and looped it through the paper clips. I secured the little flags with my Tiny Tim stapler.

Very cute to slip onto cards, tags, sacks and more.

Creating your own spray mists...
It's very simple to create your own spray mists. Instead of using ink refill droppers, did you know you can use acrylic paints too for a more opaque look? Simply fill a small spray bottle with water and drop in acrylic paints. I used a pink and a yellow to get just the pink tone I was after. Shake the bottle and spray onto scrap paper until the mist appears.


Painting with Gesso...
Gesso, one of my new favorite things. Here I put a small dab of Gesso in a dish. I added a few drops of water to make the Gesso a bit watery so I could paint with it.

You'll see these used on my finished projects but here are some samples of the Gesso painting. On the yellow card I smudged on the Gesso with my finger to get a white washed look. I painted o the polka dots with a small pointy brush. I even sprinkled in some glitter before the circles dried to create a shimmery look. On the small Instagram from the kit, I painted around the edges. For the dimensional paper flower, I painted the petal tips for a shabby look. On the book paper, I flicked some Gesso paint to create splatters.

Finally on the square of corrugated cardboard I cut from a box, I swiped some of the Gesso over the ridges. Then I loaded my brush again and ran the tip of the brush over the top of the square. I tilted the cardboard so that the paint would run down and dry in long drips. I'll use this under a mini Instagram later.

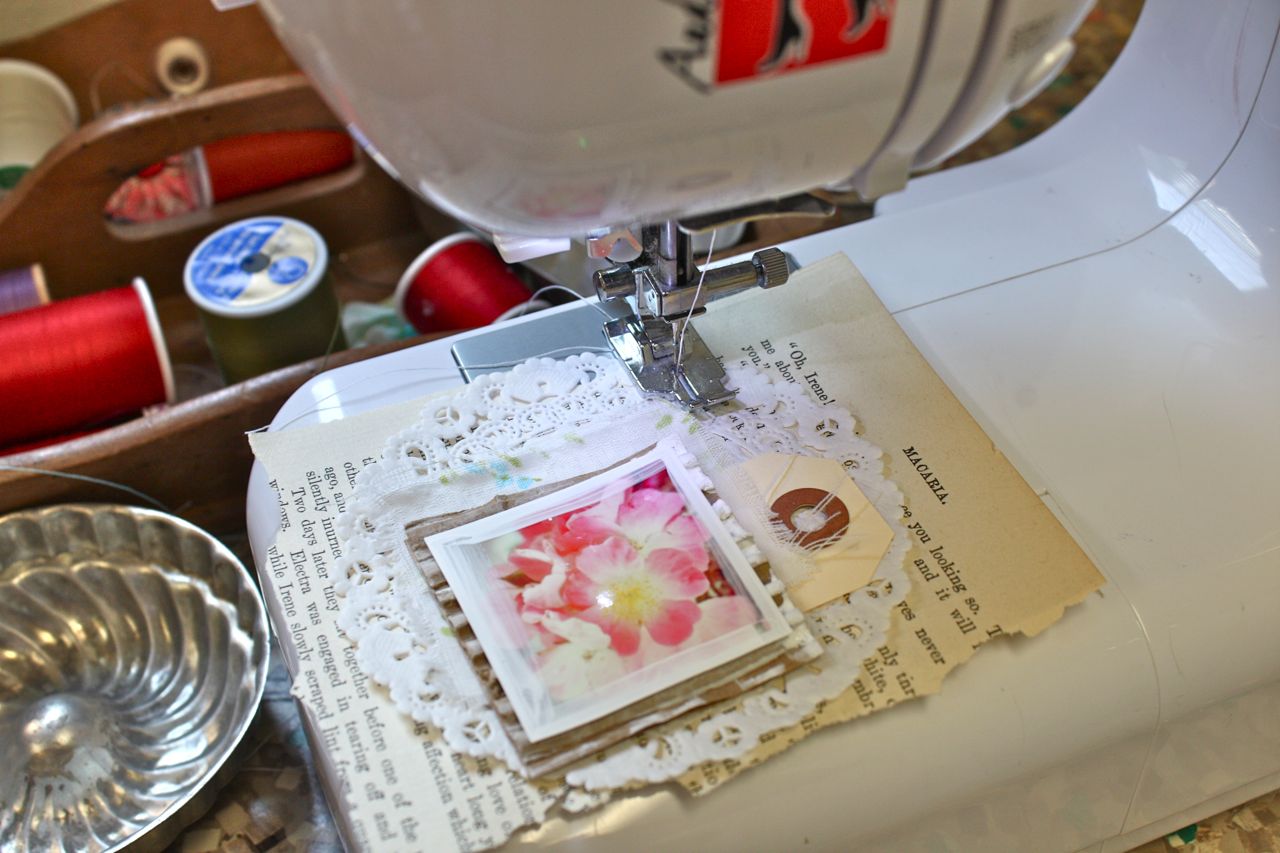
Creating layers on your projects...
This is a hard one for some folks so I'll share what I do. I picked a card base that I wanted to use and then I set it aside. From the kit I picked a few more elements to layer. I cut a piece of fabric from the larger piece.

Then what I do is layer the pieces in my hands, not on the card base. I start picking up the largest items then finish with the smallest items. It's very natural to work with the layers and shift them around while in your hands instead of laying them on the base of the project (the yellow card).


Then I find that stitching the layers together is a great way to keep all the pieces securely in place. I like to leave the thread ends hanging also instead of trimming them short.

Here's a sweet notecard with a misted gift sack.


Don't think you can mix and match florals? I love how it looks, especially when the prints are vintage looking.

Another card which has the splattered coin envelope and fabric paper clip.


One last project, a pretty gift sack with soft, vintage layers.

I used my homemade spray mist on the sack, using the nozzle to flick on splatters of paint. The neutral colors of the book paper, tags, doily and cardboard create a nice background for the colorful photo. The yellow paper flower helps the yellow in the photo pop out.

Coming soon to the shop...
I have a special delivery coming later this week to create a new kit for the shop. If you like the mixed media look, this one might be for you. If you've been wanting to add a more artistic flair to your creations, this kit might be for you. If you've always wanted to try out some art journaling, this kit might be for you. I can't wait to share it with you!!


7 comments:
Thanks for all the great tips. I have made my own spray with perfect pearls, but didn't realize you could do it with acrylic paint. I definitely want to try that. I love your vintagey goodness. Again, thanks so much.
Wauw!! This is so cute!! Must try this :)
Great post, thanks for sharing your creative process! I'm off to try to make my own spray now...thank you for the tip!
Love the look Michelle and how clever to simply pick up items, place in your hands to quickly get the look you want. I will certainly try it!
Love this...I really enjoy your blog.
Thanks for sharing your tips.
Thank you for all the wonderful information in this poast! I have lots of acrylic paint and have made "splatters" thining it down and flicking it from an old toothbrush. Just bought a spray bottle so will try that out! Instagrams...I don't know anything about that process, can Instagrams be made from a photo on your computer or do you need one of the fancier type cell phones? Mine is just a basic one. I do have lots of lovely flower photos on my computer though! Hope this question is not too dumb!
Love the whimsy of this card. I like the lace on the paper clip.
Post a Comment