August 17, 2011

Tag Tent Topper Cards

Hi there. Today I have another set of cards to show you from the August Papertrey release. I created some mini tent topper cards using tags. These will make great little cards to add to teacher treat sacks or perhaps some little thank you notes.
I used lots of stamp sets from this month's release including Tag-its #7 for the main circle image and small tag, Modern Wood Mats for the Smokey Shadow stamped image on the gray tags, and Background Basics: Houndstooth for the notched pieces behind the circles. The acorn + leaf images were colored with Copic Sketch markers.
For the base cards, I used Rustic White cardstock +the new Fall Prints & Patterns. Love the green polka dot paper, my favorite from this collection.
For accents, I used a small tag to stamp the *autumn wishes* sentiment. I threaded the strings through the hole in the gray tag and stitched over that with my sewing machine. Both the tiny white tags + 2 sizes of the gray parcel tags will be in my Etsy shop soon. Have you noticed how popular the color gray is right now? I love to use this a neutral color on my projects lately instead of the typical cream or tan.
Hope you enjoy! Have a great day everyone. The reds are in the midst of 2-a-day volleyball practices. It makes for broken up days so we're just enjoying the down time between practices. School starts next week!

Stay tuned: I'm working on some posts featuring some pieces from my Fall Mini Album Starter Kit + a fun organizational post that will feature my favorite storage item from my craft room.

August 16, 2011

Remember Card...

Hey there. Today I have a card from my August Papertrey release gallery.
I used Harvest Berries, a great organic, floral set that comes with coordinating dies. Love how simple it is to cut out that intricate, leafy image. I used two inks to get the orange/yellow combo. The sentiment was stamped on a Half & Half die cut. Little labels were die cut from Label Basics and stamped with the new Modern Wood Mats stamps. Polka dot patterned paper is Fall Prints & Patterns.
You can check out all of this month's new products at this link.

August 15, 2011

Etsy shop update....

Etsy update: I've got a new kit up in my Etsy shop here. It's a great little starter kit for creating your own gratitude journal, Fall or Halloween mini album, Thanksgiving album, etc.

Coming soon: Also I'll be adding lots of new items to the shop once the girls get back in school and I get back on schedule with my work. You might see those items start to trickle in the shop yet this week.

On the blog: Look for fun, organization post coming soon. Great for us *visual* crafters. :)


August 13, 2011

Attitude of Gratitude

Edited: Question: I would love to know the name and maker of the tab punch for your gratitude journal please. Answer: as stated in my blog post, the wonderful tabs are new dies that will come out this month to coordinate with the Gratitude Journal set. :)


Hi there and welcome to today's Papertrey's Group Post. Today the Design Team will be showcasing the new Gratitude Journal stamp set. Dawn designed many images in this new set to fit right onto the button card die that coordinates with Button Boutique.

For my project I've created a gratitude journal using the new Gratitude Journal stamp set + lots of bits and pieces from my stash.
My album measures 4" x 6" and is bound with 2 metal ring enclosures. For my front cover I used patterned papers, solid cardstock, a button card die stamped with images from the new set, a vintage stamp and a pretty leaf tied with a vintage button and button twine. All throughout my album, I've used this muted color scheme..so pretty for Fall photos or perhaps this years Thanksgiving dinner.
There are a few journal tab dies that coordinate with this set as well. Here I created two tabs that have the 2010 and 2011 dates on them. I have a few Fall photos from last year that I'd like to stick in this mini album + I'll have a lot of room for this years Thanksgiving dinner. The outline circle numbers are also included in this new stamp set.
Next I added in some items from stash to create the bulk of my mini album. Here I've used some index cards inked with the tea dye duo inks.
A large manila tag and a tag trio you saw in my last post.
Here I have a small envelope and a postcard I got at Stamp-a-faire.
A Fall themed recipe card will be perfect for jotting down a newly acquired recipe or perhaps an old family favorite. I've got lots more pages that are just solid cardstock, patterned papers, more envelopes, tags, etc.
And now onto the embellishments I will add to my album once I get some photos. Here I have an assortment of stamped and die cut tags and tabs, and some snippets of ribbon.
For this ledger looking accent I used a piece from the It's Official paper collection + I stuck on a stamped, white mailing label. A little stitched on ric rac and a vintage wallpaper circle with tied button finish off the embellishment.
Here are more of the embellishments you saw in my last post that feature Pine's new Fillable Frames Additions 2 stamp set and coordinating frame dies.
Button card embellishments will be perfect to add to my gratitude journal. You can add the button card to one page and then a photo or journaling to the opposite side. Here I've used the Signature Series: Butterfly die, spray mist splatters, a strip of cork, a stamp from Gratitude Journal, a tied button + the new Houndstooth set from Maile.
The Gratitude Journal set also includes this stamp image that is a series of wide lines. You can stamp it right across a Button Card die or get a little creative like I did and stamp several of the lines in various colors onto cardstock.
Use your paper trimmer to trim the images into strips. Then cut notches at the ends of the strips to create little flags. Stitch or staple these to your embellishments like I did below.
Here I've created a few fun tag embellishments by using some circle punches, the pinked square from the Button Card die collection, a yellow tag and some little white hang tags. Adhere these to the journal pages where a little extra embellishment is needed.
And finally I created little collection of small embellishments to add to my pages. Using various punches and dies, it's easy to create layered accents to adhere over photos, journaling cards, etc. Just reach into your stash and see what you can come up with. That's really the fun part about creating a mini album.
I'll be tucking my mini album away for a bit but when I get my photos this Fall I'll be sure to share my album when I get to working on it. Hope you enjoy!

If you'd like to see more Gratitude Journal inspiration be sure to check out Nichole's + the Design Team girls' blogs here:


August 12, 2011

Fillable Frames Additions 2 & Simple Sunflower

Hi there, today I'm introducing Fillable Frames Additions 2 and Simple Sunflower. Both of these new Papertrey sets will be available on August 15th at Papertrey Ink. For more information and fun projects using these sets, be sure to visit Nichole's blog today too.

I'm starting off my projects today by using the Fillable Frames Additions 2 stamp set and all of the coordinating dies that are already available at Papertrey from previous releases. I'll be showing you a few fun tags I created for this fun project coming up......stay tuned to the blog. :)
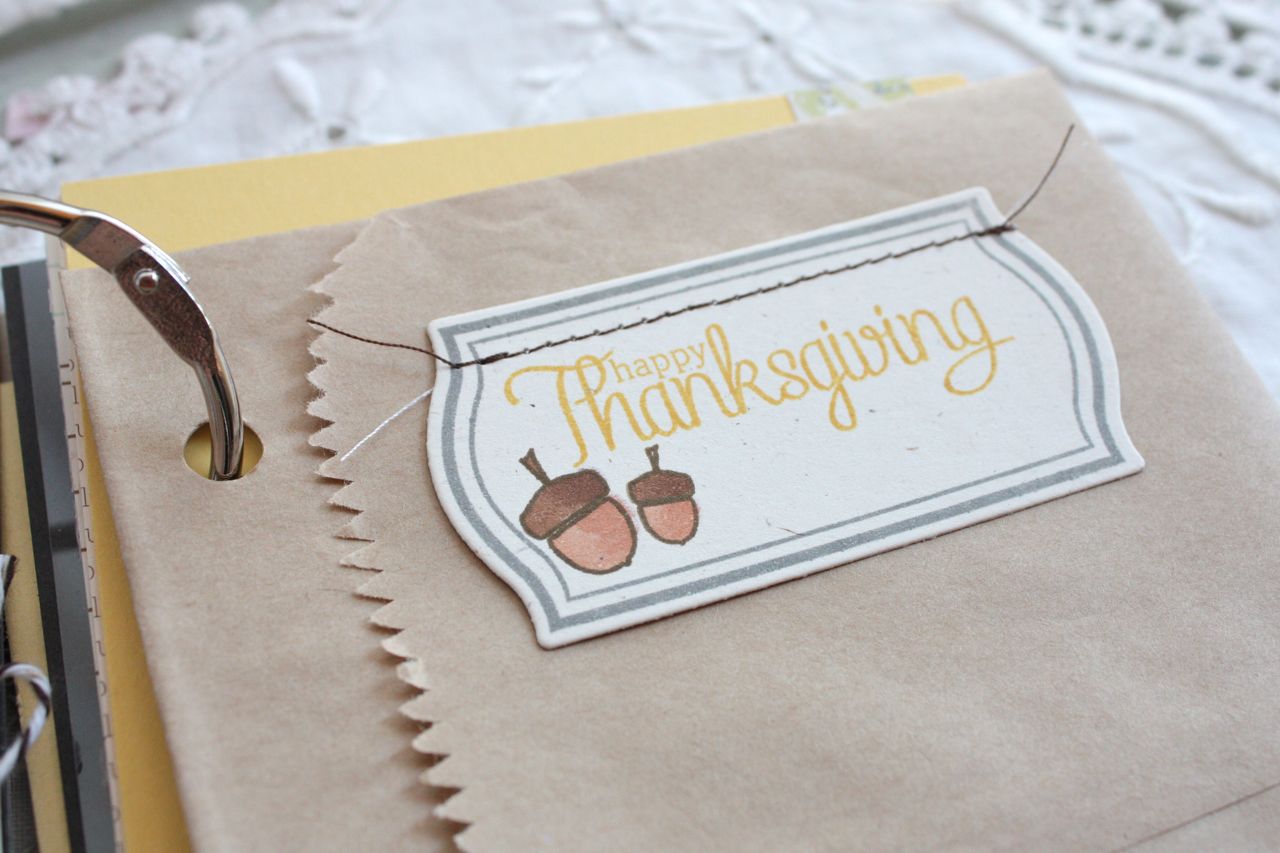
For now though, let's look at a fun fun tags you can create by mixing and matching stamp sets, one of my favorite crafty things to do. Here I've die cut three of the same tags on Kraft cardstock and stamped the tag image on with Smokey Shadow ink. I used Maile's new Autumn Acorns to add the sentiment + the acorn image in Dark Chocolate ink.
By adhering all three tags to patterned paper, you can cut around the tags to create a fun journaling embellishment. I machine stitched over the chocolate baker's twine. I recently saw the idea for this this fun tag technique on Ali Edwards' blog.
Here I've stamped a swirly frame onto the coordinating die which was cut from patterned paper. The round, stamped embellishments are from Dawn's new Gratitude Journal stamp set coming out this month. I mixed and matched sentiments to create a *grateful for you* phrase.
Here I used a classy looking frame that was die cut from Rustic White cardstock and stamped with Smokey Shadow ink. This little tag will be adhered to a brown paper sack that is folded to create a pocket.
This fun embellishment will be perfect for a little page listing the menu items for Thanksgiving dinner this year. I used a frame die cut + stamp to create a fun placemat. Then I used Nichole's new Table Service stamp set to create a place setting, complete with dinner plate + utensils. Love. I will be using Nichole's new set a ton, I can already tell!
Here I've used a frame die + new frame stamp to create a cork embellishment. It's fun to experiment with different items and your die cutting machine. The cork is super pliable and die cuts so easily + it takes ink really well + can be ran through the sewing machine. This embellishment will be adhered to a piece of clear cardstock.
And lastly, I made an embellishment that uses Dawn's Gratitude Journal stamp set again + another frame from the new Fillable Frames Additions 2 stamp set. A vintage button tied with chocolate baker's twine finishes it off nicely.

You'll be able to see this project in full later on this week. You'll definitely want to have the new frames set + dies in your stash. They're *go to* products for me and I keep them handy at all times.
Today I'm also showcasing Simple Sunflower. As a reminder, this set was available for free with a $100 order at Stamp-a-faire last month. This month it's available to everyone again as a product in the regular line up. Plus now there's a coordinating die to go with the stamp set.

When I first received my Simple Sunflower stamp set to make samples for Stamp-a-faire, I did not receive the dies as they weren't ready yet from the manufacturer. I realized how spoiled I've gotten by always receiving the dies and the coordinating stamps at the same time. And I know that many of you as customers are not always able to purchase the stamps + the dies all in one month because your wish list items are always changing and rearranging....right?

Well today I want to show you a few ways to create focal points with the main images in stamp sets without the use of the coordinating dies. Below are three sunflower cards that I created using traditional Kansas yellow and brown sunflower images but without the use of the sunflower dies.
To start off my projects I first stamped a bunch of sunflower images onto my Rustic Cream Cardstock. I punched these out with various sized circle punches. These circles with the sunflowers will become the main accents on all three of my cards today.

On this first card I created a background by running my cardstock through my die cutting machine using the Woodgrain Impression Plate. I punched more holes in this woodgrain piece and added in smaller punched circles of patterned paper from Happy Spots.
The grouping of all the circle accents makes for a fun card. I used a visual triangle + odd numbers to keep the card design balanced.
Next up I used my sewing machine to sew a triangle of circles on my base Rustic Cream Cardstock.
By using pop dots to adhere the sunflower circles, the machine stitching really stands out.
And lastly I made use of other Papertrey dies to accent my card front. I used the Sunshine Impression Plate to create more circle accents for my card. Tied vintage buttons also add the repetition of circles to the card.
Other dies I used to to pop up the focal point were the curved accent die from Sending You + the Simple Circles Border die under the tied ribbon.
So there you have it. A few more ways to add focal points to your cards while you're patiently waiting to acquire more dies. I hope you've enjoyed my post today. Be sure to check Nichole's blog link at the top of this post to see more creations + to check out more links to Design Team projects today. Enjoy!

August 10, 2011

Halloween Treats & Sweets

Hey there friends. Welcome to today's Papertrey Group Post. Today it's all about Halloween, one of my favorite holidays of the year. Heather has a fun new set coming up called Halloween Treats & Sweets. Full of small and large size images + dies, perfect for creating cards, treat sacks, home decor and more.

My project for today were inspired by this photo I found on Pinterest. My chosen critter to work with for my projects was the spider image. I love this old crocheted doily that was stretched across an embroidery hoop to resemble a spider web. I have lots of these giant size doilies that come in boxes of auction linens that I never know what to do with. Problem solved. :)
{photo from Pinterest here}

My first project uses the small version of the spider from Halloween Treats & Sweets.
For the smaller sized images, there is a pumpkin shaped treat bag that can be stamped with all kinds of cute Halloween images + there are dies for things such as the spider legs. So many possibilities.
For the bottom of my card, you're getting a peek at another new stamp coming out this month + I used a Half & Half die for the sentiment. The background paper is old book print that was splattered with October Afternoon mist. My quirky little spider web was created with a Doily Details Collection die + black thread and my sewing machine. I just sewed round and round to create a spider web + I left the cut threads long to resemble more webbing. The little spider body was die cut from silver shimmer cardstock and embossed with black embossing powder.
My next project refers back to my inspiration photo from Pinterest. I have never decorated my craft room for the holidays before so I decided to see what a little Halloween decor looked like in there. I likey.
I used black tulle netting, some fake leaves, some spider webbing stuff and old witchy photos to set the Halloween mood. The bottom photos are so awesome. They look like sweet, old photos of long lost relatives...then when you turn a certain way, they turn into vampires and crazy ladies! Thanks Carmen, I will always love these!!
And here's my take on the giant spider web doily frame. I used the large stamps and dies to create this bigger spider. Same techniques I used on the card + I added some big, googly eyes. The spider hangs from some soft seam binding as she sits on the crocheted doily spider web. There's even a die for the large sized spider legs. So cute!
I love the look of my Halloween decor in my crafty space. I guess I should decorate more often since I spend so much of my time in there.
And I couldn't leave out my beloved typewriter. I added in some Halloween type paper and a few of my Halloween decorations. Fun stuff! Love vintage typewriters? Here's another cute idea to spook it up, courtesy of Pinterest.

And to get you more in the mood for Halloween, be sure to check out what the rest of the Papertrey Design Team has in store for Heather's new products:


Road Trip Mini Album....taking it on the road

So, you've got your supplies and album all ready to go. It's road trip time! Let's talk about taking your supplies on the road with you.

One of my new loves is vintage suitcases. I use them around the house to store various items and I think they make the neatest display pieces. Check out this lovely from Pinterest below.
{photo from my Pinterest site}

I'm hoping to bring home a suitcase full of memories myself so I'm using one of my own vintage suitcases to pack up all my supplies + my Road Trip Mini Album.
Here's all my goodies tucked inside.
I've got my beloved Washi tape...
All of my necessities like my alphabet stamps and tools......
Can't forget the album itself.....
All tucked neatly inside. Keeping organized is key.
With my album tucked safely on top.......
Everything safely stored inside and ready to roll.......
A traveler. Ready to make some memories.
Ready to road trip, baby!!
{photo from Pinterest}

This concludes my Road Trip blogging, folks. Hope you have enjoyed my ideas. If you ordered one of my Road Trip Mini Albums, have fun with it!!
Related Posts with Thumbnails