Showing posts with label One Little Bird. Show all posts

June 28, 2015

Project Life..... Week 7, 2015

Today I'm sharing Week 7 of my 2015 Project Life.  I used One Little Bird journaling cards that I downloaded and printed here at home.  I love Peppermint's designs so much. Clean and simple and so easy to use.  Here's the two page spread. 
 The left page. Simple photos and a few embellished journaling cards.
 The right page.  I added more photos and journaling cards with hand written journaling.
 For the main, dated 4 x 6 insert, I added chipboard letters to a tag.
 I love how the One Little Bird kits coordinate so well and are designed so simply.  That leaves lots of room for embellishments and journaling.  Or I can leave the inserts unadorned if I want a cleaner look.
Slow but sure.....more pages to fill my album.

March 27, 2015

Project Life 2015.....Week 4

Today I'm sharing Week 4 of my 2015 Project Life.  Here's the two page spread. 
The left side. Lots of One Little Bird and Gossamer Blue products this week.
The right side.
For the main, dated 4 x 6 insert I used a One Little Bird digital printable with word overlays.
Love the circle card with the Gossamer Blue wood veneer piece on top.  I created a little messy nest of thread and adhered that below the wood piece.
Journaling under the date stamp.  An easy way to get more than one day's worth of journaling onto one journaling card.
Thanks for stopping by today!

March 18, 2015

Project Life 2014.....Week 44

This is Week 44 of my 2014 Project Life.  I used One Little Bird printable journaling cards and digital overlay for the week number card.
This week was Halloween week so lots of decor and traditional Halloween colors.
Tailgating at the football game with lots of friends.
I love adding the digital overlays to photos.  I use One Little Bird, save to Drop Box, open on my phone and insert into my apps.
Love this journaling card.  The black and white is a nice contrast to all the color.
Still plugging away at my Project Life.  I'm way behind but just am enjoying the process when I get to work on my albums.

January 28, 2015

Project Life 2014....Week 40 with inserts

Edit:  Guys, I'm sorry but I made an error which has now been corrected in my post.  There is not a 10 x 12 insert, it's an 8 x 12 insert which was cut down from a Project Life Z page protector.  

Just finished Week 40 of my 2014 Project Life.  Instead of stressing about behind behind and getting caught up, I'm totally embracing my new simple outlook and getting more of the stories told. It's a new challenge to see what kind of a total package I can pull together for a weekly spread.  This week was just a joy to create.  Hang with me, lots of photos but I'll keep the chit chat to a minimum.  

For Week 40 I've got a two page spread plus two inserts.  All inserts were printed from One Little Bird. 
Here's what the two page spread looks like with no inserts. 
The left page was just random photos from the week with a single journaling card acting as a week in review.  
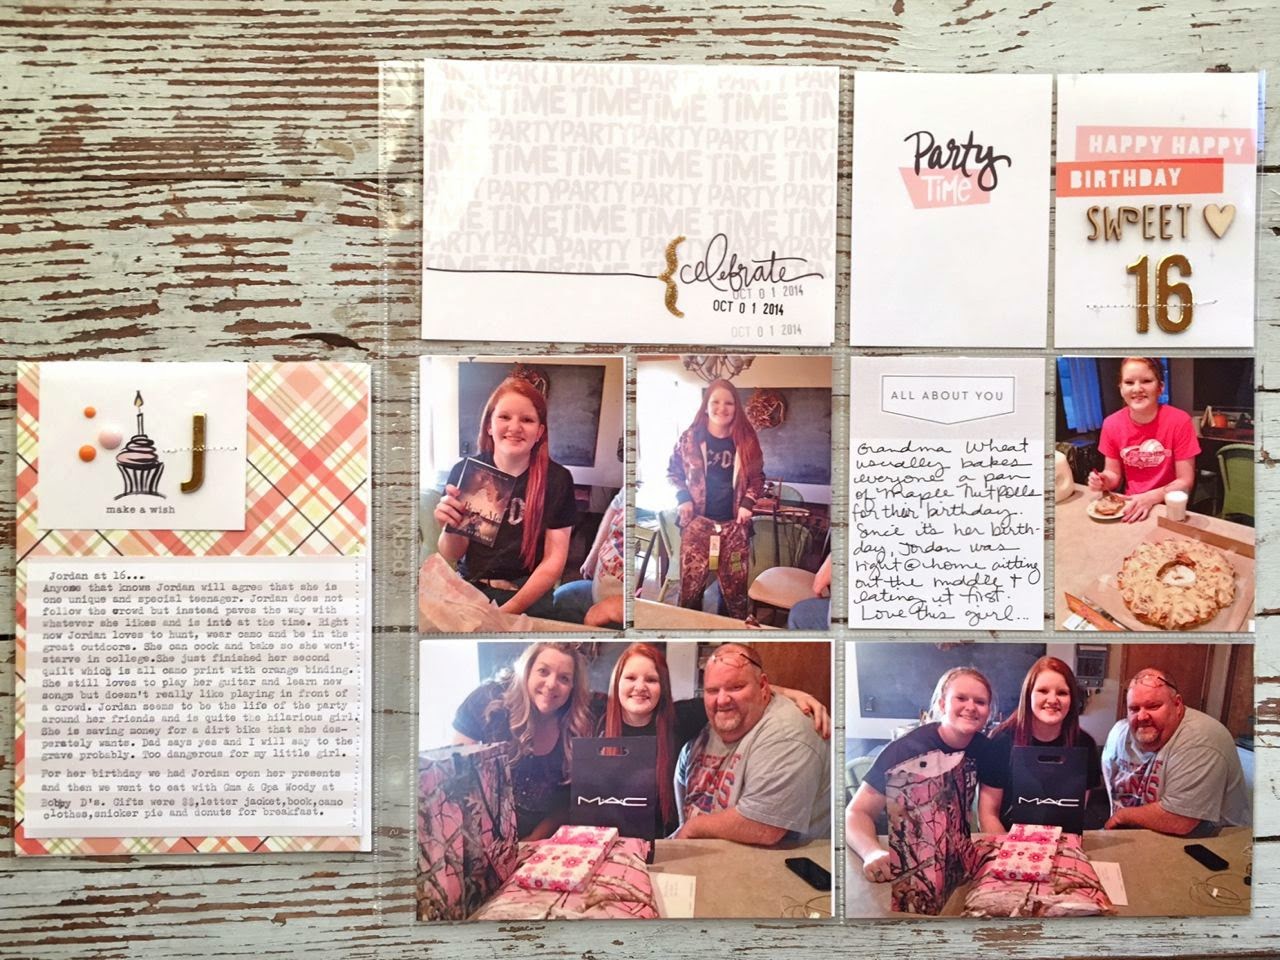
The right page is all dedicated to Jordan's 16th birthday.  
For my week number card I used a One Little Bird digital overlay and added the date.  I used Dropbox to import the overlay into the LetterGlow app. 
This is the weekly spread with the front of an 8" x 12"insert cut down from a 12 x 12 Project Life Z Page Protector.  The photos were just more random photos from the week but they were all of nature so I collaged them together on one page. 
Here's a closeup of that insert.  
Turning the page you can see the back side of the 8" x 12" insert.  You can also see another 5" x 7" insert on the right side.  
Here's the two pages together.  These two inserts coordinate with one another.  
I copied a blog post into a word document and printed it at 4 x 6 size.  Title is cut from a One Little Bird journaling card and leaf is from Gossamer Blue's Gramercy Road collection.  Boy, Ali Edwards hits it right on the money when she uses her blog posts for journaling.  I think I'm going to start adding more stories to my blog so I can do the same.  So easy to get a full story instead of trying to do it when you're assembling layouts. 
Turning the page again, you can see the back side of the 5 x 7 insert.  
This insert coordinates with the 12 x 12 page of Jordan's birthday.  
Patterned background is from a Gossamer Blue kit.  Cake piece is from a One Little Bird journaling card.  Embellishments and lined journaling card are from Gossamer Blue kits and shop. 
Here's some of the One Little Bird journaling cards I used for Jordan's birthday.  Gosh, I love them so.  Simple, not too much color, lots of white space.  Just the look I'm going for this year. 
Wood veneer is from Studio Calico and gold letters are from a Gossamer Blue kit, from American Crafts. 
That's it for this week. Hope you are inspired and enjoy my project!

January 26, 2015

Project Life 2015....Week 2

Up on the blog today, I'm sharing my Week 2 of my Project Life 2015.  Lots of photos this week so the layout is kept simple.  
The left page.
The right page.
For my 4 x 6 dated insert, I chose a photo I took while at the gas station.  A great day to wear my Converse with no socks.  I purposely think about white space (meaning blank space) when I take photos.  Those little areas become perfect spots for titles or journaling.  Here I used a One Little Bird digital overlay and then typed in my journaling.  All using my iPhone 6+...in gold.  Because gold is so pretty.  :)
The hello 2015 is from Gossamer Blue as well as the journaling cards I used this week.  Camera puffy sticker is from Evalicious. I used a little bit of blue watercoloring under the this and that title.
For my bottom two 4 x 6 inserts I did some journaling about a family friend's funeral.  I know it sounds odd but in Ali's videos in her Gathering Story Kit she talked about the various reasons why we gather.  Jimmy's funeral was a celebration of his life.  I saw lots of people I hadn't seen in years that were getting elderly.  We were happy to see each other even in this circumstance.  As I sat and listened to the service, I reflected on some good memories.  Worthy enough to get the story down in the books.

For my photos, I used 3 separate overlays from Ali's Gathering product line.  I typed out the journaling using the Project Life app on my phone.  The wood veneer arrow is from Gossamer Blue.  On the journaling card at the top, I used more blue watercoloring to fill in the ampersand.
Thanks for stopping by today.  Hope you are getting the stories + photos in those albums.

January 21, 2015

Project Life 2015....Week 1

Edit: I had a question about the digital overlays.  I'll be adding a post soon about the apps I use to create the overlays.  However there won't be detailed tutorials for them.  If you read through this post, I did a little recap of how I am using Dropbox, Letterglow and One Little Bird digital elements.  Thanks for your patience. 
LISA C. PARSONS said...
Where is the tuturiol to add digital overlays?

Starting fresh with my Project Life Week 1.  It's so so simplified from what I've been doing.  While I'm in catch up mode with 2014, my goal is to just get the stories told and finish the weeks on time.  I took some time yesterday to jot down some real, nitty gritty stories that I want to tell.  I can't wait for those to be added in between the pages soon.  
 My left page.  Back to 3 x 4 and 4 x 6 photos.  I didn't have to plan a thing.  I just started printing off the most important photos.  What a time saver that was.
 The right page.  I took three slots to dedicate to a first time experience.  It was the first time ever I went to the movies with my mom and dad.  My dad read the book Unbroken and really wanted to see the movie.  He loved it.  We got out tickets, two big buckets of popcorn + the pops I tucked in my big bag (yes we are those people).  It was quite touching to hear my dad sniffling at the end of the movie.  As a war veteran he is so patriotic.  On the way to and from the movie, we heard stories from the book and my dad's own accounts of serving in the military.  I used Ali Edwards' Story stamps to note this "first time".
The Week one 4 x 6 photo.  I used One Little Bird's digital set to add this to a 4 x 6 photo. I downloaded all of the digital overlays to Drop Box on my computer.  I then installed the same app on my iPhone.  I opened up the LetterGlow app on my iPhone, chose the Drop Box icon and imported the "week one" right on top of my photo.  I sized it and placed it where I wanted it on my photo.  Saved the photo and sent it to my computer to print for my album.  I could have also typed in the dates for this week but I had already added them to my week in review card you can see in this photo also. 
 Some 3 x 4 journaling cards.  Have you seen the new color for the 2015 limited edition Ball canning jars?  Purple, my friends!  We are K-State fans around here and this is gonna be awesome.  I'll be collecting a few boxes to use next year for Jordan's graduation party.  She's gonna be a Wildcat soon! The other card has my stamped "first time" and my handwritten journaling.  Still embracing that but it makes the pages come together so quickly.
Week 1.  Done.  Easy. Simple. In the album.  Happy day to you, my friends.  

January 19, 2015

2015 Project Life Intro Page + One Little Word +Changes..

Here I go with my 2015 Project Life.  It's always fun to start the new year off with a fresh start and to try new things. This year I'll be making some changes to my Project Life. I think a little bit is due to some boredom with the way I was creating my pages...maybe not really bored because I love my weekly pages but perhaps just needing to change things up.  I also want to be able to keep up with my pages in a timely manner and to stay on track.  I'm about 12 weeks behind in my 2014 Project Life and I really just don't like that feeling.  I'm hoping to simplify my pages to remedy that.  

So here we go, I'll just jump right in by showing you my introduction pages for 2015 and my One Little Word page.  One Little Word is a concept created by Ali Edwards where you select a word for the year that represents something special to you.  You can read more about it on her blog.  Below is a 6 x 8 page that is the first page of my 2015 Project Life album. All three inserts are printed from digital downloads from One Little Bird.  Peppermint Granberg Jones is the digital artist behind One Little Bird and she's a designer for Gossamer Blue and on the Design Team.  I love her simple designs so much that I'm branching out and will be using more of her digital products purchased from The Lilypad.  I'll be using both printable journaling cards and digital overlays.  I'll talk more about the digital side of my Project Life and some great iPhone apps in an upcoming post.  
 For my embellishments, I used this awesome acrylic 2015 piece and some glittery gold stars from Gossamer Blue kits. I'll be continuing my role on the Design Team + using the Gossamer Blue kits for my Project Life and other crafty projects.
 Turning the page, I have the back side of that 6 x 8 insert + a 12 x 12 divided page for my One Little Word.  There's also a 4 x 6 insert (trimmed from a page protector) with a free quote from Ali Edwards.
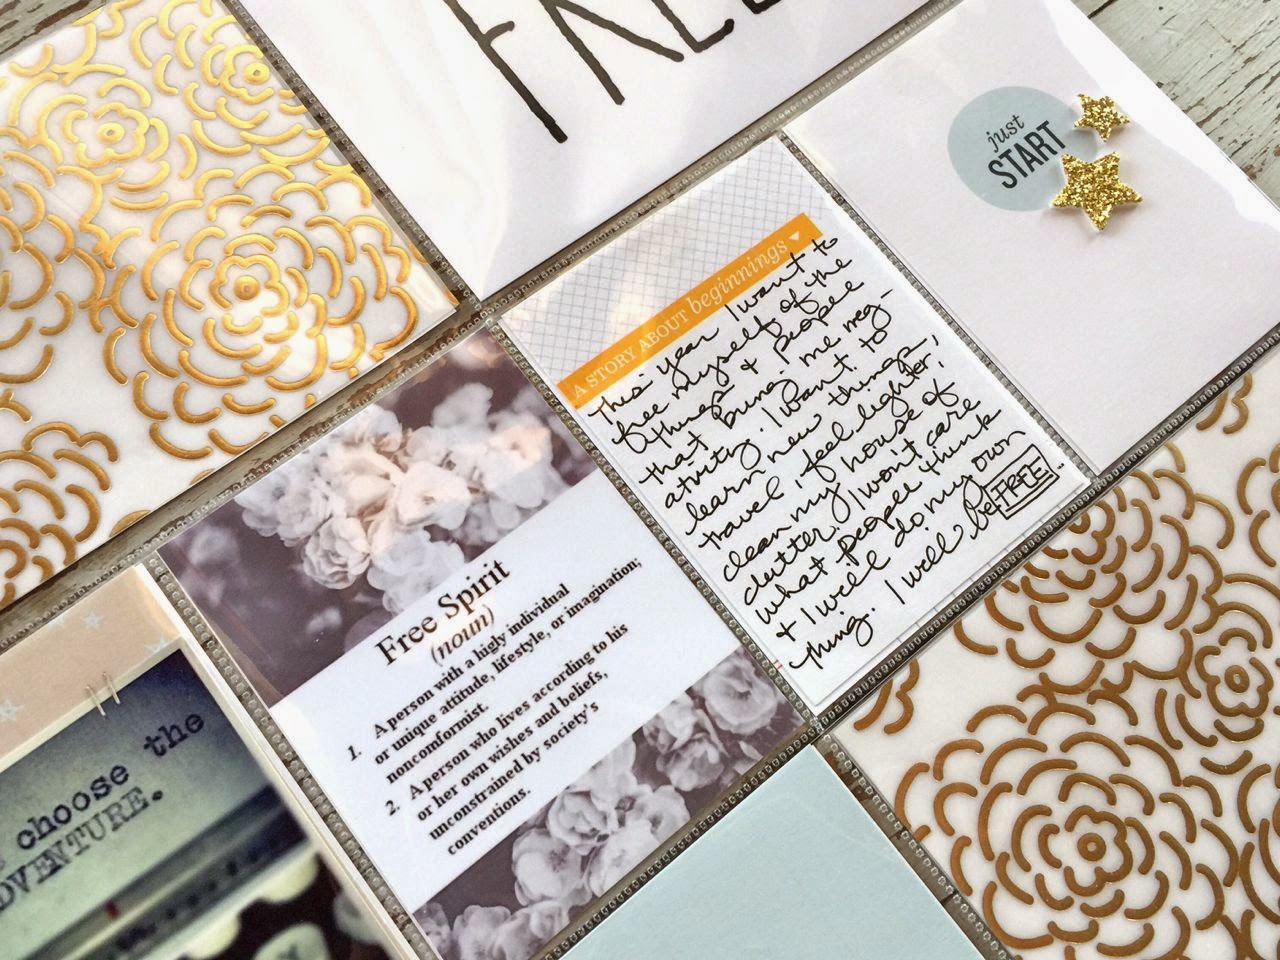
 Here's the two page spread without the quote insert. Gold floral vellum is from the On My Desk collection from Gossamer Blue.  I think I need more sheets of this.
 I always like to include a photo of my family for the intro pages to a new Project Life album.  This is a fave from our Colorado trip last Summer.  We are starting a tradition of taking a photo of the same pose at the same location every year.  Certainly worthy of the front page of our albums.
 Vellum is from Gossamer Blue, gold circle is from a GB kit and I typed the #always4.  I've adopted this hashtag to use on Instagram and pages and texts to my family.  Four family members=always 4.  The blue journaling card is printed from One Little Bird.
 This 12 x 12 page is all about my One Little Word for 2015.  I chose FREE as my word for the year.  I'll perhaps do a post all about my One Little Word in a future post.
 Journaling cards are from One Little Bird along with some photos I printed from a Pinterest board.
I love the look of all of these first pages.  They definitely set the tone for how I want my upcoming pages to look.  Simple, clean and able to be completed quickly.

That brings me to some changes that I'll be making to my 2015 Project Life albums.  I'm not sure I'll implement all of these changes as I'm giving myself the freedom to just go with the flow.  Here's my list  of thoughts/changes/what I'm keeping the same, in no particular order:

Use 12 x 12 format, mostly Design A page protectors from Project Life.  I'll be mixing in traditional scrapbook pages and inserts in smaller sizes too.

No more white borders around photos. This was a huge decision that I've teetered on for months.  I've done a lot of looking around at other Project Lifers' pages and I've decided I really like the clean and simple look.  Plus it means less time when printing.

Use mostly 4 x 6 and 3 x 4 photos, eliminating most of the smaller, square Instagrams. It's just simpler for planning purposes, printing and it looks clean in my pages.

Journal most on 3 x 4 journaling cards leaving the photos without journaling or embellishing. I will write directly on some photos here and there.

More handwritten journaling.  This is huge because my handwriting is big and loopy and I don't really like to see it on my pages.  But it's simpler and I think it will be important to see my handwriting in the years to come.

Weekly, dated information on first 4 x 6 photo using digital overlays from One Little Bird.

Week in review on 3 x 4 journaling card.  Instead of using a journaling card for each photo/event, some weeks may have all journaling in bullet form on a 3 x 4 card.  Simple.

Organize sports photos and newspaper articles better.  Maybe Project Life pockets, special inserts for photos.

More selective on photo choices so I can condense the number of photos.

Use digital products to print journaling cards and to use overlays on photos.  I'll be doing a lot of behind the scenes work on my iPhone.  More to come on this in a future post.

Use the Project Life iPhone app to create photo collages.  Some of my weekly spreads or inserts may be created fully with the page designs too.  It's just too simple not to take advantage of at times.

Stay caught up in 2015.  My plan is to use a Monday-Sunday format.  Plan a week on Sunday, print and work on pages on Monday and then blog that week.

More in depth stories between the weekly pages.  I subscribe to both Ali Edwards' Story Stamps and Story Kits which are wonderful products for jump starting your stories.  Ali's educational videos and blog posts that go along with these products is are so well executed.  It's an entire bundle of information and I highly recommend.

More event/us/real life photos versus just still life photos of house stuff, etc.  I want to see the people and read their stories more.

Simple, clean pages with fewer embellishments.  It all goes back to keeping the focus on stories + photos. I don't want color and embellishments to overpower my photos.  I can always get more crazy on my other crafty projects like wrappings and cards.

Stay true to my style in terms of embellishments, colors, etc.  I want my album to represent what I like so I'll be selective in my choices.

Stick with two 12 x 12 albums per year.  I've been able to do this and should easily keep with this method, especially if I'm adding fewer embellishments.

Most photos will continue to be taken on my iPhone 6+ and some from my big camera.

Print photos at home using my Epson Artisan printer and Epson Premium Glossy photo paper.

Eliminate planning pages and just print the photos that fit.  I spent a lot of time planning pages in 2014 and it was draining.  By using just 4 x 6 and 3 x 4 photos, I'm hoping to just be able to eyeball it and print what fits.  Sticky notes are my friend when it comes to Project Life.

Use my planner/calendar to keep track of photos taken and to make notes about stories I want to write.

Possibly create blog posts that tell stories I will want to document later on.  I love how Ali Edwards does this and then copies the journaling directly into her layouts.  Not sure on this one though.

Finish inserts at the time I finish a weekly spread.  Last year I skipped doing a lot of inserts and these are some of the most important moments.....like birthdays, graduations, etc.  I want to keep on top of it all.

Put more of me into the photos.  This will be a challenge.  I'm fat.  I don't like to be in photos.  But I need to get over it.  My family loves me and it is what it is.  (I know....just lose weight, right)

Okay, that was a lot of sharing for today so if you stayed with me, thank you!  I've already finished the first two weeks of 2015 and they are very simple in nature.  I got them done so quickly.  We'll see how my weeks end up looking as the weeks progress.  I hope you'll join me all year long. 


Related Posts with Thumbnails