December 20, 2013

December Memories 2013...Pages 3, 4, and 5

Edit: Today I also have a post up at the Gossamer Blue blog showing how to create 3 x 4 pockets using the stamps from the December Life Pages Kit.  Link is here.  

Has this month just flown by or what?  My girls have a half day of school today (if they make it that long with the weather) and I'm scurrying around trying to finish a few things before our Christmas break begins.  

I've been working on my December Memories album and have found that I like to work on it a week at a time, just like I do my Project Life.  Today I'm sharing pages 3, 4 and 5 with you.  Here's page 3 which was all about getting the ornaments out from storage and decorating the tree.  
 I love to get a little fancy with the filler inserts.  For this one I stitched it with gold thread, added sequins and plopped on this big rhinestone from Glitz which was in the December 2013 Gossamer Blue Life Pages Themed Add-on.  I add dimensional items like this right to the outside of my page protectors.
 This day has an insert which was made from a 6 x 8 page protector that I trimmed down and stitched.  Now it's size is approximately 4 x 8.
 I wanted to highlight our new ornaments on one side and our vintage ornaments on the other side.  I think the addition of photos that have really close up shots makes pocket style scrapbooking so interesting.  I would love to see photos of the ornaments we hung on the tree when I was a child.
I added sequins, fluffy snow and wood veneer pieces to the top then stitched it to form a pocket.  I first stitched the trees onto a strip of clear cardstock so that the pieces wouldn't float around in the stitched pocket. 
 Here's the back side of the insert which shows my Shiny and Brite vintage ornaments.  I typed right onto the two photos in my insert with my vintage typewriter. 
On to page 4. I'm only showing half of this layout because I'm just adding to it as the days go by.  This layout is all about deer season.  I'll be adding typed pieces of vellum which note the days my family hunts.  Other photos show the camo clutter that is constantly on my dining room table during deer season and I try to snap a photo of who hunts on which day. 
 I used the label stamp from the Gossamer Blue December Memories Kit at the top of the insert below.  I typed on it then added a deer rhinestone.  I also added a wood veneer arrow from Gossamer Blue.
 This is page 5 which is a layout that shows my holiday crafts.  I'll be adding to this 2 page spread as I create things so I'm just showing the left page for now.  It shows my holiday planners and some gift sack packaging.
 Here I used the label stamp again to note what this page is about.  I used a sticker, wood veneer snowflake, enamel dots on top of the 3 x 4 card that I created previously. 
My album is coming right along.  I'll be sharing more pages soon & stay tuned for my hot cocoa/hot spiced tea station and an update on the progress of my Paperwhites.  Stay warm and snuggly everyone!

December 18, 2013

Project Life 2013, Week 46 using December Gossamer Blue

I'm back with Week 46 of my Project Life/Life Pages today.  Who knew that all the purple tones in the December Gossamer Blue kits would come in so handy this week.  I love the colors but they don't typically take center stage on my projects.  This week, however, I scrapped a lot about our trim to the K-State football game.  Definitely worthy of some purple tones.  And....it's the new color of the year so let's roll with it, shall we? Here's my 2 page layout.
The left page. Ended up that a lot of my photos had some purple undertones.  I kept the pages nice and tidy and tried to keep in some white space. Lots of fun inserts if you want to zoom in.
The right page was all photos of our trip to the KSU football game.  We drove the girls and their friends around to all of our old stomping grounds....our old apartments, the dorms, campus, the hangouts, stadium,etc. Loved having this walk down memory lane. You can zoom in below to see the vellum pocket I stitched on with the drink chipboard accent and typed sticker.
For my weekly, dated insert I've been filling the slots with some 3 x 4 journaling cards.  I just add them side by side or stick one down to a 4 x 6 insert.  Really digging photo corners lately.
The football game.  Awesome time!
I had a back to back insert too, highlighting my favorite photos of the girls.  Hair flying around, all in purple.  Great group of girlies.
To remember names when I grow old...or maybe in 2 years at the rate my memory is failing...I stitched on typed names.
The back side is a big photo of the football stadium with a beautiful Kansas sunset.  I also slipped in our parking ticket stub.  Good times.
So glad this week is in the books.  My next college pages might actually include my sweet reds while IN college.  Josey just texted me and said she finished her College Algebra test.  She's taking the class as a Junior in high school.  She was so nervous.  In no time at all she'll be in college.  And that's why I love this Project Life.

December 17, 2013

Project Life 2013, Week 45 using December Gossamer Blue

Edit: The typewriter looking journaling is indeed done with a vintage typewriter.  I just run the journaling cards right through my old typewriter.  :)

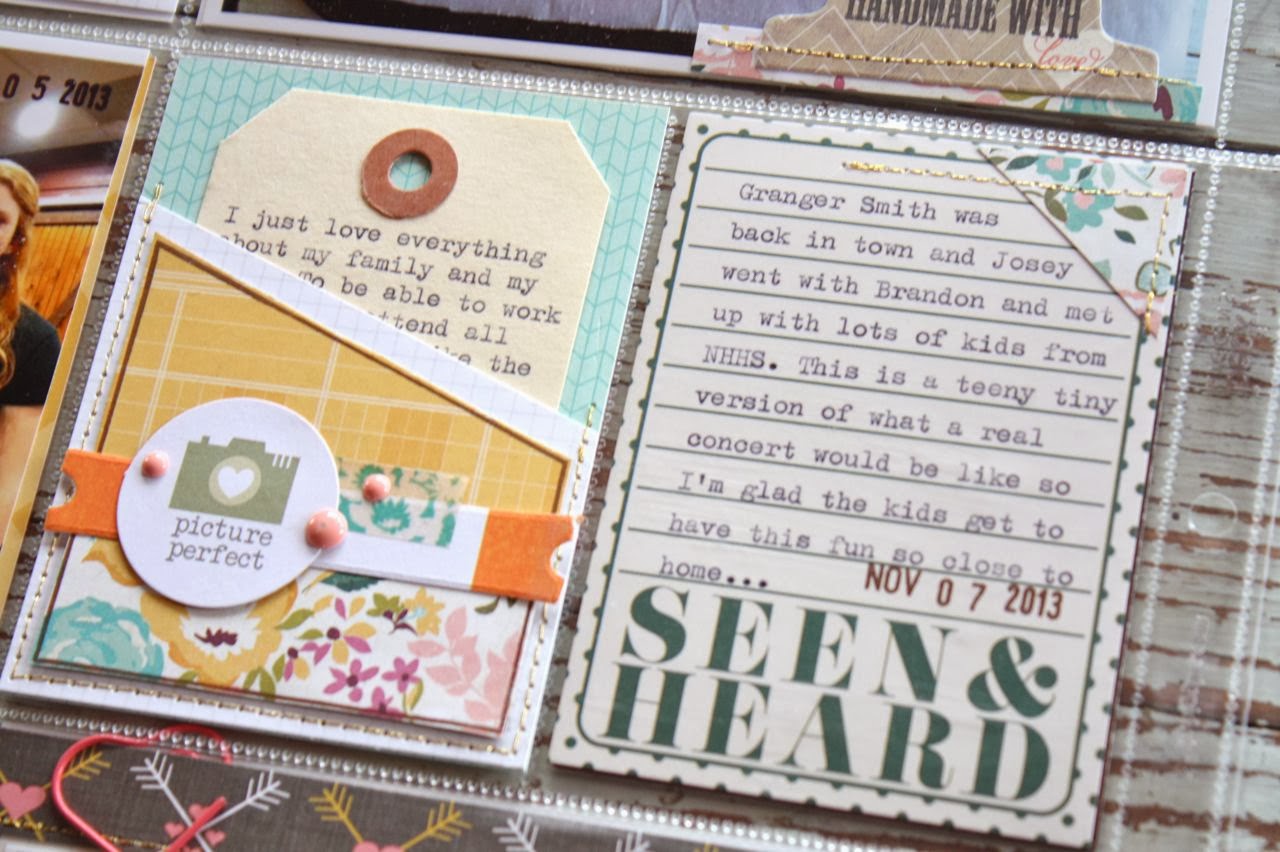
Week 44 of my Project Life 2013 was a recent favorite.  This was a week from November and the December Gossamer Blue Kits had the perfect colors to go along with my Fall photos. I was able to use florals, feathers and lighter, earthier colors without having to use dark browns and oranges.  
Here's the left page of Week 45.  I love some of the white backgrounds, the simplicity of the photos with cookies and the fun pocket.
This is the right page.  The feather card and salmon/orange colors went perfectly with my pumpkins.
For my weekly dated insert I used a Gossamer Blue blank grid journaling card.  Have you seen these basic cards yet?  You get 28 mixed 3 x 4 and 4 x 6 journaling cards with various, graphic designs.  I LOVE these so much.  I keep a nice stash handy to use when I just want a simple background to build upon.  You can find them here, they'll be a staple item in the GB shop.  I also used the fun chipboard letters, a circle tag, sticker numbers, patterned paper and the fun "right here" embellishment.
On this 4 x 6 card I loved using the Pink Paislee Color Wash chipboard alphabet from the December Life Pages Main Add-on Kit.
Here I combined 2 photos on one 4 x 6 sheet.  The little tag is from the Chic Tag packet from the December Life Pages Main Add-on.  I used some thread that was piling up at my sewing machine under the circle.
A favorite photo from this week.  I love this simple photo of some cookies ready to go into the oven.  The stitched on label adds just a little embellishing.
Here I have a fun pocket that I made with the stamp set I designed for the December Life Pages Kit.  (produced by Elle's Studio).  It provides a new way to create pocket inserts for your Life Pages/Project Life.  Later on this month, you'll see a full tutorial on the Gossamer Blue blog with some tips and tricks for creating easy pockets.  The stamps from the December Main Kit also coordinate with the pocket stamp set.
You can see in this photo how you can use any types of embellishments to fancy up the pockets.  I used a Large Manila Parcel Tag to slip my journaling into the pocket.
Here I trimmed a journaling card from the Carta Bella Wildflower sheet of paper.  I stitched on some flowers cut from patterned paper. Really love how this turned out.
Here I added a hand cut corner to my journaling card with gold stitching. 
Just a ton of fun on this week's layout. Thanks for stopping by today.

December 13, 2013

Snowfall Kit Packaging

If you're like me, sometimes you just need a few fancy packaging ideas.  Not just the regular gift sack or rolled wrapping paper but something special for that someone special.  My Snowfall Kits might just do the trick for you. In the kits you'll find everything you need to complete 5 special gift sacks.  All you need is some white spray mist or white spray paint, baker's twine, adhesive,a stapler and some ribbon.  
 Here's a really quick and easy idea for assembling the Snowfall Kit sacks.  These are not hard at all...you'll do some misting and easily assembly.  First up, take the sacks and place them in a safe area to spray.  I use a box with layers of packing material inside.  Use the vintage snowflake included in the kit as a mask.  Spray the white mist or spray paint over the snowflake.
 Move it around a few times and you'll have the most beautiful snowflake patterns.  I did mine three times, concentrating the mist on the center of the snowflake.  Once you're done you can use the snowflake as a decoration or hang it on the tree.  Let the sacks dry for a bit.
 Next divide the snowflake confetti mix between the small zipper sacks, about a scant teaspoon in each one will do the trick.
 Then fold the paper doilies in half.  Use a strip of adhesive to adhere the confetti sacks to the doilies as shown.  Stamp a sentiment on the tags.  I'm using my friend Heather's Papertrey stamp set called Rustic Wreath.  Staple the floral sprigs to the tags (mine are different from the kit).
 Lightly adhere the tags at an angle to the doilies then adhere the doilies to the front of the sacks using just a tiny strip of adhesive.  Tie a long length of ribbon around each sack.  Tip:  Cut a piece of cardboard to fit just inside the width of the sack.  This helps keeps the sacks stable when tying on the ribbon.  Tie a knot in the ribbon.
Then finish tying all the bows.  Leave the ribbon tails long and cut at an angle.
 In no time at all you'll have all of your gift sacks ready to be filled.  They're so soft and pretty and wintry looking.
 I used baker's twine to tie on two jolly jingle bells to each sack.  Love that frosty look.
 Oh, the snowflake pattern.  My favorite part. You could also do this on large sheets of Kraft paper and use as wrapping paper.
 The sequin mix has just a little fluffy snow in it to resemble frosty snowflakes.
 So beautiful.  So pretty for that special someone.
 I plan to tuck in a few cards with envelopes and give these to our school secretaries.  I usually have a special, homemade little treat to sit on top of the sacks too.
Hope you enjoy and are inspired to give out just a few special gifts this year.  Thanks for stopping by.

Coming soon, I'll be sharing the next completed pages of my December Memories album and more holiday happenings around our house.

December 12, 2013

Planting Paperwhites to bloom for Christmas....

Hello everyone, December is flying by and I've been doing a lot of behind the scenes activities in preparation for the holiday season.  This year I was bound and determined to start a new tradition of planting Paperwhites in hopes that they will bloom by Christmas Day.  I got really inspired by this beautiful post from the Stone Gable blog.  

If you'd like to try planting Paperwhites I have found a few tips through my searches that I thought I would share.  To find Paperwhites, you can purchase them in little gift boxes like you see below from your local shops.  My mom and dad brought these home for me one day.  You can also purchase them at your local greenhouse right out of the bin as singles or in bulk.  The kits will usually have a container  and a dry potting soil mixture.  If you buy them from the green house you will need some potting soil or small stones.  
Next up is the fun part...choosing the container for your Paperwhites. You can plant the bulbs in one big container or plant each bulb separately, it's all up to you.  This is the fun part, picking out just the right planter for your Paperwhites.  I went back and forth because I had so many fun options to choose from sitting around my house. Some of my options were galvanized containers, old cooking tins, blue mason jars, sewing machine drawers, milk glass and so many more.  I finally chose an actual planter in a beautiful robin's egg blue color along with some coordinating vases to stick some pine cones in. I've pinned some container ideas on my Christmas Ideas board if you need more inspiration.
I had 5 Paperwhites in my boxed kit so I decided to plant them all in my one planter. When you get them you'll see that the bulbs may have begun to sprout.  This is good because the bulbs have been forced and are ready to grow.  The rest of the bulbs will have dry skins like onions.
For your container, you'll need to determine how deep you'll plant the bulbs.  You want the dirt or pebble level to be almost to the top of your container.  I used some large rocks from my driveway to fill most of my planter first.  No need to waste potting soil.  The rocks also help for drainage.
Next I dumped in my potting soil mixture.  You can see that it's about 1" from the top of the container.  I then just plopped in my Paperwhite bulbs, pushing them into the soil just a little bit.  All the Paperwhites need is just a place for the roots to make contact.  You don't need to put soil or pebbles up around the bulbs much.  They're part of the pretty holiday display so don't cover them up.
That's it, now they're ready to grow and grow and grow.  I wet my soil to begin with and then all you need to do is keep the soil damp.  I created this little ensemble of planters, complete with pinecones, feathers, deer antlers and a pretty pinecone plate from the thrift store.  I placed them all on top of my large wood base that my sister gave to me.  I have this all sitting next to my window which has wonderful diffused, natural lighting.  You don't want bright, direct sunlight for your Paperwhites.  They also like it cold so if you can put them in a cold room at night for a sleepover if you prefer.
Now the fun begins.  Your Paperwhites should start to sprout the very next day.  I decided to take a photo of my Paperwhites once a week to record their growth progress in my December Memories album.  I planted my Paperwhites on Thanksgiving as that is when I read to plant them to have them bloom for Christmas.  We'll see.  The photo below shows one week of growth.
This photo shows my Paperwhites after two weeks of growth.  I'm so absolutely thrilled that I'm tending to flowers in the middle of Winter.  Next year I'll probably have a whole indoor garden of Paperwhites, knowing how much I love flowers.
I hope you're inspired to give Paperwhites a try.  I think this would be a great idea for the kiddos too...plant them near Thanksgiving Day for Christmas blooms.  I'll be sure to update the blog with more progress photos.

Edit:  I'll be adding something fun to my Paperwhite planter once they're close to blooming.  I need to make a trip out to the timber with Charlie for that one.  Stay tuned.

Edit:  This set of milk glass dishes is up for sale in my shop.  I almost used these for my Paperwhites this year.  The pretty white of the glass with the white blooms would look so delicate.  You could probably use 5-6 bulbs for this collection.  Idea: spray paint twigs white to hold the blooms upright once they get really tall.


Thanks for stopping by today....and as always, I so appreciate those of you who leave nice comments.  :)
Related Posts with Thumbnails