April 15, 2012

Papertrey April Release Projects

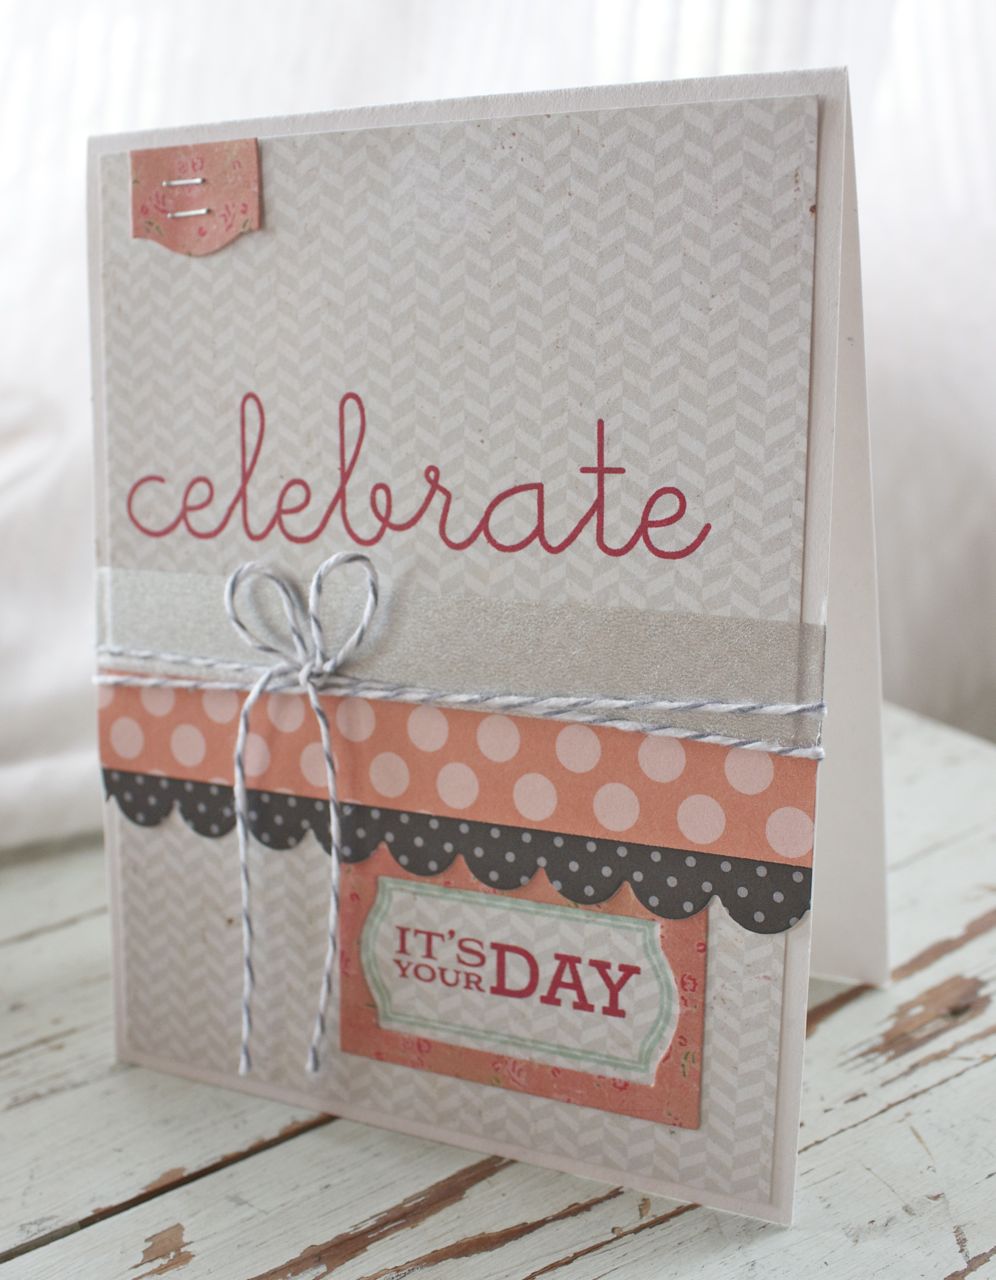
It's the day after the April Papertrey release and I have a few projects to share with you.

With the months of April and May being so busy I try to plan my stamping sessions with cards and gifts that I will need in mind. I created a few sets of these cards below to use for Mother's Day gifts. I used Strawberry Patch & Sentiments and the coordinating dies to mass produce some cards.
I 2 step stamped the main image and then picked the largest strawberry to add a die cut embellishment to. Love the popped up look.
And the stamped patches are stamped with various sentiments from the set. I love the combination of the scripty font with the old fashioned typewriter font. Later on this month I'll be doing a blog post to show how I did the masking and a few more variations on this design.
Here I used Strawberry Patch in combination with Garden Variety II and its coordinating die. I love the new seed packet frame and the little spaces which allows some stamped sentiments. If you arch your sentiment just right, they stamp perfectly into the spaces. I also used Think Big Favorites #15 for the larger words on the bottom of the card. Patterned papers are from Crate Paper.
A tiny little strawberry and red baker's twine finish off the card front.
Here I used Strawberry Patch with a sentiment from Tagged Sentiments. I used the patch stamps in Strawberry Patch to create a stamped off background behind the sentiment. I also used some spray mist and a mask up the left hand corner.
I love stamping the main vine image from Strawberry Patch and leaving it pretty plain. Then by adding a few die cut strawberries, it makes the image come alive.
My last card for today uses Think Big Favorites #15 and images from Framed Out #3.
I also used some of the new papers from the Melon Berry and Smokey Shadow Pattern Packs.
And that's it for now. When time allows I have lots more I want to share with this month's release. And look for a unique vintage find that I'll be adding to my shop + a new strawberry themed kit. Be sure to stop by Nichole's blog and the rest of the Design Team blogs for their remaining release projects. Enjoy!

April 13, 2012

Project Life Prize Winner Announced!

Hey everyone, I have the winner for the awesome Project Life prize package. Molly, from St. Louis had this to say:

"I love that you included your dad's surgery. It probably sounds dumb, but I wish I had scrapped all of my dad's surgeries/health issues over the years. They were important events in my life and my family's life, and I think remembering some of the details would help me to look back and remember the good parts of those events (because there were some good parts, too) and to remember how strong he is.

I love adding little pieces of ephemera to my scrapbooks - receipts, movie tickets, the labels from soda bottles, etc. I have been wanting to try PL for a long time and hope to win a kit! Thanks so much for having a giveaway :) "


Molly
St. Louis, MO

Congratulations Molly, please email me at stamplady@satelephone.com. I'll give you all the details on how to receive your prize.

April 12, 2012

Strawberry Patch...bath gifts

Today Nichole Heady is introducing a new set for Papertrey Ink that she designed from my concept sketches. The set is called Strawberry Patch and it's packed with sweet images, sentiments + there are fun dies that coordinate with each little image.

This set is definitely strawberry themed so if you're a strawberry lover like me, you're in for a real treat. What I envisioned with this set product wise, Nichole delivered upon her execution with this stamp set and dies. The Strawberry Patch collection offers the following possibilities:
1. Stamping the images with ink to use as a line image for backgrounds.
2. Stamping the images and then coloring with Copic markers or your choice of art medium.
3. Stamping the images and then "2 step stamping" the strawberries, leaves and flowers with solid images.
4. Die cutting the strawberries, leaves and flowers then color...or die cut using patterned paper, or fabric, felt, etc.
5. Any combination of the above. Oodles of possibilities.

Today I have a little gift idea to show you using simple tags, basic stamping of the line images + added a popped up die cut strawberry. The upcoming month of May finds me needing lots of gift ideas for birthdays, Mother's Day, end of the year teacher gifts, etc. There are tons of bath and body type products on the market with strawberry scents that make the sweetest little gifts. I chose this hand soap from Bath & Body that has fresh picked strawberries on the packaging.
I made a simple tag by stamping the largest line image from Strawberry Patch onto a Rectangle Hang Tag. I outlined the images with an Ivory Copic Marker. Very clean, simple & fast. Next I used the largest strawberry die and stem die to die cut some Crate Paper patterned paper. I popped this up on the small tag then stapled the tag to a Medium White Parcel Tag. I used Pure Poppy and Chartreuse ink to stamp the sentiments. I love the combination of the loopy cursive and the vintage typewriter font that Nichole chose. I sent her some font samples along with my sketches and she picked the cream of the crop, I think. For the rest of my gift packaging I attached the tag to the soap bottle with a simple strip of pink Washi tape then tucked it all inside an aqua berry basket filled with iridescent scrunchy filler. I tied PTI Sweet Blush around the basket for a finishing touch.
I hope you'll enjoy Strawberry Patch and all the fun accessories. I'll have more projects and inspiration here on the blog all month long. This week we have 3 track meets + I'm one of only 3 parents that volunteered to make cookies and work the concession at one of the track meets. I have cookies in the oven as I type this. Plus we have tornado watches already issued for Friday/Saturday...my anxiety is already creeping in. So forgive me if I'm absent for the PTI countdown week but you can be sure that I'll have more fun Strawberry Patch goodies for you all month long.

Be sure to stop by Nichole's blog for her introduction to Strawberry Patch + she has links for the PTI Design Team's Group Posts.....all featuring goodies from Strawberry Patch.

How about a little Pinterest inspiration too? Since I'm knee deep in cookie baking I'll share a fun recipe I'd like to try called Strawberry Shortcake Cookies. My Pinterest link for this recipe is here. Okay, timer's a dingin' so I gotta run. Enjoy!

April 10, 2012

Project Life Week 12, 2012

Hi there, I'm back with Week 12 from my Project Life. First, thank you so much for the nice comments on my last post. Remember, you can still enter to win my Project Life prize drawing. See this post for details...and be sure to leave your comment on that post, not this one. :)

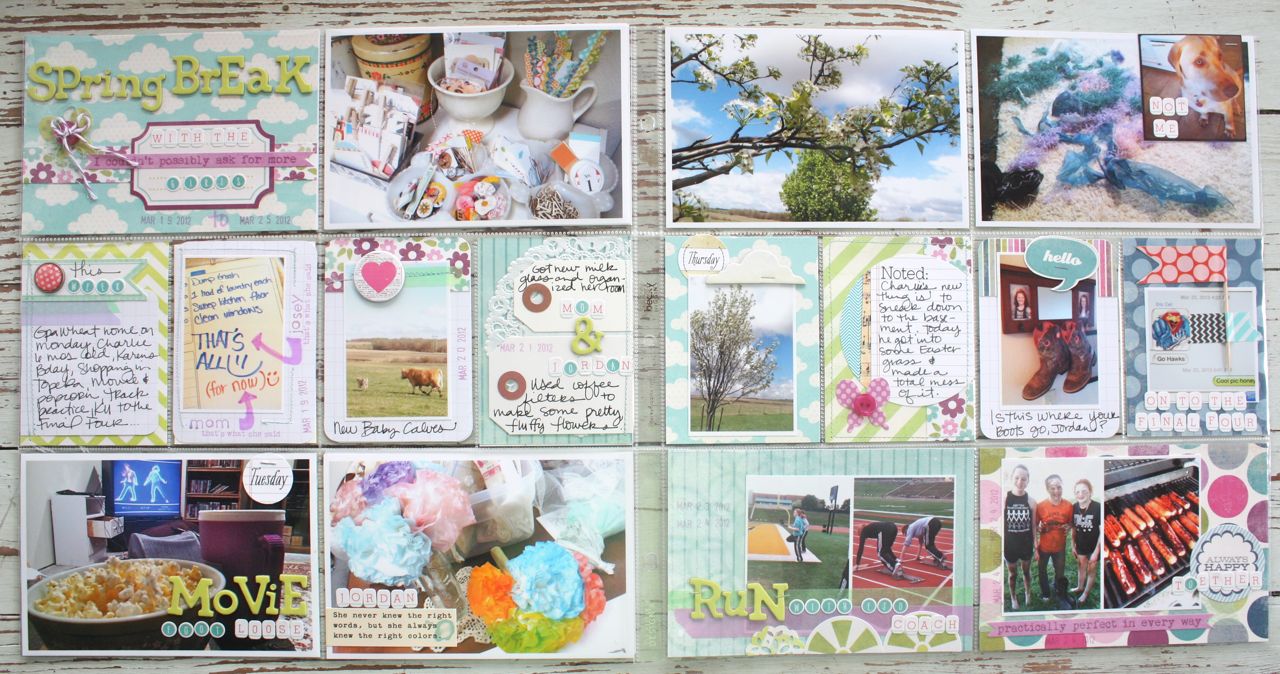
Okay, on to Week 12. This was Spring Break week for the girls. It was rainy a lot but we ended up with some sunny, bright days towards the end of the week. I had some colorful photos that actually had some purple in them. I hardly ever use purple but I knew which products I wanted to reach for right away. The My Mind's Eye Lime Twist Happy Go Lucky collection was calling my name. I usually like to be a little more mixy matchy with my products but everything coordinated so well, I just rolled with it. You can see that my 2 page spread is very colorful this week.
Here's the left page.
And the right page.
And now for the 3 x 4 inserts. I ended up using a ton of letters from this sheet and this sheet. You'll see them a lot on my 3 x 4 as well as 4 x 6 inserts. The left insert is my week in review, with a sticker flag and polka dot brad added. On the right, I have a photo of some chores written on a whiteboard for the girls. I used Hero Arts letters, Studio Calico stamps and a Bic Markit pen to add some hand drawn arrows. We just love whiteboards in our house.
Here I used a heart chipboard accent from Banana Fish Studio on top of the photo with a mama and her newborn calf. On the right I used a Small White Parcel Tag and a Medium White Parcel Tag for journaling + more stickers. The small tag refers to the photo above the insert. The medium tag refers to the photo below the insert. I might go back and add some arrow stickers to signify that.
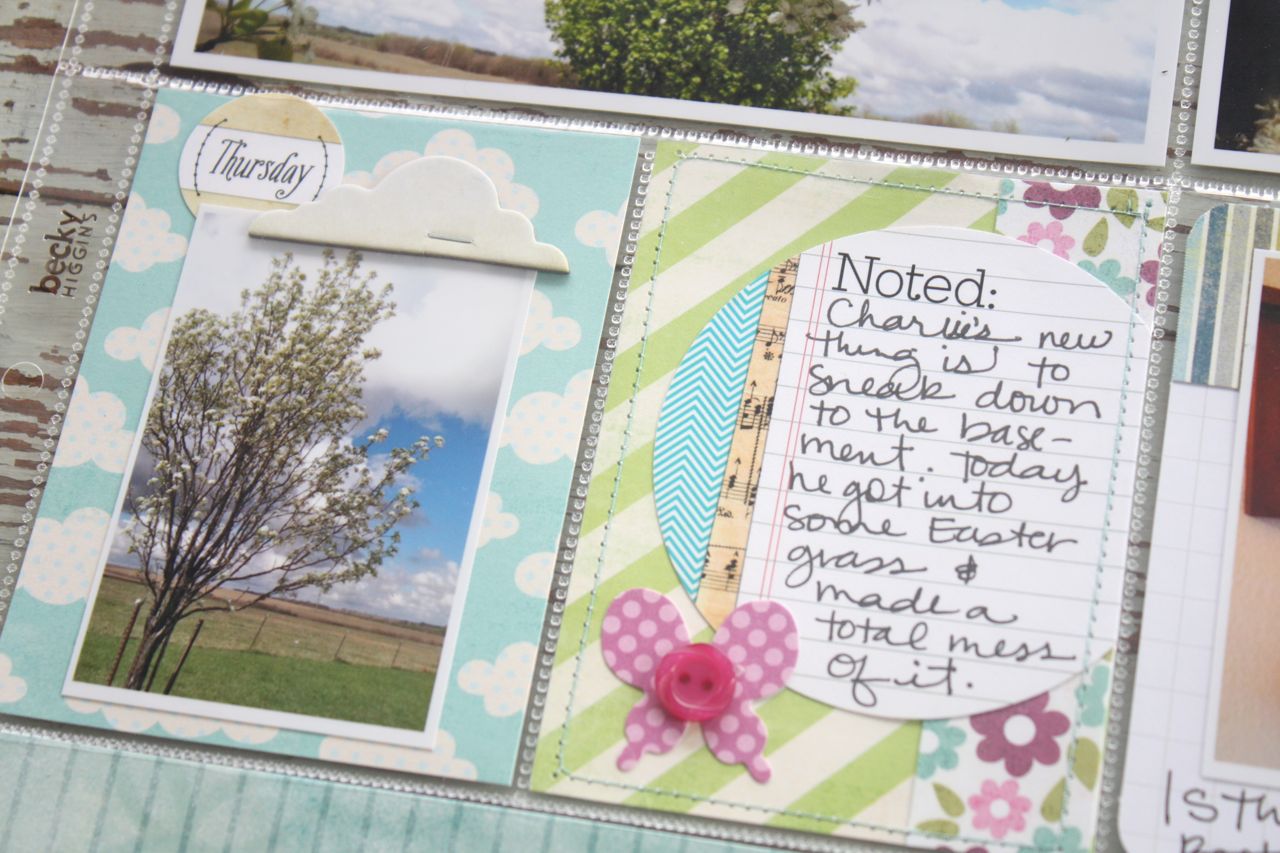
Here on the left I used a Studio Calico chipboard cloud + an Elle's Studio accent circle over my tree photo. On the right I used patterned paper from the MME Lime Twist line + a large circle piece from Elle's Studio.
Here on the left I used a cut out piece from this patterned paper for the quote bubble. I later found out that Jordan had hung her boots up so that Charlie wouldn't run off with them. On the right I used a text message from Eric about KU + added a little flag from a Studio Calico monthly kit. I adhered the flag down with Washi tape.
And now on to the 4 x 6 inserts. This is my main, dated insert. I definitely wanted to make an insert noting that it was Spring break. Stickers and papers are from the MME Lime Twist line.
Here you can see that I used more of the lime green chipboard sticker letters along with the MME letter stickers for journaling. It was so fun to change things up a bit and use the sticker letters.
More of the same here with some photos of the girls working with a college track coach over break. Washi tape provided a nice horizontal accent for the letters to rest on.
More stickers and MME accents here on these photos of Jordan and her friends that got in a mud fight. Weenies on the grill afterwards for a fun BBQ.
And now on to my insert for the week. I'm reaaalllyy trying hard to do the inserts as the same time as the main layout for the week. Otherwise I just don't seem to find the time to go back and add them in later. This one is fun! If you remember, I like to keep all of my inserts a smaller size than the 12 x 12 main pages. I like to be able to see the 2 main pages, with the inserts being smaller additions. This insert started out as a 12 x 12, 9 pocket photo sleeve. The finished size is 8 x 12. I trimmed off the last row of vertical squares from the sleeve and then did a little sewing to create a new flipper style photo sleeve. You can't really tell here.......
But I further trimmed the excess down to two squares and then stitched that piece to the top of my trimmed down 8 x 12 photo sleeve. On the top I used some more of my My Mind's Eye papers and accents to create a little title page.
Under the flipper I included an extra photo showing the neon trend we noticed while shopping over Spring Break + I was able to add some journaling. Eeeek, so fun!!
Here's the back side of that 8 x 12 insert page. More photos of some outdoor activities we did over Spring Break.
Annnnd, I couldn't let that one leftover square that I trimmed go to waste. I used for another flipper on this back side of the photo sleeve. So I ended up using all 9 squares of the photo sleeve......just rearranged to make a smaller size page + it made for some fun new flippers!
Hope you give the flippers a try! This was a fun, fun week of Project Life.....lots of pretty colors to work with, a cute line of My Mind's Eye goodies, the fun flipper pages & of course the memories we made over Spring Break. Life is good.

For more inspiration using flippers, be sure to check out Mary Ann Penner's blog. She's got some fabulous pages up as of recent.

Note: I slipped the photos/embellished pieces into the pockets before stitching, just so that I made sure the inserts would fit.


April 9, 2012

Project Life Week 11, 2012

Hi there, if you're visiting from Becky Higgins' blog, welcome! Today Becky is sharing links to all the Project Life Creative Team Members blogs so be sure to check out her blog for links. It's always so inspiring to see what everyone else is up to with Project Life.

Today I'm sharing Week 11 of my Project Life. I'm about 2 weeks behind but that is very manageable compared to the 17 weeks I got behind in 2011. I've been trying to make any inserts that go with a week that I'm working on so that is taking a little bit longer. But well worth it. Here's my 2 page spread
Note: It seems I forgot to take photos of the individual pages. I'll get to that later and add them back into this post soon.

Here are some of my favorite inserts from this week. I was working with my snow confetti this week on crafty projects so I thought it would be fun to include it right in my insert. I also used some Washi tape from the Smash Book collection + a journaling spot, fabric brad and a Large White Tag. I've really enjoyed including a photo of a weekly craft project in my albums.
Here's a line up of some 3 x 4 journaling cards, starting with my week in review on the left, a shot of the weather in the middle and an artsy quote sticker from Cosmo Cricket. The plaid journaling card is from the Clementine Core Kit.
Here I used a trimmed down Library Card for a journaling card with typed label and photo. The middle insert is another Clementine card with letter stickers and hand journaling. On the 4 x 6 photo insert at the top, I typed on some of my Grid Labels + added a circle embellishment from Banana Fish Studio.
Here's another 4 x 6 insert with photos of Charlie digging in the garden. I added a hand cut patterned paper flat + wood grain chipboard letters + a stamped Small White Tag. The letter stamps are from Hero Arts.
I also added an insert this week using a Design G Photo Pocket Page. I love this 10 x 12 size because I like to keep my inserts smaller than the 12 x 12 pages. I think the main week remains more visible and the smaller inserts lets the viewer know that the inserts act as add-ons to the week.

The front page of my insert shows my dad, a hard working farmer. Always active. A recent world traveler and always on the go. Healthier than ever at age 78.
The back side of the insert shows my dad the day that he had surgery to remove a cancerous tumor. This page was very, very hard to make. I almost trashed it because I really don't want to be reminded of this horrible time. The horrible news. But I decided that it's a part of life. A part of my life that I want to document. A year ago, my mother-in-law was diagnosed with breast cancer and I didn't scrapbook one bit of it. I wanted to forget that it happened. I decided that making this insert about my dad's cancer is part of our journey. A story that needed to be told. And before I cry anymore I will just stop typing. On a good note, my dad's surgery was a success. The doctor's think the cancer was contained and caught early. We hope and pray that this is the end of this little journey.
And now for some fun stuff. Many of the Creative Team Members are giving away some Project Life products this week. I'll be giving away lots of items from the Cobalt Project Life collection + a variety pack of the Photo Pocket Pages.
To enter your name for the prizing drawing, please leave a comment telling me something special you've added to your Project Life pages. It can be a special story, an insert page, a fun piece of memorabilia.....anything you like. Or perhaps you have a story you'd like to add to your album. Anything you want.

Here's the details on how to enter the contest:
1. Contest is open to US residents only, sorry to everyone outside the US
2. You must leave your first name and state in the comments section + a blurb (see above)
3. Comments to be considered for the contest will remain open until Wednesday 11:00 PM Central Time. Winner will be announced Thursday.
4. Contest winner will be asked to email a Project Life representative with contact & shipping information. Prize package will ship from Amazon.
5. Good luck!

April 8, 2012

"This is Awesome" Card

I've had a lot of fun lately using Studio Calico's Awesome stamp set for my Project Life. The stamp set is now retired but you can see the images here. A while back I got an idea that stuck in my head so I just had to try it out.

I started out by embossing the frame from the stamp set onto a Project Life journaling card using Powder Zing embossing powder. Very cool in itself and this would look fabulous with a small photo on top for a Project Life insert. Which I will probably/definitely try sometime.
But I took it even a step further and used my Nestabilities square dies to die cut/emboss a square. Now this IS awesome. There are tons of ideas running through my little brain right now for uses for this type of frame. Tiny Instagrams for cards of scrapbook pages, popped up chipboard shapes, fabric yo-yo's. Vintage papers for the background. Or vellum. Etc, etc, etc.
I decided to use my frame on a card front. I used Papertrey's Rustic White cardstock for the base which was splattered with SC Mister Huey spray mist. I made two long flag strips and adhered them next.
For the embellishments I used lots of items from my Lemon, Lime & Aqua Embellishing Kit like the metal rim tags with punched circles, a piece of a paper doily, the baker's twine and the stamped tag. I also used a small bag full of snow confetti that comes with the kit. I love this behind the frame. I tucked a punched shape into the bag before sealing up. I used a few strips of Scor-Tape to adhere the seal confetti bag to the back of the frame...then adhered the frame to the card front with pop dots. The sentiment from the tag is from Papertrey's 2012 Birthday Tags stamp set. The Vintage Buttons are Sweet Blush from Papertrey.
So fun and festive....and could be used for lots of occasions. I might end up making some of these for graduation cards for Jordan's friends in our school colors. Black & white plus make a little silver shimmer. Too much fun! Hope you enjoy.

April 4, 2012

Snow Confetti Gift Sacks...

Hi there, I'm back today with more inspiration from the Lemon Lime Kits I offered in the shop recently. By request I've made up lots more of the kits and they are in the shop now right here. I've also added some assorted glassine and clear bags that you can use for confetti projects like the ones I've been doing lately. You can see the Snow Confetti Tag & Bookmark post I did for more ideas using the kit.

Here we go for today's projects. It's all about confetti gift sacks. It's like a gift for your gift. A package on top of your package. Double the fun! I used a regular paper sack for the base that can be filled with an actual gift.
Then I filled a glassine sack with these color Sixlet treats as a little bonus gift. Cute!
I stitched glassine sack shut with my sewing machine then added a strip of fun snow confetti tape that I made across both sacks. So shimmery and shiny.
Tags, button and baker's twine from the kit for embellishments....just couldn't be cuter. I might just use something like this for Jordan's graduation gifts to her friends. We will be on a mission to find something that fits inside. :)
Here I used a polka dot sack (the kits have a striped sack) to make another confetti embellished sack. A hand cut banner + more of my handmade border strips adorn the front of the sack.
I filled a little sack that comes with the kit with about a teaspoon of snow confetti, also included in the kit. I wrapped around some baker's twine, added a button and topped off the sack with a stamped embellishment from the kit. SO cute and perfect for holding cards or small gifts.
Kits are limited in quantity and I also have most of the kit items available on their own in the shop too. Lots of new tags, bookmarks, sacks....+ a few stamped cards....Bookmark Kits, Confetti Gift Sack Kits and Wrinkle Ribbon. Thanks for stopping by. Wrapping gifts has never been so much fun!! Enjoy...

April 2, 2012

Snow Confetti Tag & Bookmark...

Edit: Studio Calici set used was Epic. No longer available at the shop.

Hi everyone, are you back at it today? Last week I had a limited supply of Lemon-Lime Love kits available in my shop. The kits were jam packed full of fun paper crafting items to create fun tags, cards and/or gift wrap. This week I have a couple posts planned to share a few fun items I made from the kit, all using some glittery snow confetti that was included. If you weren't able to purchase a kit, many of the supply items are available in the shop. I'll link those up for you as I go.

Today's projects are a big tag and a fun bookmark. Very mixy matchy with lots of colors. The patterned papers I used on today's projects were not included in the kits so it's very easy to just select your own style of papers that can be added to the basic supplies.
First up is an embellished tag which would be perfect to tie to a gift sack, wrapped package, a book, etc. The bag tag is an XL Manila Tag which was splattered with Mister Huey's spray mist. I then stitched on a Dainty Doily using orange thread. I used a tiny plastic bag to hold a little of the snow confetti and adhered it under a border die cut strip.
Using a White Garment Tag as a base, I added a messy bundle of thread, a small punched shape and a Studio Calico wood veneer asterisk. This was stapled to my large tag using my Tiny Attacher. Yellow baker's twine was tied around the tag for extra dimension. I used Studio Calico Epic stamps on the base of my tag in bright colors.
Next up is a bookmark that is so perfect for all the book lovers on your list. Wrap a few books in simple Kraft paper or newspaper and tie on one of these bookmarks and you are a gift wrapping genius. All my book reading friends just go nuts over these. The base of the bookmark is a Library Card that was punched with a Swiss cheese punch then backed with patterned paper. I also have a some Bookmark Kits that come with some extra products if you want some extras.
I stitched on several fun patterned papers to the front of the Library card, tucking a snippet of a Dainty Doily under one layer. The papers I used today from Pink Paislee's Prairie Hill collection, a new fave! Another small bag of the snow confetti was adhered under the top patterned paper strip before stitching. I finished off the bookmark with a Jenni Bowlin tab punch & plastic flower + some more stamping from the Studio Calico Epic set.
These were SO MUCH FUN to make, I just had a ball adding all the little layers. And the snow confetti adds a fun shimmer to both projects. For some additional packaging ideas, add a tag or bookmark to a Kraft Sack or Vertical Stripe Sack. The tags and bookmarks will also fit into my Medium Glassine Sacks. You can easily slip in a candy bar or gift card, etc. I also have a Simple Sack Gift Packaging Kit or my Confetti Gift Sack Kits that you could use for fun packaging along with the tag or bookmark. I'm thinking both of these would be great additions for graduation gifts that Jordan will be giving out to her friends in May. Mother's Day is coming up too and I know our mothers will be getting a really dolled up tag with their gift. One more idea....package up a bunch of the supplies and gift them to a crafty friend. Have one sample made up and then let them know how they can create their own tags and bookmarks to have on hand for upcoming gift ideas. Have fun!

Stay tuned because I will be back this week with some fun gift sack ideas using the Lemon-Lime kit and more shop items + more snow confetti. Plus I'll have a Project Life update to share too.
Related Posts with Thumbnails